|
Tutorial by Soxikibem English Translation by Moderation SIM-PSP Original Tutorial:
MATERIAL 1 Main Tube of your choice 1 Misted Landscape of your choice tituloGHbySoxikibem nevoa.msk (save in mask folder on PSP)
PLUGINS AAA Filters Alien Skin Eye Candy 5 Impact Flaming Pear Mura's Meister
Note:
Feel free to change the Blends
according to the material
Tutorial created in PSP 2020 Ultimate
TUTORIAL
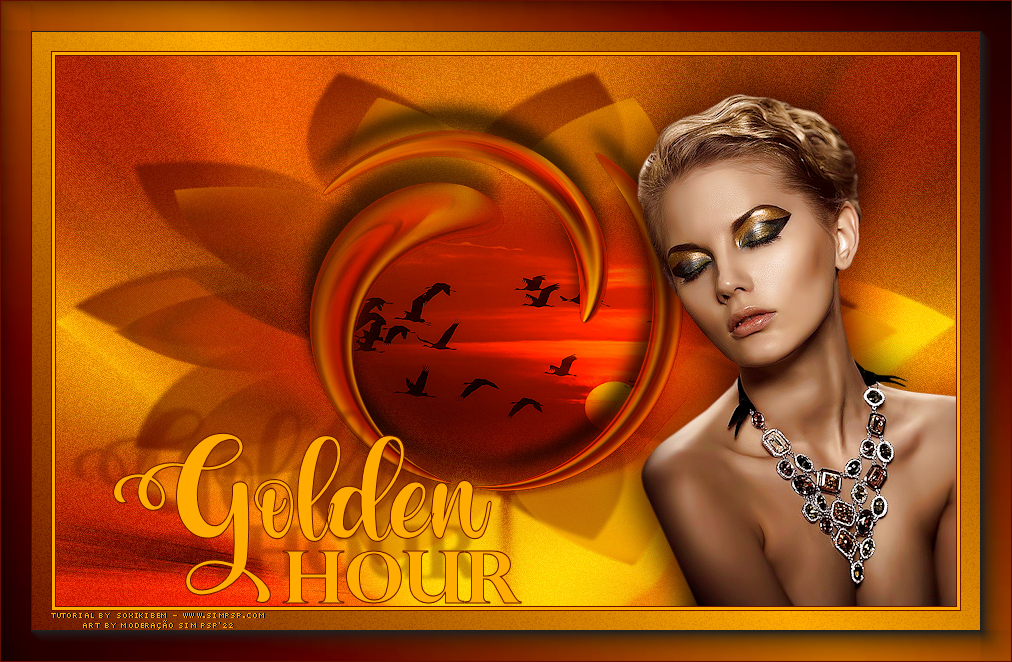
1 - Open the material on the PSP, duplicate and close the original. Choose t wo colors to work with:Foreground: #640e00 Background: #ffab00
2 - Open a 900x550px transparent image. Paint it with the Background color. Selections > Select All. Edit > Copy in Misted Landscape. Edit > Paste Into Selection. Selections > Select None.
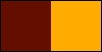
3 - Effects > Image Effects > Seamless tiling: Default. Adjust > Blur > Radial Blur.
Effects > Edge Effects > Enhance. Edit > Repeat Enhance Edges.
4 - Layers > Duplicate. Image > Resize: 30%, all layers unchecked. Effects > Plugins > Mura's Meister > Pole Transform:
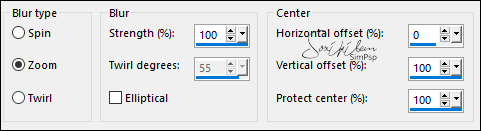
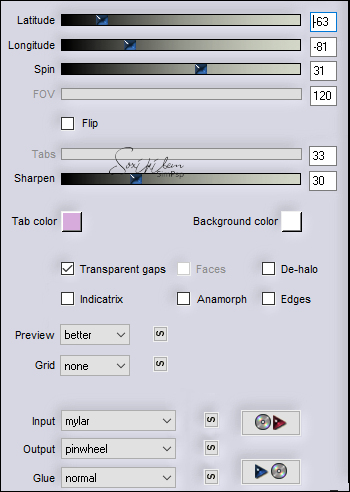
5 - Effects > Plugins > Flaming Pear > Flexify 2:
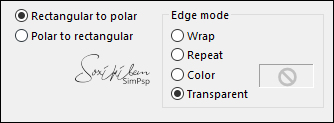
6 - Effects > Distortion Effects > Polar Coordinates:
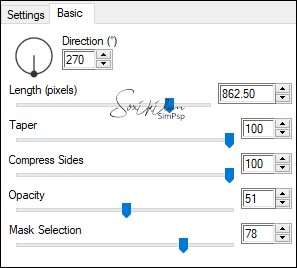
7 - Layers > Duplicate. Activate the layer Copy of Raster 1. Effects > Plugins > Alien Skin Eye Candy 5 Impact > Motion Trail:
Layers > Properties > General > Blend Mode: Screen or another of your choice.
8 - Activate the Layer Raster 1. Layers > Duplicate. Layers > Arrange > Bring to Top. Effects > Geometric Effects > Circle: Transparent. Image > Resize: 50%, all layers unchecked.
9 - Effects > Image Effects > Seamless Tiling: Side by side.
10 - Effects > Plugins > Flaming Pear > Flexify 2.
11 - Image > Resize: 80%, all layers unchecked. Adjust > Sharpness > Sharpen. Effects > 3D Effects > Drop Shadow: -25, -5, 75, 20, Color: #000000 (black) With the Pick Tool tool, position: Position X: 233, Position Y: 33.
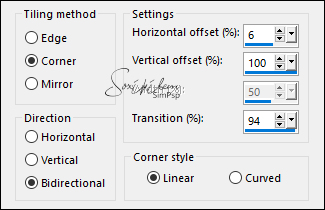
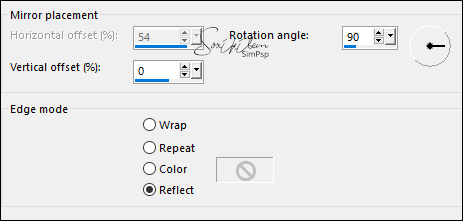
12 - Activate the layer Copy (2) of Raster 1. Image > Resize: 90%, all layers unchecked. Effects > Reflection Effects > Rotating Mirror:
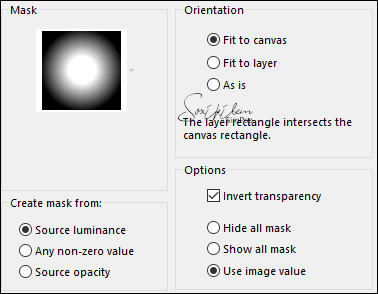
13 - Layers > Load/Save Mask > Load Mask from Disk: nevoa.
Layers > Merge > Merge Group.
14 - Adjust > Sharpness > Sharpen. Effects > 3D Effects > Drop Shadow: -25, -40, 100, 5, Color: Foreground color. Activate the layer Raster 1. Effects > Plugins > AAA Filters > Granularity:
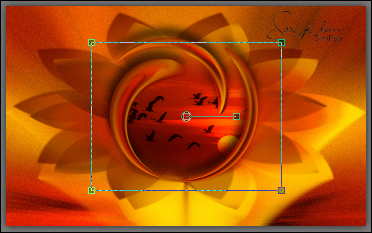
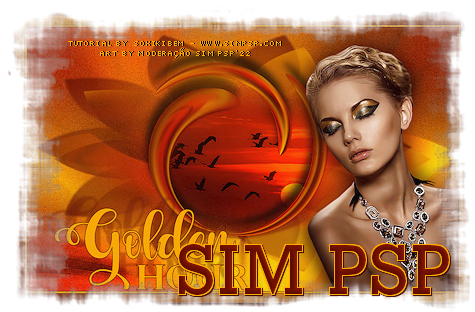
15 - Edit > Copy in Misted Landscape. Edit > Paste as New Layer. Image > Resize if necessary. Adjust > Sharpness > Sharpen. Position as in the example:
16 - Activate the Top layer. Edit > Copy the Main Tube. Edit > Paste as New Layer. Position to the right. Effects > 3D Effects > Drop Shadow: your choice.
17- Edit > Copy in the tituloGHbySoxikibem. Edit > Paste as New Layer. With the Pick Tool tool, position: Position X 57, Position Y 376.
18 - Effects > 3D Effects > Drop Shadow: -25, -40, 35, 5, Color: Foreground color.
19 - Image > Add Borders > Symmetric: 1px - Color: Foreground color 3px - Color: Background color 1px - Color: Foreground color Selections > Select All. Image > Add Borders > Symmetric: 50px with any color. Selections > Invert.
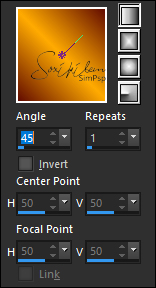
20 - Paint this selection with a Linear gradient, formed by the chosen colors:
21 - Effects > Plugins > AAA Filters > Granularity:
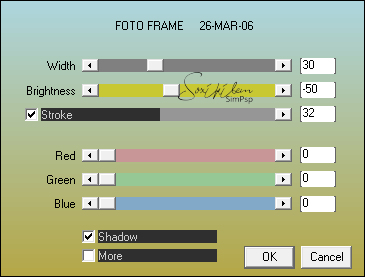
22 - Effects > Plugins > AAA Filters > Foto Frame:
23 - Selections > Select None. Image > Add Borders > Symmetric: 1px - Color: Foreground color.
24 -
Apply your watermark or signature.
CREDITS: Tutorial by Soxikibem English Translation by Moderation SIM-PSP Main Tube: Tubed by Lily Misted Landscape: Tubed by Animabelle
Feel free to send your versions. I will be happy to publish them on our website.
Send your version to the email address: soxikibem.simpsp@gmail.com
|