|
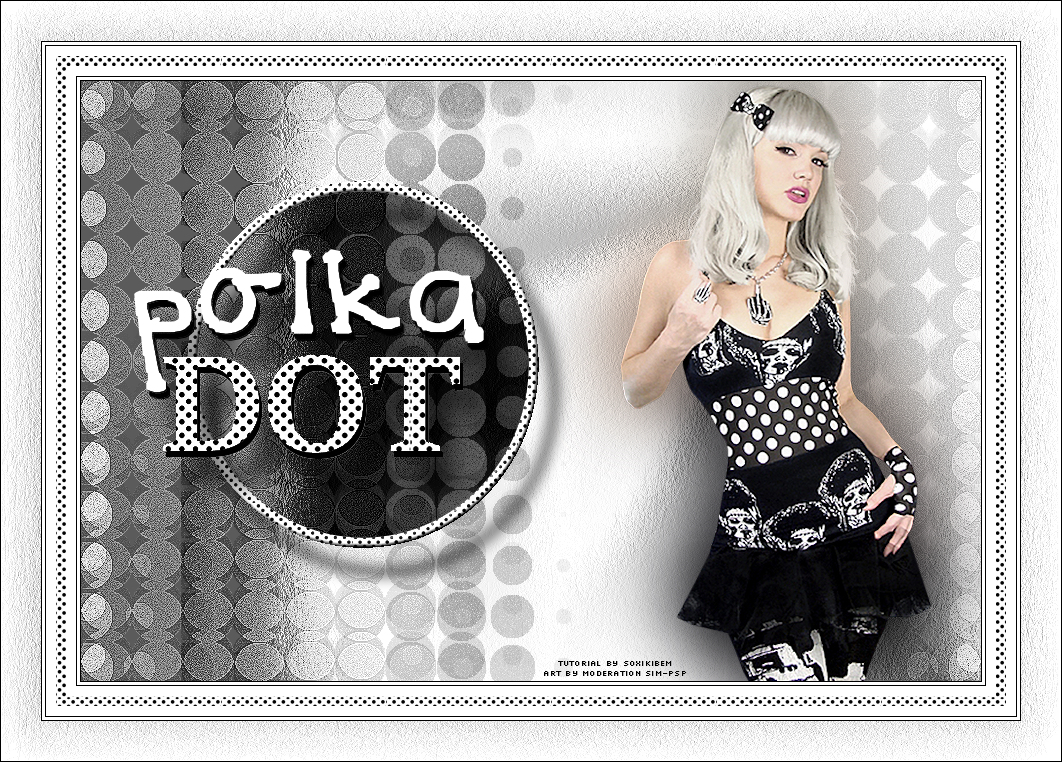
Tutorial By Soxikibem English Translation by SIM-PSP moderation Original Tutorial
MATERIAL 1 Main Tube of your choice BlackPolkaDot PolkaDotTituloSoxikibem circleBySoxikibem aroBySoxikibem
Plugins VM Extravaganza > imported by Filters Unlimted Italian Editors Generatore Transparency
TUTORIAL
1 - Open the material on the PSP, duplicate and close the original. Choose two colors to work with. Foreground: #000000 Background: #ffffff
2 - Open a transparent image of 900x600px. Selections > Select All. Edit > Copy on BlackPolkaDot. Edit > Paste Into Selection. Selections > Select None.
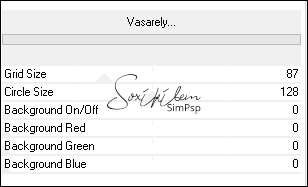
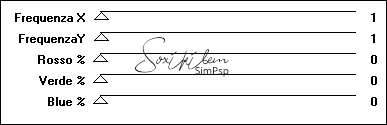
3 - Effects > Filters Unlimited 2.0 > VM Extravaganza > Vasarely.
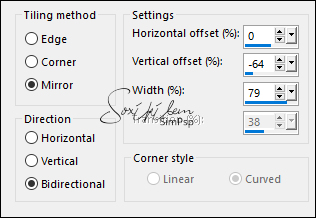
4 - Effects > Image Effects > Seamless Tling: Mirror ghost.
5 - Effects > Plugin Transparency > Eliminate Black.
6 - Effects > 3D Effects > Drop Shadow: 0, 100, 100, 0, color: #000000. Adjust > Add/Remove Noise > Add Noise: Gaussian, 20, Monochrome marked. Effects > Edge Effects > Enhance,
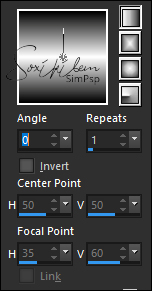
7 - Layers > New Raster Layer. Paint a gradient formed with the chosen colors: Linear > Angle 0 and Repeats 1
8 - Adjust > Blur > Gaussian Blur: 80.
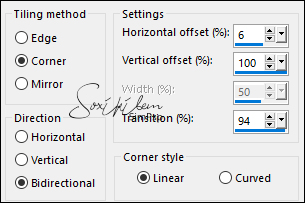
9 - Effects > Plugin Italian Editors Generatore > Pattern Wipe Schiu.
10 - Effects > Image Effects > Seamless Tling: Side by Side.
11 - Image > Negative Image. Layers > Properties > General > Blend Mode: Screen, Opacity: 65%.
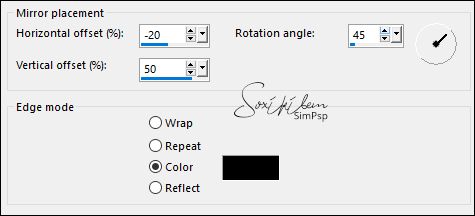
12 - Effects > Reflection Effects > Rotating Mirror.
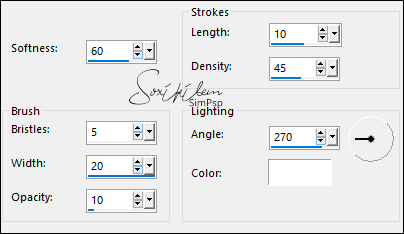
13 - Effects > Art Media Effects > Brush Strokes.
Layers > Merge > Merge All.
14 - Edit > Copy the Main Tube. Edit > Paste a New Layer. Position to the right. Layers > Duplicate. In the original layer of the tube apply > Adjust > Blur > Gaussian Blur: 40. Layers > Properties > General > Blend: Mode Multiply.
15 - Activate the Copy layer of the tube. Edit > Copy on circleBySoxikibem. Edit > Paste as New Layer. Pick Tool: Position X 113, Position Y 107. Layers > Properties > General > Blend Mode: Exclusion.
16 - Edit > Copy on aroBySoxikibem. Edit > Paste as New Layer. Pick Tool: Position X 106, Position Y 100.
17 - Edit > Cpy on PolkaDotTituloSoxikibem. Edit Paste as New Layer. Pick Tool: Position X 48, Position Y 168.
18 - Image > Add Borders: 1px foreground color 3px background color 1px foreground color 10px background color
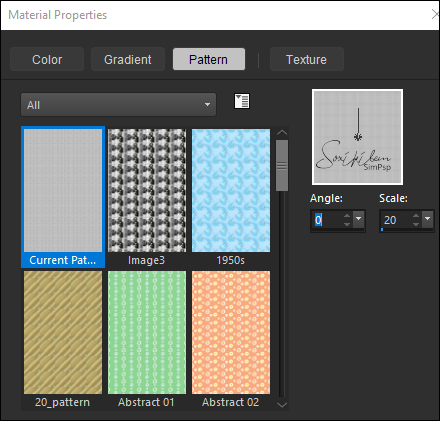
19 - Selections > Select All Image > Add Borders: 10px with any color Selections > Invert Materials > Pattern > BlackPolkaDot.
Paint the border with this pattern. Selections > Select None.
20 - Image > Add Borders: 10px background color 1px foreground color 3px background color 1px foreground color 40px background color 1px foreground color
21 - With the Magic Wand Tool: Tolerance and Feather em 0, select the 40px border. Effects > Art Media Effects > Brush Strokes.
Selections > Select None. Image > Add Borders: 1px foreground color
22 - Apply your watermark or signature. File > Export > JPEG Optimizer.
CREDITS: Tutorial by Soxikibem'21 English Translation by Moderation SIM-PSP Main Tube: Tubed by Leny
Feel free to send your versions.
|