|
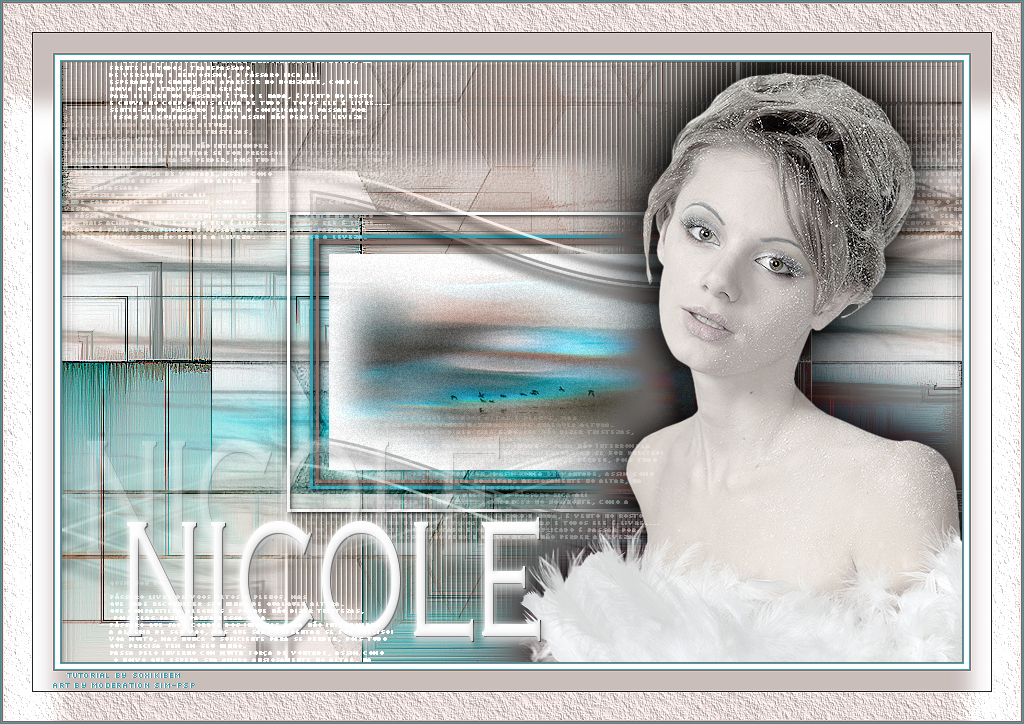
Tutorial By Soxikibem English Translation by SIM-PSP moderation Original Tutorial
MATERIAL 1 Main Tube of your choice 1 Misted landscape JPG of your choice tituloNicoleBySoxikibem textSoxikibem NarahsMasks_1607
Plugins Redfield AAA Frame Mehdi
TUTORIAL
1 - Open the material on the PSP, duplicate and close the original. Choose two colors to work with. Foreground: #8c716a Background: #36a4b5 And the white color: #ffffff
2 - Open a transparent image of 900x600px.Paint with the color of the foreground. Selections > Select All.
3 - Edit > Copy the Misted LandscapeEdit > paste Into Selection. Selections > Select None.
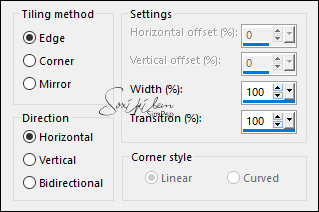
4 - Effects > Image Effects > Seamless Tiling.
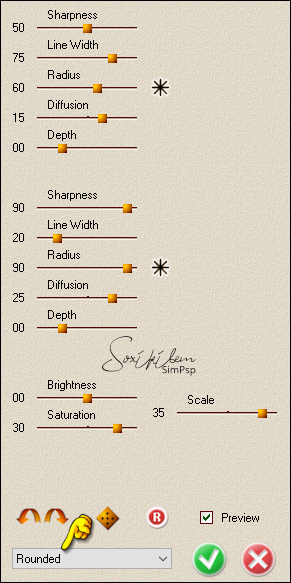
5 - Effects > Plugin Redfield > Fractalius v 1.50.
6 - Effects > Image Effects > Seamless Tiling.
7 - Adjust > Add/Remove Noise > Add Noise.
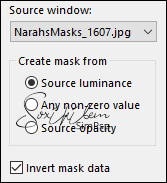
8 - Layers > New Raster Layer. Paint with white color. Layers > New Mask layer > From Image: NarahsMasks_1607.
Effects > Edge Effects > Enhance Layers > Merge > Merge Group. Layers > Properties > General > Opacity: 70%.
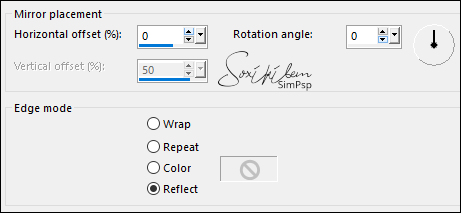
9 - Effects > Reflect Effects > Rotating Mirror.
10 - Effects > 3D Effects > Drop Shadow: 1, 1, 60, 0, color: #000000 (black).
11 - Layers > New Raster Layer. Selections > Select All. Edit > Copy the Misted Landscape Edit > Paste Into Selection. Selections > Select None.
12 - Effects > Image Effects > Seamless Tiling: Default. Adjust > Blur > Gaussian Blur: 80. Layers > Properties > General > Blend Mode: Burn.
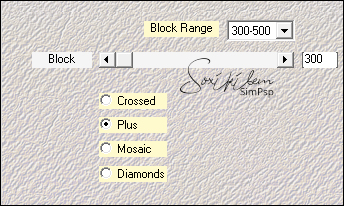
13 - Layers > Merge > Merge Visible. Layers > Duplicate. Effects > Plugin Mehdi > Sorting Tiles.
Layers > Properties > General > Blend Mode: Darken.
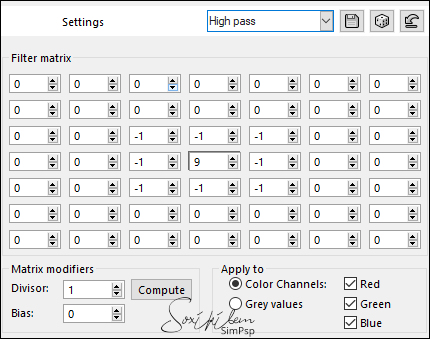
14 - Effects > User Defined Filter: High pass.
15 - Layers > New Raster Layer. Paint with white color. Image > Resize: 50%, all layers unchecked. With the Magic Wand Tool: Tolerance and Feather at 0, click outside the whiteboard.
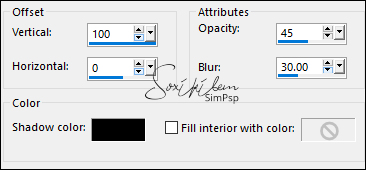
16 - Effects > 3D Effects > Cutout.
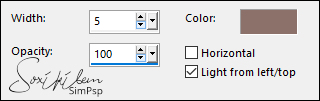
17 - Effects > Texture Effects > Blinds, Color: Foreground.
Effects > Edge Effects > Enhance.
18 - Selections > Invert. Selections > Modify > Contract: 3 Press the Delete key. Selections > Modify > Contract: 20 Paint with the background color. Selections > Modify > Contract: 3 Press the Delete key. Selections > Modify > Contract: 3 Paint with the foreground color. Selections > Modify > Contract: 3 Press the Delete key. Selections > Modify > Contract: 10 Paint with white color.
19 - Edit > Copy the Misted Landscape .Edit > Paste Into Selection. Adjust > Sharpness > Sharpen.
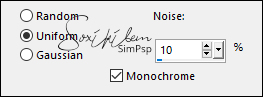
20 - Adjust > Add/Remove Noise > Add Noise: Gaussian, 10, Monochrome marked. Selections > Select None.
21 - With the Magic Wand Tool: Tolerance and Feather at 0, select the thin borders as in the example:
22 - Effects > 3D Effects > Drop Shadow: 1, 1, 100, 5, color: #000000 (black)
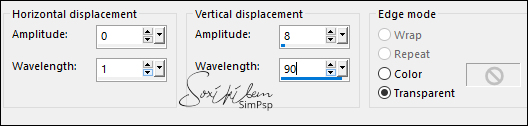
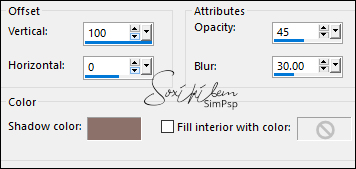
23 - Effects > Distortion Effects > Wave.
Selections > Promote Selection to Layer. Effects > 3D Effects > Drop Shadow: 10, 5, 100, 10, color: #000000 (black) Selections > Select None.
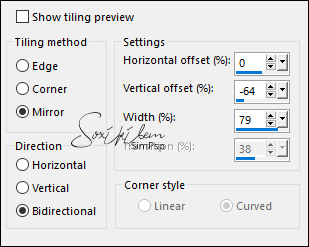
24 - Effects > Image Effects > Seamless Tiling: Default. Effects > Image Effects > Seamless Tiling: Mirror ghost.
Layers > Properties > General > Blend Mode: Luminace (Leagcy), Opacity 80%.
25 - Edit > Copy in the Main Tube.Edit > Paste as New Layer. Position to the right. Layers > Duplicate. Activate the original layer of the tube and apply: Adjust > Blur > Gaussian Blur: 50. Layers > Properties > General > Blend Mode: Difference.
26 - Click on the top layer (Copy from Tube). Effects > 3D Effects > Drop Shadow: 0, 0, 100, 60, color: #000000 (black)
27 - Edit > Copy on tituloNicoleBySoxikibem. Edit > Paste as New Layer. Pick Tool: Position X 17, Position Y 367.
28 - Edit > Copy on textSoxikibem. Edit > Paste a New Layer. Layers > Propertie > General > Blend Mode Luminance (L).
29 - Image > Add Borders: 1px color: foreground 1px color: background 5px color: White (#FFFFFF) 1px color: background 1px color: foreground 50px color: White (#FFFFFF) 1px color: foreground 1px color: background 1px color: foreground
30 - With the Magic Wand Tool: Tolerance and Feather at 0, select the 50px border. Effects > 3D Effects > Cutout: Shadow color: foreground.
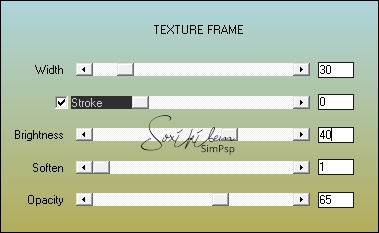
31 - Plugin AAA Frame > Texture Frame.
Adjust > Sharpness > Sharpen. Selections > Select None.
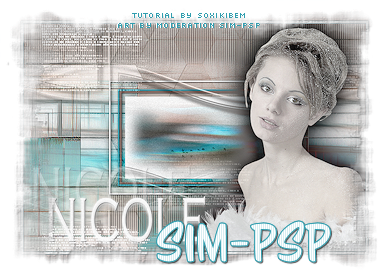
32 - Apply your watermark or signature.File > Export > JPEG Optimizer.
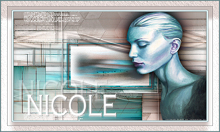
CREDITS: Tutorial by Soxikibem'21 English Translation by Moderation SIM-PSP Main Tube and Misted landscape: Tubed by Nicole (le-monde-de-bambou)
Feel free to send your versions.
|