|
MATERIAL 1 Main Tube of your choice 1 Tube Flower of your choice decor_nikita1_bySoxikibem decor_nikita2_bySoxikibem titulo_nikita_bySoxikibem NarahsMasks_1536
Pluguins AAA Frames Carolaine and Sensibility Filter Factory Gallery G Filters Unlimited 2.0 Simple
Tutorial
1 - Open the material on the PSP, duplicate and close the original.Choose two colors to work with. Foreground #aa542f Background #f0e4cb
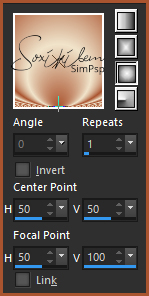
2 - Open a transparent 850x550px image. Paint with a Sunburst gradient.
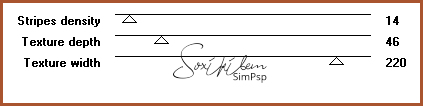
3 - Effects > Plugin Filter Factory Gallery G > Panel Stripes.
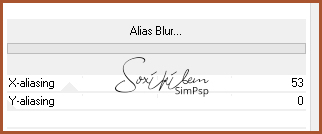
4 - Effects > Filters Unlimited 2.0 > Deformation > Alias Blur.
5 - Layers > Duplicate. Close the visibility of the Copy of Raster 1 layer. Activate the Raster 1 layer.
6 - Effects > Plugin Simple > Pizza Slice Mirror. Effects > Plugin Simple > Top Left Mirror.
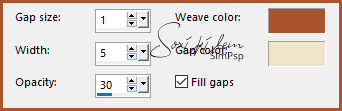
7 - Effects > Texture Effects > Weave. With the colors of the foreground and background.
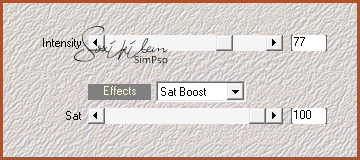
8 - Enable and open the visibility of Layer Copy of Raster 1. Effects > Plugin Filter Factory Gallery G > Other Worlds.
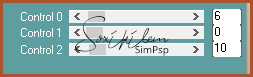
9 - Effects > Plugin Carolaine and Sensibility > CS-HLines
10 - Effects > Plugin Mehdi > Edges FX.
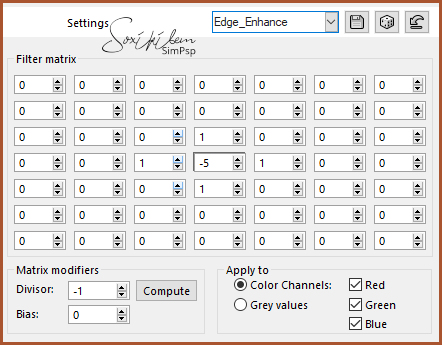
11 - Effects > User Defined Filter: Edge_Enhance.
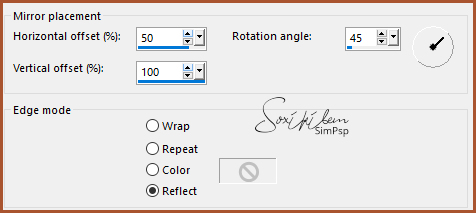
12 - Effects > Reflection Effects > Rotating Mirror.
13 - Layers > New Raster Layer. Paint this layer with the gradient in use. Layers > New Mask Layer > From Image: NarahsMasks_1536. Layers > Merge > Merge Group. Layers > Properties > General > Blend Mode: Multiply.
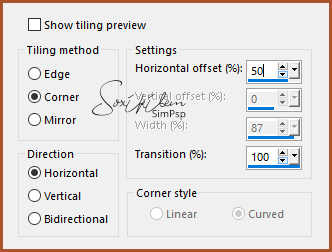
14 - Effects > Image Effects > Seamless Tilling.
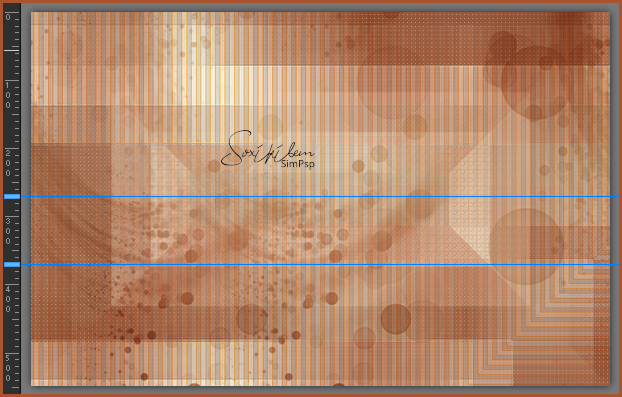
15 - Layers > New Raster Layer. Place two guide lines horizontally, one at 270 and the other at size 370.
With the Selection tool, select between these lines. Paint this selection with the gradient in use. Remove the guide lines. Selections > Select None.
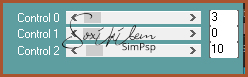
16 - Adjust > Blur > Gaussian Blur: 5. Effects > Plugin Carolaine and Sensibility > CS-HLines.
Edit > Repeat CS-HLines.
17 - Edit > Copy in decor_nikita2_bySoxikibem. Edit > Paste a New Layer. Use the Pick Tool to position the Decor: Positon X 571, Position Y 124.
18 - Edit > Copy in decor_nikita1_bySoxikibem. Edit > Paste a New Layer. Use the Pick Tool to position the Decor: Positon X -14, Position Y 31.
19 - Edit> Copy on the main Tube. Edit Paste a New Layer. Position to the left. Effects > 3D Effects > Drop Shadow as you prefer.
20 - Edit > Copy on Flower's Tube. Edit > Paste a New Layer. Posicone according to the tutorial model. Effects > 3D Effects > Drop Shadow as you prefer.
21 - Edit > Copy in titulo_nikita_bySoxikibem. Edit > Paste a New Layer. Use the Pick Tool to position: Positon X 347, Position Y 97. Effects > 3D Effects > Drop Shadow: 1, 1, 100, 0, black color.
22 - Image > Add Borders: 1px foreground color 3px background color 1px foreground color
23 - Selections > Select All. Image > Add Borders: 50px with any color. Selections > Invert. Paint this border with the gradient in use.
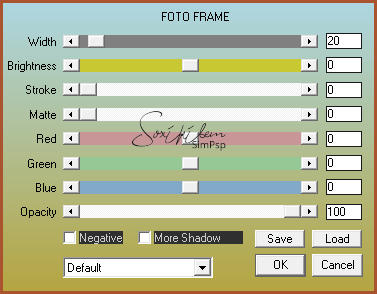
24 - Effects > Plugin AAA Frames > Foto Frame.
Selections > Select None.
25 - If you wish, resize your work. Apply your watermark or signature. File > Export > JPEG Optimizer.
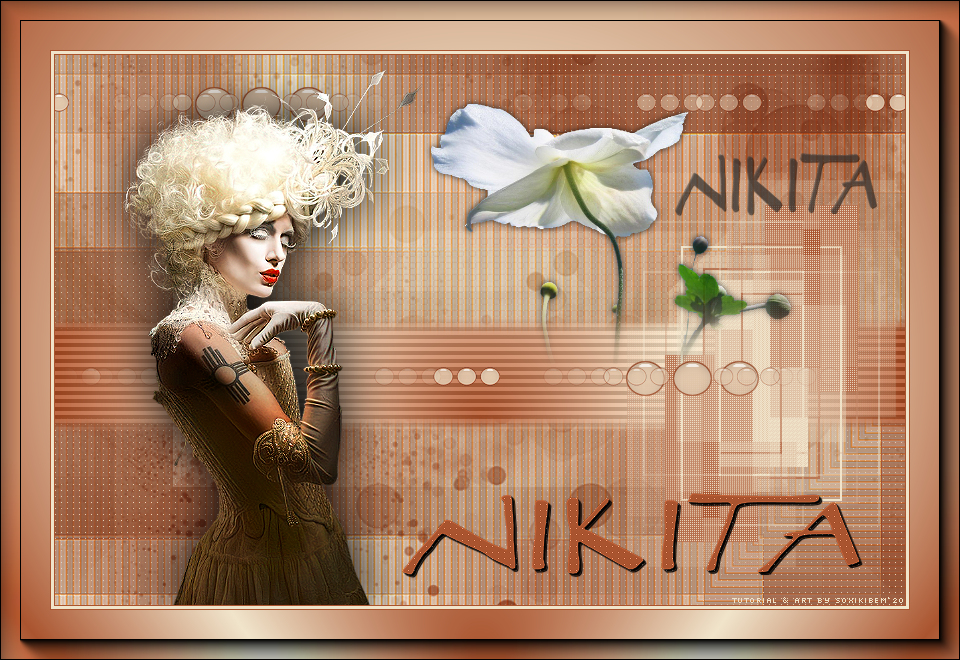
CREDIT Main Tube & Flower by Nikita
Tutorial by Soxikibem'19
Feel free to submit your versions. I will be happy to publish them on our website.
|