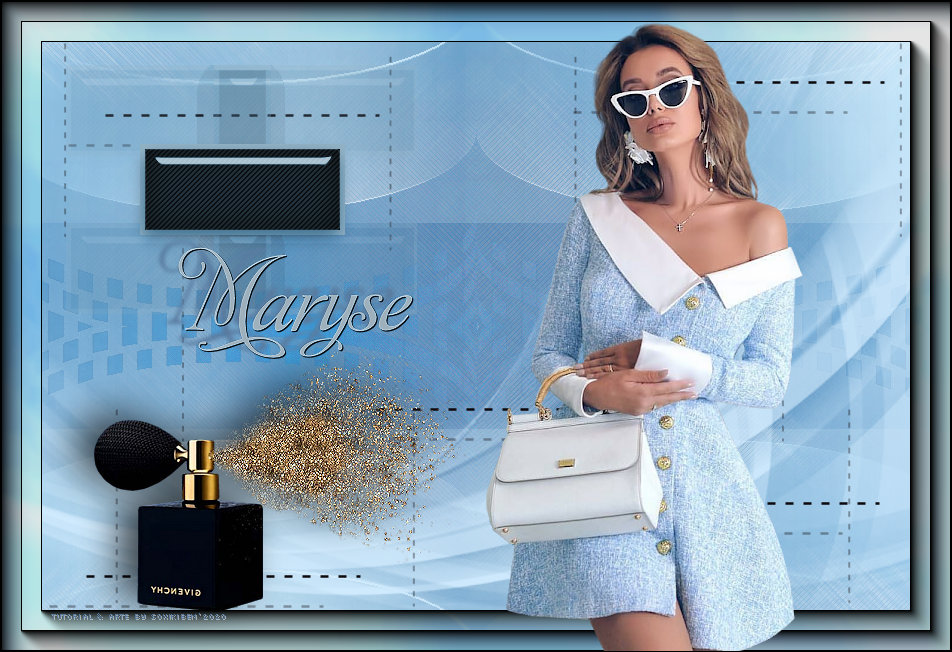
|
Tutorial dedicado a Maryse em agradecimento pelo lindo trabalho com Tubes e Misteds
TRADUÇÕES:
Obrigada aos nossos tradutores!
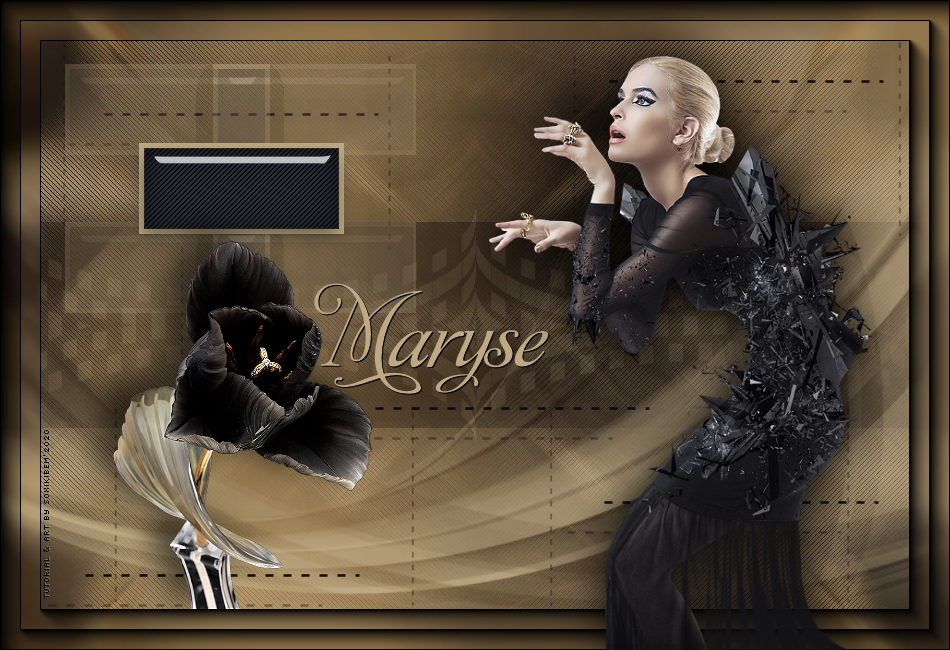
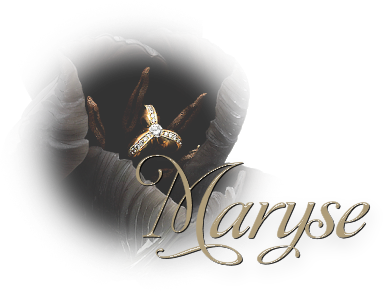
MATERIAL 1 Tube Principal à sua escolha 1 Tube Flor à sua escolha decor_maryse_bysoxikibem titulo_maryse_bysoxikibem grafico_maryse_soxiki Masks: Mask_GB_121, Mask_GB_127
Plugins AAA Frames AP [Lines] Filters Unlimited 2.0 Mehdi Mura's Seamless Toadies
Execução
1 - Abrir o material no PSP, duplique e feche o original. Escolher duas cores para trabalhar. #0c080c foreground #bdaa84 background
2 - Abra uma imagem transparente de 950x650px. Pintar com um Gradiente Sunburst formado pelas cores escolhidas.
Adjust > Blur > Gaussian Blur: 60.
3 - Layers > New Raster Layer. Selections Select All. Edit > Copy no tube flor. Edit > Paste Into Selection. Selections > Select None.
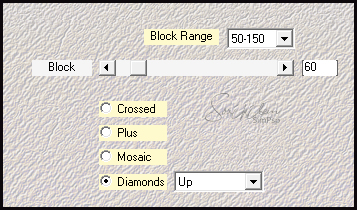
4 - Effects > Image Effects > Seamless Tiling: Default.
5 - Adjust > Blur > Motion Blur: Angle 45, Strength 100. Edit > Repeat Motion Blur.
6 - Effects > Edge Effects > Enhance. Edit > Repeat Enhance Edges.
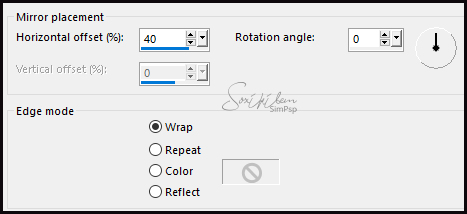
7 - Effects > Reflections Effects >Rotatin Mirror.
8 - Layers > Properties: Blend Mode Screen, Opacity 50. Layers > Duplicate. Image > Mirror > Mirror Horizontal. Layers > Merge > Merge Down.
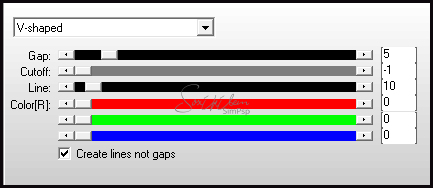
9 - Effects > Plugin AP [Lines] > Silver Lining.
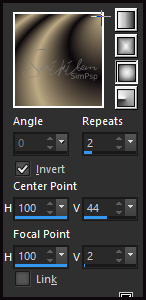
10 - Layers > New Raster Layer. Pintar com a cor do Foreground. Layers > New Mask Layer > From Image: Mask_GB_121. Layers > Merge > Merge Group.
11 - Effects > Plugin Mura's Seamless > Shift at Arch.
12 - Effects > Reflections Effects >Rotatin Mirror.
13 - Layers > Duplicate. Layers > Merge > Merge Down.
14 - Filters Unlimited 2.0 > Color Effects > Inverter. Layers > Properties > General > Blend Mode Soft Light ou outro que combine com as cores que estiver usando.
15 - Layers > New Raster Layer. Pintar com o Gradiente em uso. Layers > Duplicate. Image > Mirror > Mirror Horizontal. Layers > Properties > General: Opacity 50. Layers > Merge > Merge Down.
16 - Effects > Plugin Mehdi > Sorting Tiles.
17 - Effects > Plugin Toadies > What Are You?: 40, 40. Image > Free Rotate: Right, 90, all layers desmarcado. Effects > Plugin Toadies > What Are You?: 60, 60. Image > Free Rotate: Right, 90, all layers desmarcado. Effects > Plugin Toadies > What Are You?: 0, 65.
18 - Effects > Reflections Effects >Rotatin Mirror.
Layers > Properties: Blend Mode Hard Light.
19 - Layers > New Raster Layer. Pintar com a cor do background. Layers > New Mask Layer > From Image: Mask_GB_127. Layers > Merge > Merge Group.
20 - Layers > Duplicate. Layers > Merge > Merge Down. *Se preferir duplique mais uma vez antes e repita o Merge Down.
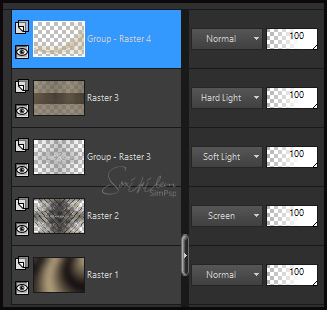
21 - As layers ficaram assim.
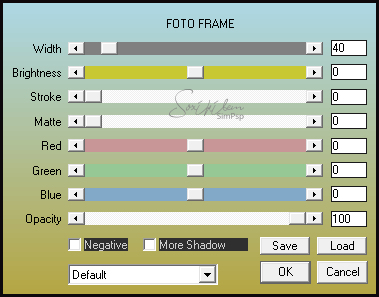
22 - Layers > Merge > Merge Visible. Effects > Plugin AAA Frames > Foto Frame.
Repetir Foto Frame mudando o valor em Width para 20.
23 - Edit > Copy no grafico_maryse_soxiki. Edit > Paste a New Layer.
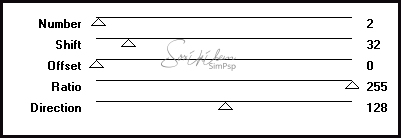
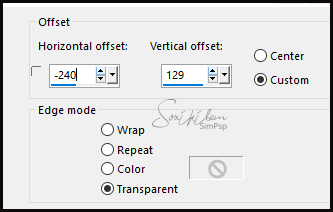
24 - Edit > Copy no decor_maryse_bysoxikibem. Edit > Paste a New Layer. Effects > Image Effects > Offset.
25 - Edit > Copy no tube flor. Edit > Paste a New Layer. Posicione. Effects > 3D Effects > Drop Shadow: como preferir.
26 - Edit > Copy no titulo_maryse_bysoxikibem. Edit > Paste a New Layer. Posicione como preferir. Se desejar aplique Effects > 3D Effects > Drop Shadow: como preferir.
27 - Edit > Copy no tube principal. Edit > Paste a New Layer. Posicione. Effects > 3D Effects > Drop Shadow: como preferir. *Se estiver usando um Tube claro como usei no segundo exemplo, finalize com uma borda de 1px cor preta.
28 - Se você desejar, redimensiona seu trabalho. Aplicar sua marca d'água ou assinatura. File > Export > JPEG Optimizer.
CREDITOS Versao 1 & 2 Tube Principal e Flor by Maryse - Masks: Mask_GB_121 e Mask_GB_127
Tutorial by Soxikibem'19
Sinta-se à vontade para enviar suas versões. Terei todo o prazer em publicá-las em nosso site.
|