|
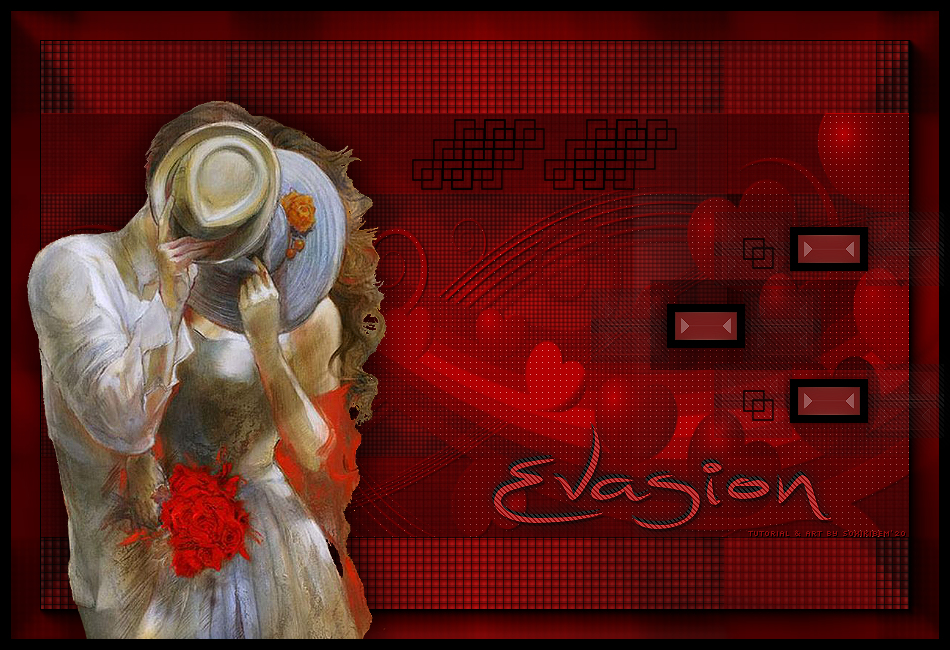
Tutorial dedicado ao grupo Evasion.
TRADUÇÕES:
Obrigada aos nossos tradutores!
MATERIAL 1 Tube Principal à sua escolha Narah_Mask_1191 titulo_evasion decor1_evasion_byxiki decor2_evasion_byxiki
Plugins AAA Frames Andrew's Filters 5 Italian Editor Effect Simple
Execução
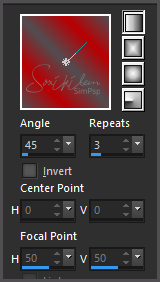
1 - Abrir o material no PSP, duplique e feche o original. Escolher duas cores para trabalhar. foreground #504e51 background #ba0003 Forme um gradiente como abaixo.
2 - Abra uma imagem transparente de 950x650px. Pintar a transparência com o gradiente.
3 - Effects > Plugin Andrew's Filters 5 > Fan.
4 - Effects > Plugin Simple > 4 Way Average.
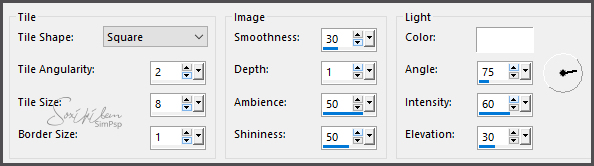
5 - Effects > Texture Effects > Tiles.
6 - Layers > Duplicate. Image > Free Rotate: Right, 90.
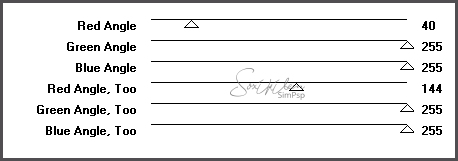
7 - Effects > Plugin Italian Editor Effect > Effetto Fantasma: 41, 93.
8 - Layers > Duplicate. Image > Free Rotate: Left, 90.
9 - Image > Resize: 53%, all layers desmarcado.
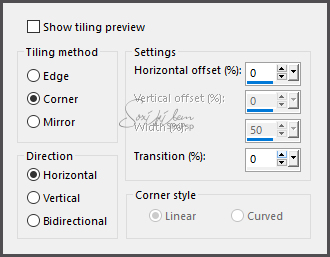
10 - Effects > Image Effects > Seamless Tiling.
11 - Effects > 3D Effects > Drop Shadow: 1, 1, 100, 0.
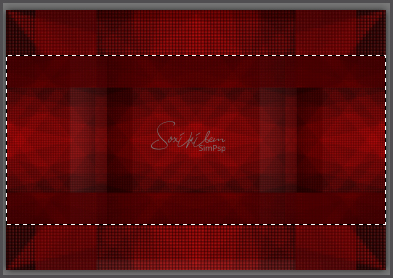
12 - Layers > New Raster Layer. Com a ferramenta Selection Tool, selecione como abaixo.
Pintar esta seleção com a cor do Background. Selections > Select None.
13 - Layers > New Mask Layer > From Image: Narah_Mask_1191. Layers > Merge > Merge Group. Effects > 3D Effects > Drop Shadow: 1, 1, 100, 0.
14 - Effects > Plugin Carolaine and Sensibility > CS-LDots: 82, 3, 2. Adjust > Sharpness > Sharpen.
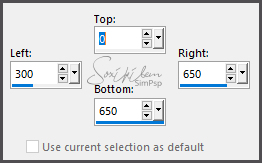
15 - Layers > New Raster Layer. Ferramenta Selection Tool > Custom Selection.
Pintar com a cor do Foreground.
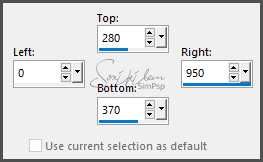
16 - Ferramenta Selection Tool > Custom Selection.
Aperte a tecla Delete do teclado. Selections > Select None. Layers > Properties > General > Blend Mode Hard Light ou Overlay.
17 - Layers > Merge > Merge Visible.
18 - Effects > Plugin AAA Frames > Foto Frame: 40, 0, 0, 0, 0, 0, 0, 100.
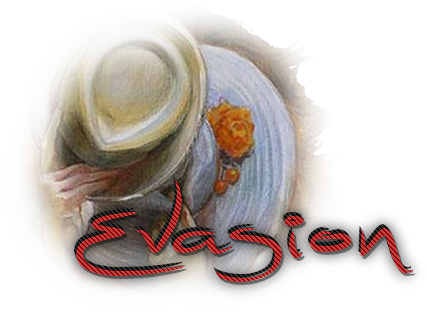
19 - Edit > Copy no Tube. Edit > Paste a New Layer. Posicione à esquerda. Effects > 3D Effects > Drop Shadow: como preferir.
20 - Layers > Merge > Merge Visible.
21 - Effects > Plugin AAA Frames > Foto Frame: 10, -255, 0, 0, 0, 0, 0, 100.
22 - Edit > copy no titulo_evasion. Edit > Paste a New Layer. Effects > Image Effects > Offset: Horizontal 186, Vertical -155, Transparent.
23 - Edit > Copy no decor1_evasion_byxiki. Edit > Paste a New Layer. Effects > Image Effects > Offset: Horizontal 283, Vertical 0, Transparent.
24 - Edit > Copy no decor2_evasion_byxiki. Edit > paste a New Layer. Effects > Image Effects > Offset: Horizontal 70, Vertical 170, Transparent.
25 - Se você desejar, redimensione seu trabalho. Aplicar sua marca d'água ou assinatura. File > Export > JPEG Optimizer.
CREDITOS Tube by FBi - Mask by Narah
Tutorial by Soxikibem'19
Sinta-se à vontade para enviar suas versões. Terei todo o prazer em publicá-las em nosso site.
|