|
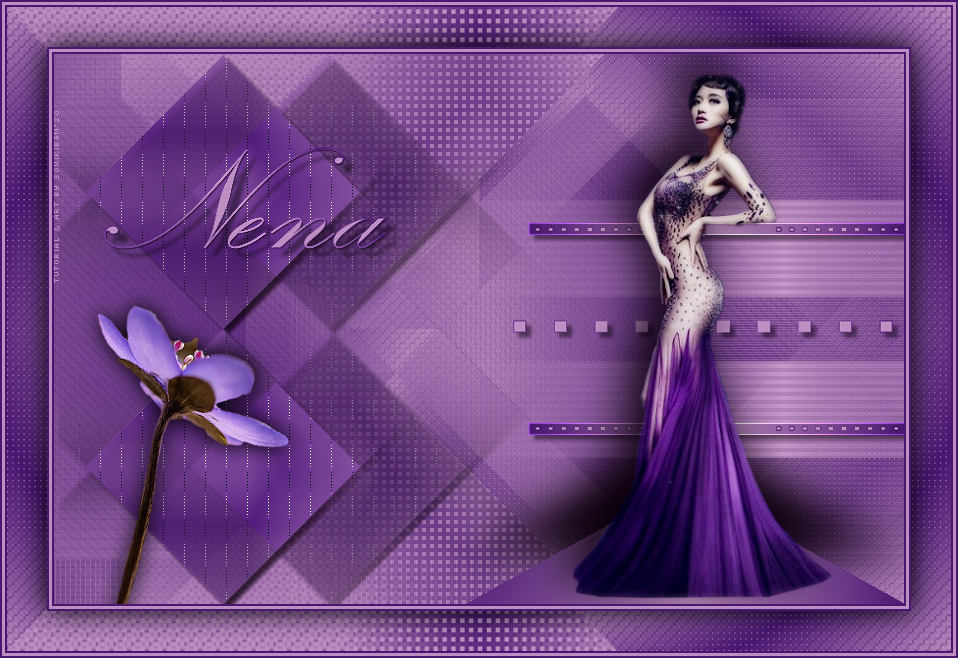
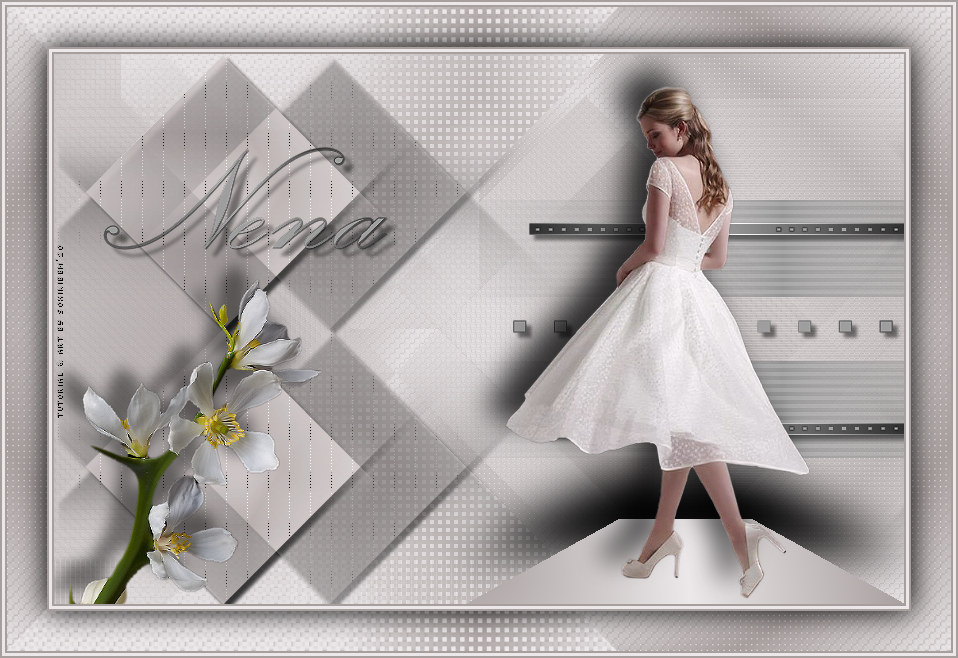
Tutorial dedicado a NENA em agradecimento pelo lindo trabalho com tubes.
TRADUÇÕES: Obrigada aos nossos tradutores!
MATERIAL 1 Tube Principal à sua escolha 1 Tube flor à sua escolha decor1_nena_bysoxiki titulo_nena_bysoxiki
Selections nena1_bysoxiki nena2_bysoxiki (Salvar a seleção na pasta Selection do PSP)
Plugins Italian Editors Effect L en K's Unlimited 2.0
Execução
1 - Abrir o material no PSP, duplique e feche o original. Escolher duas cores para trabalhar. Foreground #481770 Background #bd8ec1
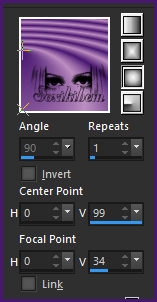
2 -Abra uma transparência de 850x550px. Pintar com o gradient Sunburst como no print.
3 - Effects > Plugins Unlimited 2.0 > Bkg Designers sf10 IV > Instant Tile: 224, 116.
4 - Effects > Plugin Unlimited 2.0 > Bkg Designers sf10 IV > @BlueBerry Pie.
5 - Selections > Load/Save Selections > Load Selection From Disk: nena1_bysoxiki. Selections > Promote Selection to Layer. Selections > Select None.
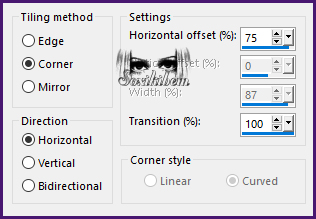
6 - Effects > Image Effects > Seamless Tiling.
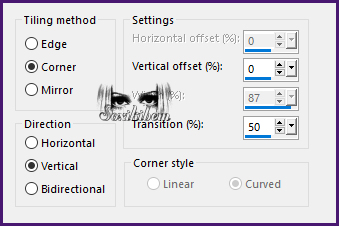
7 - Effects > Image Effects > Seamless Tiling.
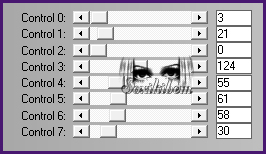
8 - Effects > Plugin L en K's > Adonis.
9 - Effects > 3D Effects > Drop Shadow: 5, 5, 100, 5, cor preta.
10 - Ative a layer Raster 1. Selections > Load/Save Selections > Load Selection From Disk: nena1_bysoxiki.
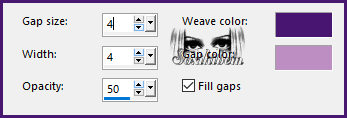
11 - Effects > Texture Effects > Weave. Com a cor do Foreground e background.
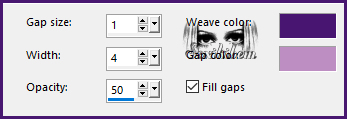
12 - Selections > Invert. Effects > Texture Effects > Weave. Com a cor do Foreground e background.
13 - Selections > Promote Selection to Layer. Selections > Select None.
14 - Plugin Italian Editors Effect > Effetto Fantasma: 140, 41. Image > Mirror > Mirror Horizontal.
15 - Ativar a Layer Promoted Selection. Layers > New Raster layer. Selections > Load/Save Selections > Load Selection From Disk: nena2_bysoxiki. Pintar com o gradiente em uso. Selections > Select None.
16 - Effects > 3D Effects > Drop Shadow: -50, 0, 100, 70, cor preta, Shadow on new layer marcado.
17 - Ative a layer Raster 2. Edit > Copy no decor1_nena_bysoxiki. (Lembre de tirar a minha marca d'agua) Edit > Paste a New Layer. Objects > Align > Right.
18 - Edit > Copy no tube principal. Edit > Paste a New Layer. Posicione à direita. Effects > 3D Effects > Drop Shadow como preferir.
19 - Edit > Copy no Tube Flor. Edit > paste a New Layer. Posicione à esquerda. Effects > 3D Effects > Drop Shadow como preferir.
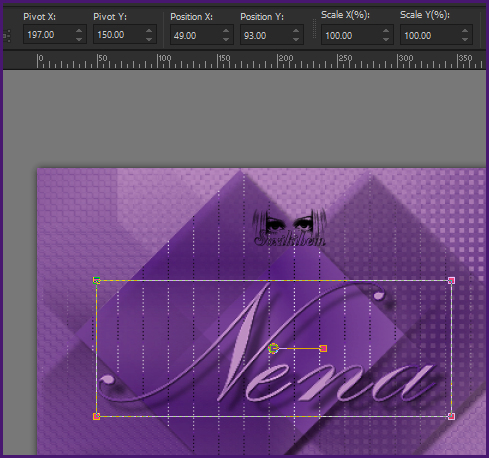
20 - Edit > Copy no titulo_nena_bysoxiki. Edit > Paste a New Layer. Ative a ferramenta Pick Tool e configure o Positon X: 49,00 e Position Y: 93,00.
21 - Ativar a layer Raster 1. Edit > Copy.
22 - Image > Add Borders: 2px na cor do foreground 3px na cor do background 2px na cor do foreground
23 - Selections > Select All. Image > Add Borders: 40px com qualquer cor. Selections > Invert.
24 - Edit > Paste Into Selection. Selections > Invert.
25 - Effects > 3D Effects > Drop Shadow: 0, 0, 100, 40, cor preta. Selections > Select None.
26 - Image > Add Borders: 2px na cor do foreground 3px na cor do background 2px na cor do foreground
27 - Se você desejar, redimensiona seu trabalho.Aplicar sua marca d'água ou assinatura. File > Export > JPEG Optimizer.
CREDITOS Versão 1 &2: Tube Principal & Tube Flor by Nena Silva
Sinta-se à vontade para enviar suas versões. Terei todo o prazer em publicá-las em nosso site.
|
