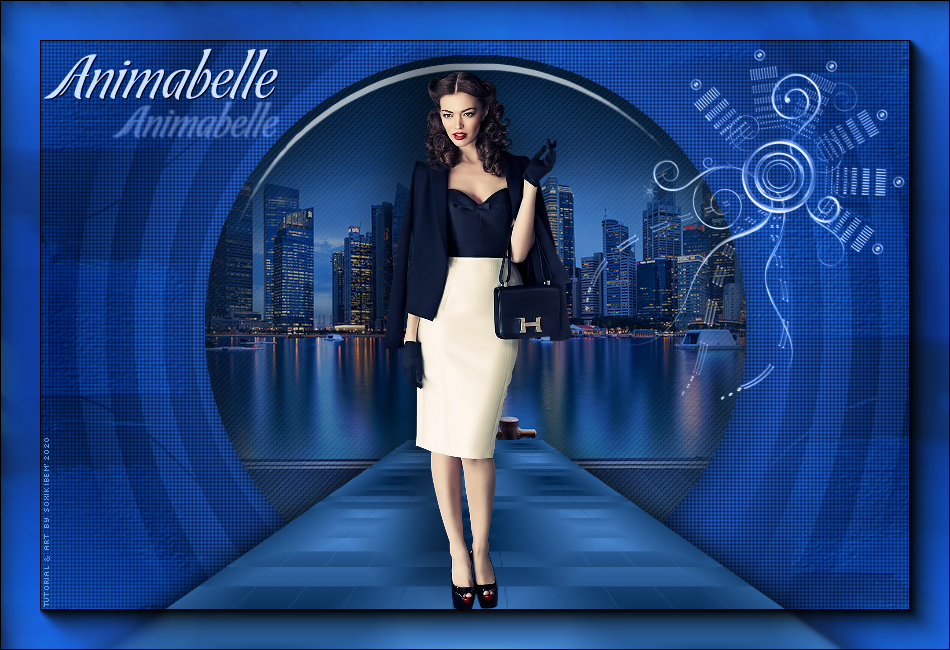
|
Tutorial dedicado a Animabelle em agradecimento pelo lindo trabalho com Tubes e Misteds
TRADUÇÕES:
Obrigada aos nossos tradutores!
MATERIAL 1 Tube Principal à sua escolha 1 Misted Paisagem à sua escolha Mask BlendidStyle_006 titulo_animabelle 3_deco_Animabelle.png
Plugins AAA Frames Alien Skin > Eye Candy 5 Unlimited 2.0 L en K's Mura's Seamless Simple
Execução
1 - Abrir o material no PSP, duplique e feche o original. Escolher duas cores para trabalhar. #a85b3d foreground #f4ddba background
2 - Abra uma imagem transparente de 950x650px. Pintar com um gradiente formado pelas cores escolhidas.
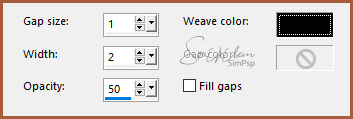
3 - Effects > Texture Effects > Weave.
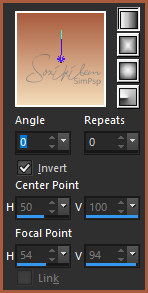
4 - Layers > New Raster Layer. Pintar com o gradiente configurado como abaixo.
5 - Effects > Plugin > Simple > Diamonds. Plugin Simple > 4Way Average.
6 - Effects > Plugin L en K's > Katharina: 58, 0.
7 - Layers > Duplicate. Fechar a visibilidade da Copy of Raster 2. Ativar a layer Raster 2.
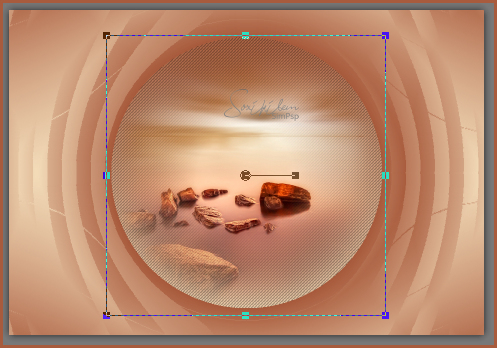
8 - Effects > Filters Unlimited 2.0 > Distortion Filters > Black Hole: 120.
9 - Ativar a layer Raster 1. Edit > Copy no Misted Paisagem. Edit > Paste a New Layer.
10 - Adjust > Sharpness > Sharpen.
11 - Ative a layer Raster 2. Effects > Texture Effects > Texture. Texture Grid, com a cor do background.
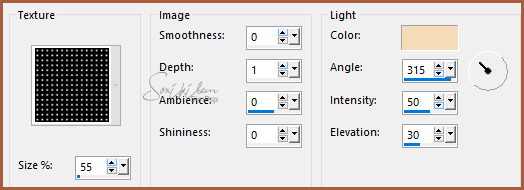
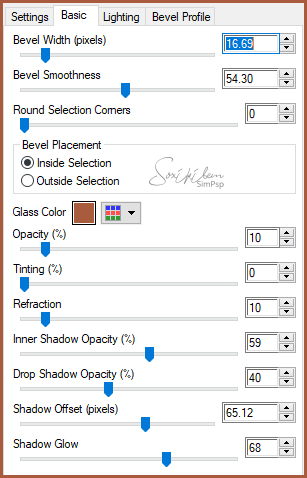
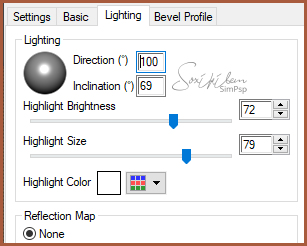
11 - Com a ferramenta Magic Wand, selecione o circulo. Effects > Plugin Alien Skin > Eye Candy 5 > Impact > Glass. Settings: Clear, Bevel Profile: Button.
Selections > Select None.
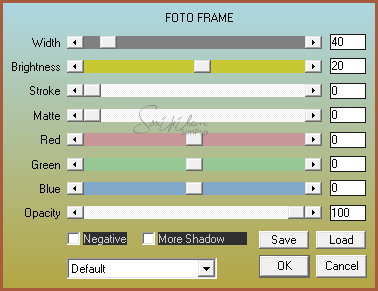
12 - Ativar e abrir a visibilidade da layer Copy of Raster 2. Image > Free Rotate: Right, 90, all layers desmarcado.
13 - Effects > Geometric Effects > Perspective - Vertical: -80, Transparent.
14 - Com a ferramenta Pick Tool, Mode Scale, diminuir ate a medida 440 da regua.
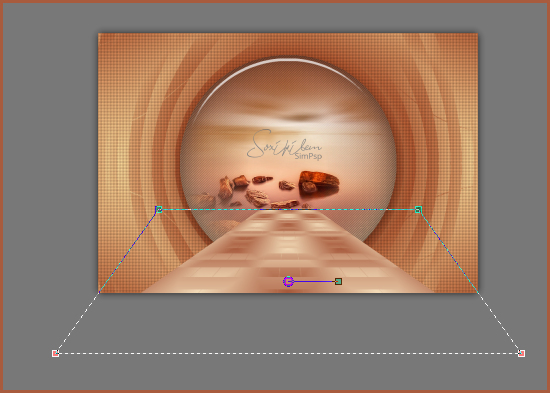
15 - Com a ferramenta Pick Tool, Mode Perspective arrastar o ponto da esquerda como no print abaixo.
16 - Effects > 3D Effects > Drop Shadow: 20, -25, 100, 50, cor preta Effects > 3D Effects > Drop Shadow: 20, 25, 100, 50, cor preta.
17 - Layers > New Raster Layer. Pintar com a cor do background. Layers > Mew Mask Layer > From Image: BlendidStyle_006. Layers > Merge > Merge Group.
18 - Effects > Plugin Mura's Seamless > Emboss at Alpha.
19 - Layers > Arrange > Move Down. Layers > Properties > General > Blend Mode: Soft Light.
20 - Layers > Merge > Merge Visible. Effects > Plugin AAA Frames > Foto Frame.
21 - Layers > New Adjustment Layer > Fill Light/Clarity. Mude apenas na aba General o Blend Mode para Multiply e Opacity 80. * Em Opacity fica livre para mais ou menos de acordo com a tonalidade que esta sendo usada.
22 - Edit > Copy no Tube principal. Edit > Paste a New Layer. Posicione. Effects > 3D Effects > Drop Shadow: como preferir.
23 - Edit > Copy no titulo_animabelle. Edit > Paste a New Layer. Posicione como preferir.
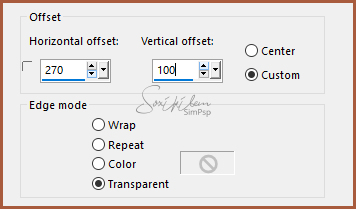
24 - Edit > Copy no 3_deco_Animabelle.png. Edit > Paste a New Layer. Image > Resize em 40%, all layers desmarcado. Image > Flip > Flip Vertical. Effect > Image Effects> Offset.
Layers > Properties > General > Blend Mode Luminense (L) ou Burn.
25 - Se você desejar, redimensiona seu trabalho. Aplicar sua marca d'água ou assinatura. File > Export > JPEG Optimizer.
CREDITOS Versao 1 & 2 Tube, Misted e Decor by Animabelle
Tutorial by Soxikibem'19
Sinta-se à vontade para enviar suas versões. Terei todo o prazer em publicá-las em nosso site.
|