|
English Translation by Soxikibem Original Tutorial
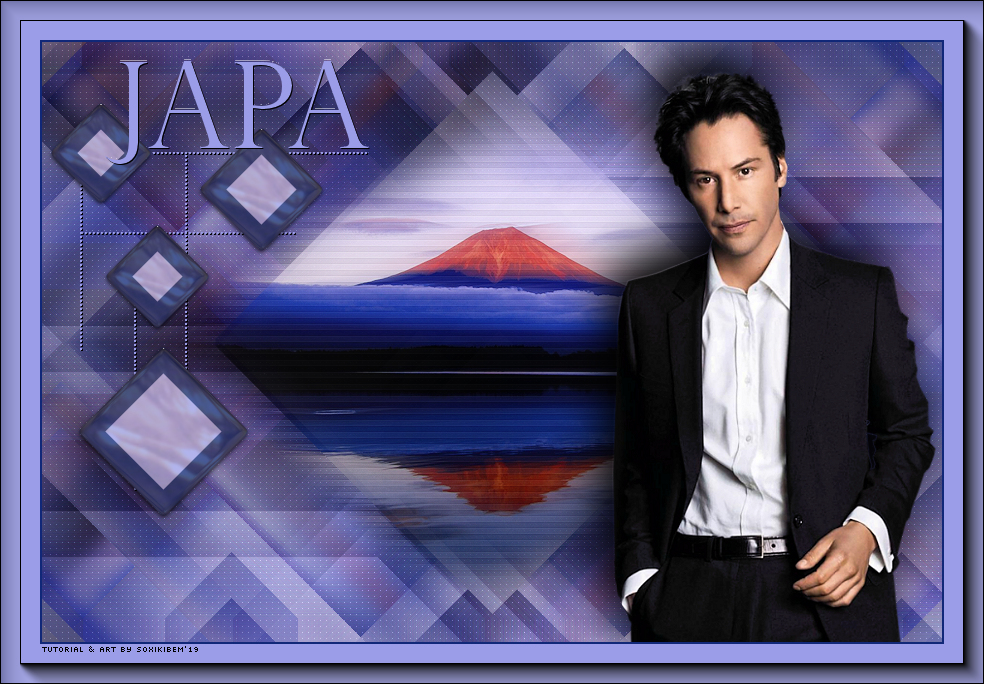
MATERIAL 1 Tube of your choice 1 Landscape image of your choice los_japa_bysoxikibem titulo_japa_bysoxikibem alpha_channel_90japa
PLUGINS AAA Frames Carolaine and Sensibility Toadies Unlimited 2.0
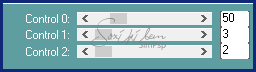
TUTORIAL 1 -Open material in PSP, duplicate and close original. Choose two colors to work with .Foreground #112878 Background #9b9de8
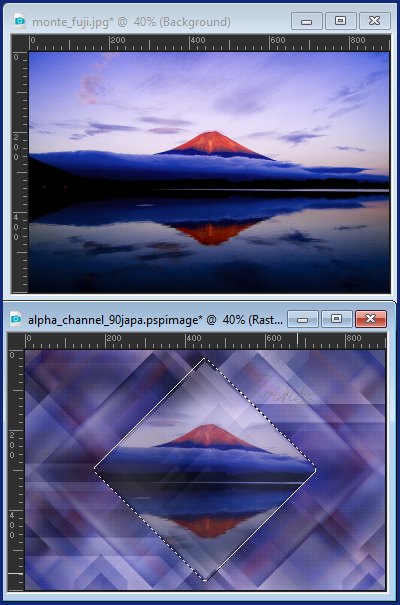
2 - Open alpha_channel_90japa. Selections > Select All. Edit > Copy in Landscape Image. Edit > Paste Into Selection. Selections > Select None.
3 - Effects > Image Effects > Seamless Tiling: Default.
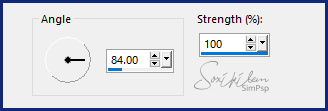
4 - Adjust > Blur > Motion Blur.
Edit > Repeat Motion blur. Effects > Edge Effects > Enhance. Edit > Repeat Enhance Edges.
5 - Effects > Plugin Toadies > Weaver.
6 - Layers > Duplicate. Close the visibility of the Copy of Raster 1 layer. Enable layer Raster 1.
7 - Effects > Filters Unlimited 2.0 > Background Designers IV > sf10 Slice N Dice.
8 - Effects > Filters Unlimited 2.0 > Bkg Designer sf10 I > Cruncher.
9 - Effects > Plugin Carolaine and Sensibility > CS-LDots.
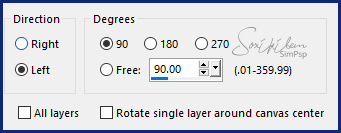
10 - Enable and open vibility of layer Copy of Raster 1. Image > Free Rotate.
11 - Effects > Filters Unlimited 2.0 > Background Designers IV > sf10 Slice N Dice.
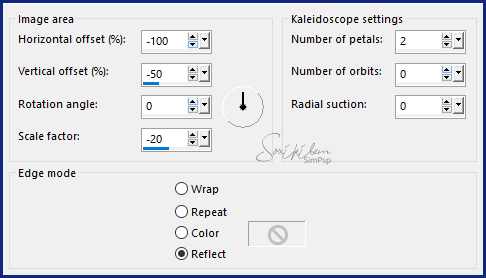
12 - Effects > Reflections Effects > Kaleidoscope.
Layers > Properties > General > Blend Mode: Soft Light.
13 - Selections > Load/Save Selections > Load Selection From Alpha Channel: Selection #1. Press the Delete key on the keyboard. Selections > Select None.
14 - Layers > New Raster Layer. Selections > Load/Save Selections > Load Selection From Alpha Channel: Selection #2.
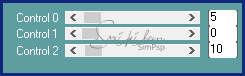
15 - Activate the Clone Brush Tool and configure as below.
Take the mouse arrow on the Landscape Image and with the right button of a click. Go back to work and with the left mouse button click inside the selection. If you want just one click or click and drag until it is your taste.
Selections > Select None.
16 - Layers > Duplicate. Edit > Repeat Duplicate.
17 - Enable Layer Raster 2. Adjust > Blur > Motion Blur.
18 - Enable Copy of Raster 2. Adjust > Blur > Motion Blur.
19 - Layers > Merge > Merge Down. Effects > Plugin Carolaine and Sensibility > CS-HLines.
Effects > Edge Effects > Enhance.
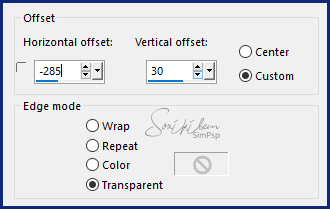
20 - Enable layer Copy (2) of Raster 2. Edit > Copy in the los_japa_bysoxikibem. Edit > Paste a New Layer. Effects > Image Effects > Offset.
21 - Edit > Copy in the Main Tube. Edit > Paste a New Layer. Position to the right. Effects > 3D Effects > Drop Shadow: of your choice.
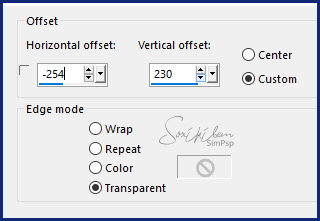
22 - Edit > Copy in titulo_japa_bysoxikibem. Edit > Paste a New Layer. Effects > Image Effects > Offset.
23 - Image > Add Borders: 2px foreground color. Selections > Select All. Image > Add Borders: 40px background color. Selections > Invert.
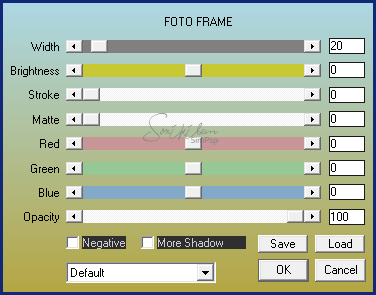
24 - Effects > Plugin AAA Frames > Foto Frame.
Selections > Select None.
25 - If you want to resize your work now. Apply your watermark or signature. File > Export > JPEG Optimizer...
CREDITS:
Tutorial by Soxikibem'19
Feel free to submit your versions. I'll be happy to post them on our site .
|