|
English Translation by Soxikibem Original Tutorial
MATERIAL 1 Tube of your choice. 1 Tube decorative of your choice. grafico73_xiki.pspimage, sq_73_xiki, setas_73_xiki, WA_attitude_what_attitude_KathyFrances Mask: Narah_Mask_1480,
Pluguins Carolaine and Sensibility, Filters Unlimited 2.0, Mehdi,
Execution
1 – Open the tube, duplicate and close the original. Choose two colors: Foreground: #2f2e34 Background: #723940
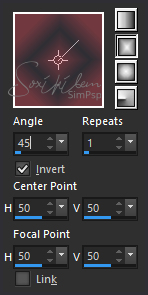
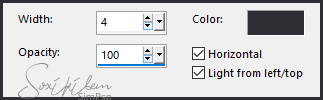
2 - Open the grafico73_xiki.pspimage and paint with Rectangular gradient in setting:
3 - Effects > Reflections Effects > Kaleidoscope.
4 - Effects > Plugin Mehdi > Weaver.
5 - Effects > Filters Unlimited 2.0 > Bkg Kaleidoscope > @BlueBerry Pie.
6 - Selections > Load/Save Selection > Load Slection From Alpha Channel: triangulo73_xiki.
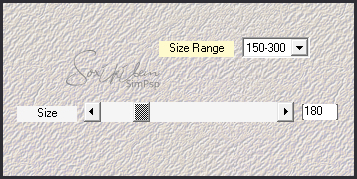
7 - Effects > Plugin Carolaine and Sensibility > CS-Ldots: 60, 3, 2. Adjust > Sharpness > Sharpen. Selections > Select None.
8 - Selections > Load/Save Selection > Load Slection From Alpha Channel: triangulo73_2_xiki.
9 - Effects > Texture Effects > Blinds with the color of foreground.
Selections > Selection None.
10 - Selections > Load/Save Selection > Load Slection From Alpha Channel: rec73_xiki.
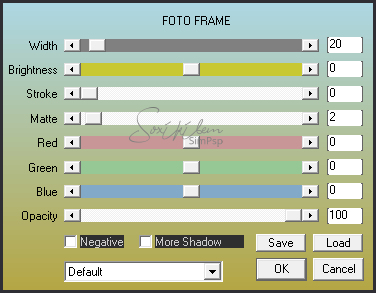
11 - Effects > Plugin AAA Frames > Foto Frame.
12 - Selections > Promote Selection to layer.
13 - Selections > Modify > Contract: 40. Plugin Funhouse > Xaggerate: 24, 24, 0, 0, 0, 0, 0, 0.
14 - Layers > New Raster Layer. Paint with the foreground color. Selections > Modify > Contract: 2. Hit the Delete key on the keyboard. Selections > Select None. Layers > Merge > Merge Down.
15 - Layers > Duplicate. Image > Resize > 50% All layers unchecked.
16 - Effects > Image Effects > Offset: Horizontal -470, Vertical 0, Custom, Transparent.
17 - Layers > New Raster Layer. Paint with color #FFFFFF (white). Apply mask: Layers > New Mask Layer > Form Image >Narah_Mask_1480 Layers > Merge > Merge Group.
18 - Layers > Arrange > Move Down. Repeat this effect.
19 - Effects > Image Effects > Offset: Horizontal 65, Vertical 0, Custom, Transparent. Layers > Properties > General > Blend Mode: Exclusion - Opacity: 40%
20 - Edit > Copy no sq_73_xiki.png Enable the Copy Selection layer... Edit > Paste as new layer. Effects > Image Effects > Offset: Horizontal 300, Vertical 120, Custom, Transparent.
21 - Layers > Duplicate. Image > Mirror > Mirror Vertical.
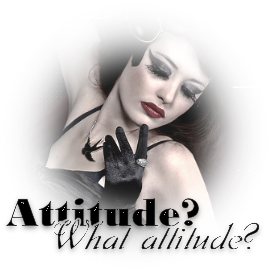
22 - Edit > Copy no png setas_73_xiki Edit> paste as new layer. Effects > Image Effects > Offset: Horizontal 270, Vertical 0, Custom, Transparent.
23 - Layers > Duplicate. Image > Free Rotate: Right, 90. Effects > Image Effects > Offset: Horizontal -700, Vertical 0, Custom, Transparent.
24 - Layers > New Adjustment Layer > Fill Light/Clarity. Change in General > Blend Mode: Overlay.
25 - Edit > Copy in the main tube. Edit > paste as new layer. Position. Effects > 3D Effects > Drop Shadow: of your choice.
26 - Edit > Copy in the decorative tube Edit > paste as new layer, place the left over the rectangle... see how I put. Effects > 3D Effects > Drop Shadow: of your choice.
27 - Edit > Copy na WordArt WA_attitude_what_attitude_KathyFrances Edit > paste as new layer. or Export as Custom Brush. Layers > New Raster Layer. Apply using a color of your choice.
28 - Image > Add Borders > 1px - symmetric - in color #000000 (black)Selections > Select All.
29 - Image > Add Borders > 50px - symmetric - in color #000000 (black)or in the darker color that was chosen. Selections > Invert.
30 - Effects > Plugin AAA Frames > Foto Frame.
31 - Selections > Select None.
32 - If you want to resize your work now. Apply your watermark or signature. File > Export > JPEG Optimizer...
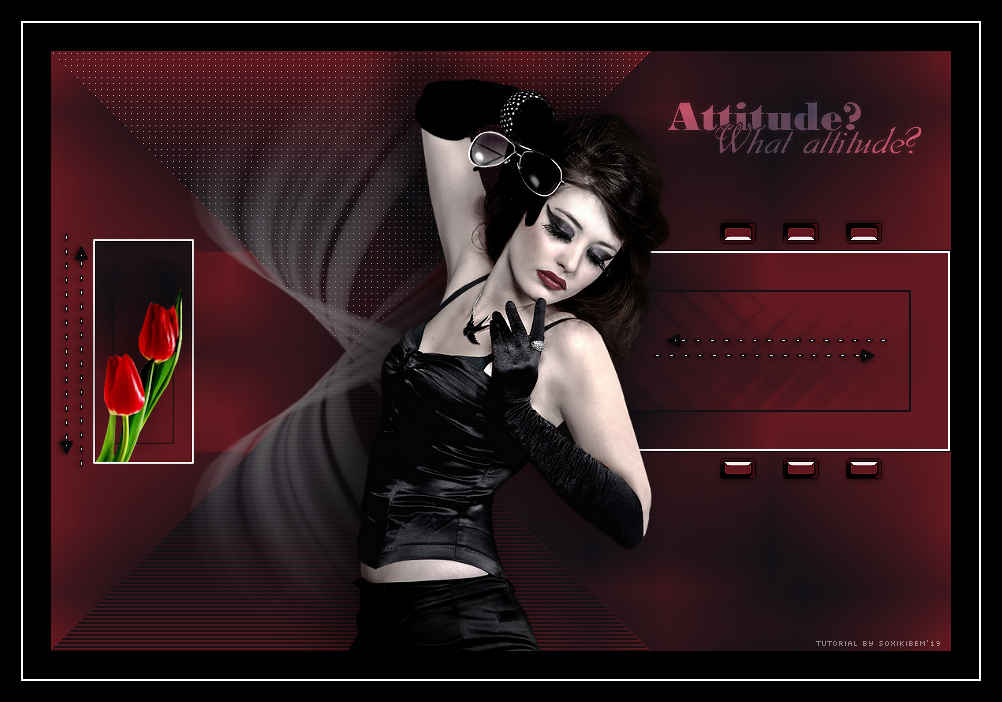
CREDITS: Tube by Annelies - WordArt by WA_attitude_what_attitude_KathyFrances - Mask by Narah
Tutorial by Soxikibem'19
Feel free to submit your versions. I'll be happy to post them on our site.
|