|
TRADUÇÕES:
Obrigada aos nossos tradutores!
MATERIAL 1 Tube a sua escolha. Pontilhados_soxiki, Aquamarine_by_soxikibem Pngtree-vector blue dynamic wave texture_1582138
Pluguins AAA Frames, AFS Import, Distort, It@lian Editors Effect, Mura's Meister, Toadies > Blast 'em!: importado pelo Filters Unlimited 2.0,
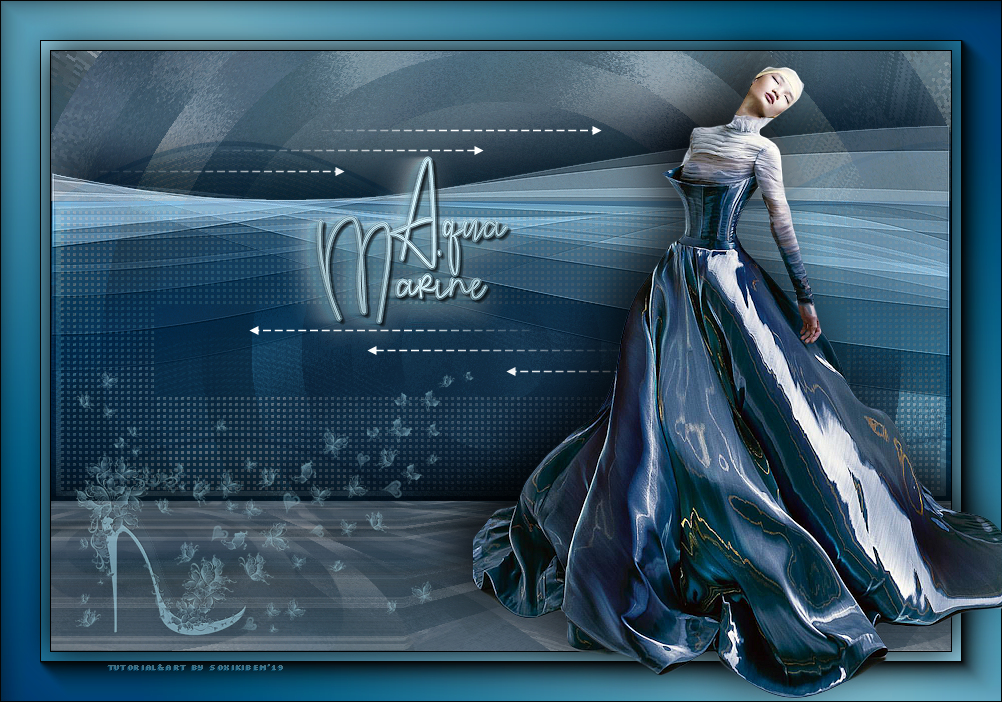
Execução
1 - Abra o tube, duplique e feche o original. Retire duas cores para trabalhar. Aqui usarei a cor #0e6b97 para o foreground e a #a8ddee para o background.
2 - Abra uma transparência de 900x600px.
3 - Selections > Select all. Edit Copy no tube e Edit > paste into selection. Selections > Select None.
4 - Effects > Image Effects> Seamless Tiling: Default.
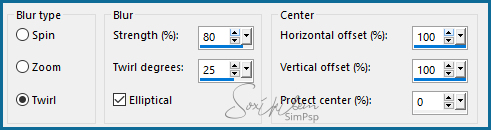
5 - Adjust > Blur > Radial Blur.
6 - Duplique esta layer. Layers > Merge > Merge Down.
7 - Filters Unlimited 2.0 > Toadies > Blast 'em!: 20, 211.
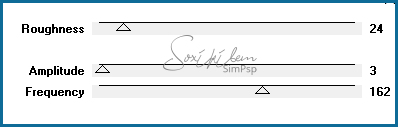
8 - Plugin Distort > Radial ZigZag.
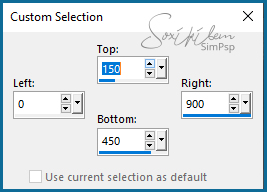
9 - Adicione uma nova layer. Ferramenta Selection > Custon Selection.
10 - Pinte esta seleção com a cor do foreground.
11 - Selection > Modify > Contract: 5. Pinte com a cor do background.
12 - Selections > Modify > Contract: 5. Pinte com um gradiente formado pelas cores em uso: Linear, Angle 45, Repeats 0, Invert desmarcado.
13 - Ainda selecionado aplique o plugin AFS Import > sqborder2.
14 - Selections > Select None.
15 - Mude o blend desta layer para Multiply.
16 - Duplique esta layer. Na layer duplicada aplique Effect > Distortion Effects > Wave.
17 - Diminua a opacidade desta layer para 30%.
18 - Edit > Copy no Pngtree-vector blue dynamic wave texture_1582138 e paste a new layer. Effects > Image Effects > Offset: Horizontal 0, Vertical, 90, Transparent.
19 - Mude o blend desta layer para Luminence (L). Diminua a visibilidade para 80%. Effects > Edge Effects > Enhance.
20 - Drop Shadow: 1, 1, 100, 0, cor preta. Drop shadow: -30, 0, 100, 70, cor preta.
21 - Adicione uma nova layer e pinte com o gradiente em uso. Layers > Arrange > Send to Bottom.
22 - Duplique a layer Raster1. Layers > Arrange > Bring to top na layer Copy of Raster1.
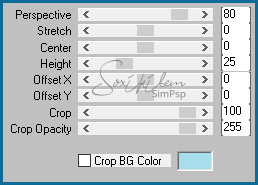
23 - Plugin Mura's Meister > Perspective Tiling.
24 - Effects > 3D Effects > Drop Shadow: -20, 0, 100, 80, com a cor preta.
25 - Plugin It@lian Editors Effect > Effetto Fantasma: 200, 0.
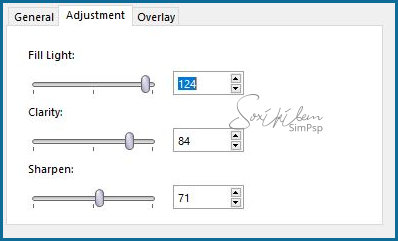
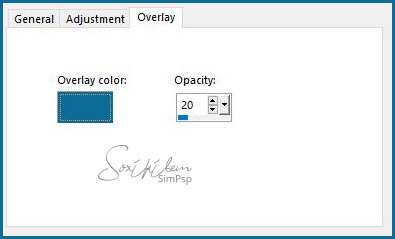
26 - Layers > New Adjustment Layer > Fill Light/Clarity.
27 - Adicione uma borda de 1px preta.
28 - Selections > Select All. Adicione uma borda de 50px. Selections > Invert. Pinte com um gradiente com as cores em uso: Linear, angle 45, Repeats 1, Invert desmarcado.
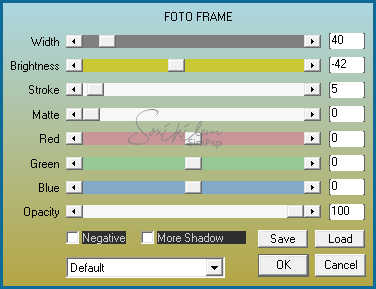
29 - AAA Frames > Foto Frame.
30 - Sections > Invert. Drop Shadow: 0, 0, 100, 50.
31 - Selections > Select None.
32 - Edit > Copy no pontilhados_soxiki e paste a new layer.
33 - Duplique esta layer. Effects > Image Effects > Offset: Horizontal -150, Vertical 200, Transparent.
34 - Image > Flip > Flip Horizontal.
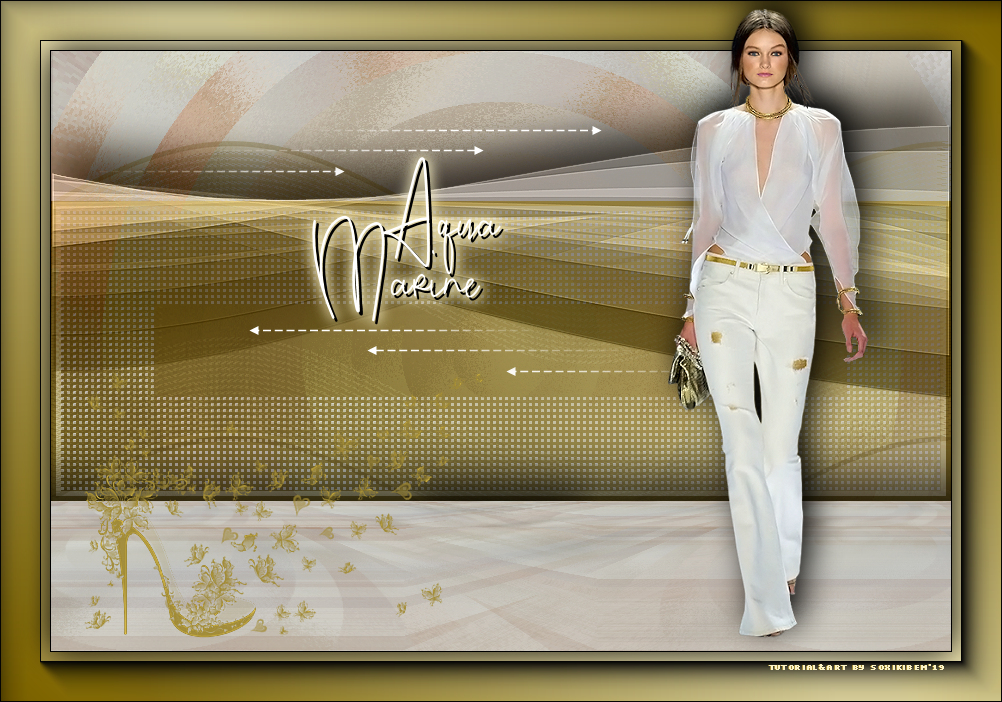
35 - Edit > Copy no titulo aquamarine e paste a new layer. Posicione como preferir. (Se preferir tem o titulo na cor branca) Aplique Drop Shadow se preferir. Posicione a gosto.
36 - Edit > Copy no tube e paste a new layer. Posicione e aplique drop shadow a gosto.
37 - Edit > Copy na imagem htb1ki e paste a new layer. Ou export como Custom Brush para usar com a cor de seu trabalho. Posicione a esquerda.
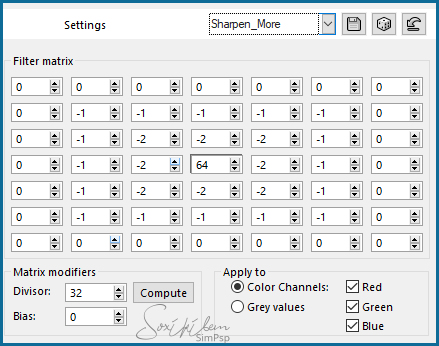
38 - Aplique Effects > User Defined Filter.
39 - Assine e salve em jpg.
CREDITOS: Tube by SuizaBella - Png htb1ki recebido em grupo de trocas - Pontilhados&WordArt by Soxikibem DynamicWaveElement & DynamicWaveTexture by Pngtree Versao 2: Tube by Colybrix
Versao 2
Tutorial by Soxikibem'19
Sinta-se à vontade para enviar suas versões. Terei todo o prazer em publicá-las em nosso site.
|