|
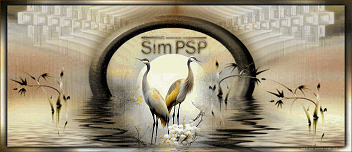
May this new year be filled with opportunities to restart, grow, and achieve. May each day bring a chance to write a new story, full of dreams come true and lessons learned. May the future be illuminated by renewed hopes and the courage to move forward. A new beginning awaits, and it is in it that we will find our strength to live the best of ourselves. ***** Que este novo ano seja repleto de oportunidades para recomeçar, crescer e conquistar. Que cada dia traga a chance de escrever uma nova história, cheia de sonhos realizados e aprendizados. Que o futuro seja iluminado por esperanças renovadas e a coragem de seguir em frente. Um novo começo aguarda, e é nele que encontraremos nossa força para viver o melhor de nós mesmos.
TRADUÇÕES: Obrigada aos nossos Tradutores
MATERIAL: 1 Tube ou Misted Personagem à sua escolha Outros Materiais by Soxikibem
PLUGINS: Mehdi: Wavy Lab 1.1 Mehdi: Sorting Tiles AP [Lines]: SilverLining Filters Unlimited 2.0: Background Designers IV > sf10 Slice N Dice
Este Tutorial foi escrito por Soxikibem, qualquer semelhança é mera coincidência. Tutorial testado e revisado por Márcinha.
Cor 3: #899dab
2 - Abra uma imagem
transparente de 900x500px. Sequencia das cores: Background, Foreground, Cor 3 e Branco.
3 - Effects > Plugins > Mehdi > Sorting Tiles.
4 - Layers > Duplicate. Image > Mirror > Mirror Horizontal. Effects > Texture Effects > Weave, com a cor do Foreground. Layers > Properties > General > Blend Mode: Lighten.
5 - Effects > Plugins > FM Tile Tools > Blend Emboss: Default.
6 - Ativar a Layer Raster 1. Selections > Load/Save Selections > Load Selection From Disk: NewBeginnings_Xiki1. Selections > Promote Selection to Layer. Filters Unlimited 2.0 > Background Designers IV > sf10 Slice N Dice. Mantenha a seleção...
7 - Layers > Arrange > Move Up. Layers > Properties > General > Blend Mode: Overlay. Effects > 3D Effects > Drop Shadow. Repita o Drop Shadow mudando o valor em Vertical para 20. Selections > Select None.
8 - Ativar a Layer Raster 1. Layers > Duplicate. Layers > Arrange > Bring to Top. Adjust > Blur > Gaussian Blur: 40. Effects > Geometric Effects > Perspective - Horizontal.
9 - Image > Mirror > Mirror Horizontal. Effects > Geometric Effects > Perspective - Horizontal.
10 - Layers > Duplicate. Image > Mirror > Mirror Horizontal. Layers > Merge > Merge Down. Effects > Distortion Effects > Wave.
11 - Pick Tool: Position X: 0, Position Y: 170 Effects > 3D Effects > Drop Shadow. Adjust > Sharpness > Sharpen.
12 - Layers > Duplicate. Pick Tool: Position X: 0, POsition Y: 360. Layers > Merge > Merge Down. Layers > Properties > General > Blend Mode: Luminance (L).
13 - Layers > New Raster Layer. Selections > Load/Save Selections > Load Selection From Disk: NewBeginnings_Xiki2 Com a ferramenta Flood Fill Tool, com o Match mode em Color, pinte estas três seleções com as três cores escolhidas. Selections > Select None.
14 - Effects > 3D Effects Drop Shadow.
15 - Effects > Image Effects > Seamless Tiling. Layers > Properties > General > Blend Mode: Overlay
16 - Layers > Duplicate. Pick Tool: Position X: 0, POsition Y: 415. Layers > Properties > General > Blend Mode: Soft Light.
17 - Ativar a Layer Raster 1. Selections > Load/Save Selections > Load Selection From Disk: NewBeginnings_Xiki3. Selections > Promote Selection to Layer. Effects > Plugins > AP [Lines] > SilverLining. Layers > Properties > General > Blend Mode: Lighten - Opacity: 60 Selections > Select None.
18 - Ativar a Layer Raster 1. Selections > Load/Save Selections > Load Selection From Disk: NewBeginnings_Xiki4. Selections > Promote Selection to Layer. Effects > Plugins > AP [Lines] > SilverLining. Selections > Select None.
19 - Ativar a Layer Raster 1. Selections > Load/Save Selections > Load Selection From Disk: NewBeginnings_Xiki5. Selections > Promote Selection to Layer. Adjust > Add/Remove Noise > Add Noise. Selections > Select None.
20 - Confira as Layers.
21 - Ativar a Layer do topo (Copy of Raster 2). Edit > Copy no TituloNB_ByXiki. *(Delete minha Marca d'agua) Edit > Paste As New Layer. Pick Tool: Position X: 4, Position Y: 204.
22 - Edit > Copy no DecorNB_ByXiki. *(Delete minha Marca d'agua) Edit > Paste As New Layer.
23 - Edit > Copy no DecorNB2_ByXiki. *(Delete minha Marca d'agua) Edit > Paste As New Layer. Pick Tool: Position X: 585, Position Y: -1.
24 - Image > Add Borders > Symmetric 1px cor preta 2px cor branca 1px cor preta 15px cor branca 1px cor preta 4px cor branca 1px cor preta 40px cor branca
25 - Edit > Copy no Misted ou tube personagem. (Delete a Marca d'agua) Edit > Paste As New Layer. Image > Resize se nescessário, no tube misted do material foi de 50%. Posicione e aplique efeito como preferir.
26 - Edit > Copy no DecorNB3_ByXiki. *(Delete minha Marca d'agua) Edit > Paste As New Layer. Pick Tool: Position X: 59, Position Y: 31.
27 - Image > Add Borders > Symmetric: 1px cor preta.
28 - Se você desejar
redimensione seu trabalho.
Versão:
Créditos: Formatação, Arte Final e Tutorial by Soxikibem Tube Principal: Tubed by Pqna&Alice Outros Materiais: by Soxikibem
Sinta-se à vontade para enviar suas versões. Terei todo o prazer em publicá-las em nosso site.
|


