|
Tutorial By Roberta Maver English Translation by Soxikibem Original Tutorial
MATERIAL 1 Main tube of your choice 1 Misted Landscape of your choice Mask NarahMasks_1549
Pluguins AP [Lines] Carolaine and Sensibility Graphics Plus
TUTORIAL 1 - Open the material on the PSP, duplicate and close the original.Choose two colors to work with. Here I used the colors: Foreground #0e080e Background #d26d9f
2 - Open a transparent 800 x500 px image. Paint this layer with the background color.
3 - Selections > Select All. Edit > Copy in the Main Tube. Edit > Paste Into Selection. Selections > Select None.
4 - Effects > Image Effects > Seamless Tiling: Default.
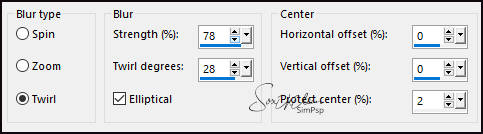
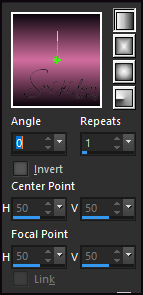
5 - Adjust > Blu > Radial Blur.
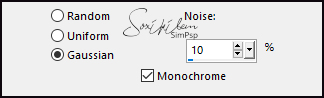
6 - Adjust > Add/Remove Noise > Add Noise.
7 - Layers > New Raster Layer. Paint this layer with the foreground color. Layers > New Mask Layer > From Image: NarahMasks_1549. Layers > Merge > Merge Group.
8 - Layers > Duplicate. Layers > Merge > Merge Down.
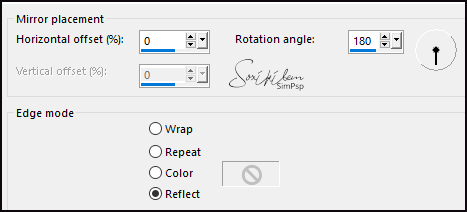
9 - Effects > Reflection Effects > Rotating Mirror.
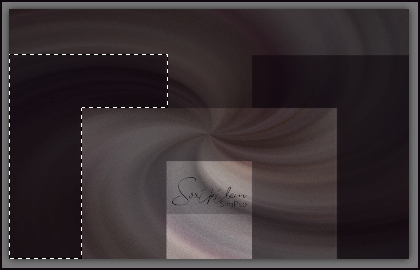
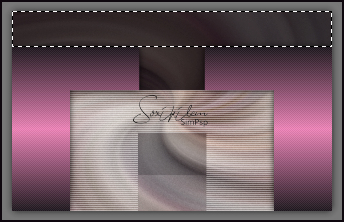
10 - Select with the Freehand Selection Tool as shown in the print below.
11 - Layers > New Raster Layer. Paint with the Linear gradient formed by the chosen colors.
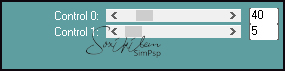
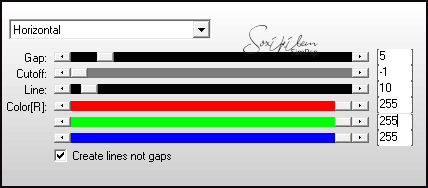
12 - Plugin Carolaine and Sensibility: CS_DLines.
13 - Selections > Select None. Effects > 3D Effects > Drop Shadow: 0, 0, 80, 25.
14 - Layers > Duplicate. Image > Mirror > Mirror Horizontal. Layers > Merge > Merge Down.
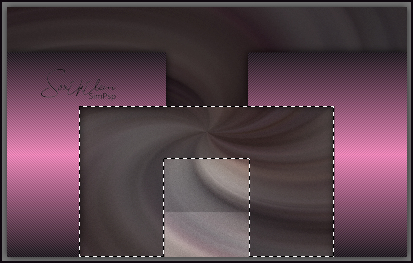
15 - Activate Raster 1. Select with the Freehand Selection Toll tool as shown in the print below.
16 - Selections > Promote Selection to Layer. Move this layer below raster 2.
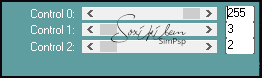
17 - Plugin AP [Lines] > Silver Lining.
18 - Effects > 3D Effects > Drop Shadow: 0, 0, 80, 25, black color. Selections > Select None.
19 - Activate Raster 1. Select with the Freehand Selection Tool as shown in the print below. Selections > Promote Selection to Layer. Selections > Select None.
20 - Plugin Carolaine and Sensibility > CS-LDots.
21 - Effects > 3D Effects > Drop Shadow: 0, 0, 80, 25, black color. Rename this layer to TIRA.
22 - Activate the promoted Selection layer. Effects > Image Effects > Seamless Tiling: Default.
23 - Activate the Mask layer. Effects > Geometric Effects > Perspective Horizontal: Distortion 95, Wrap.
24 - Layers > Duplicate. Image > Mirror > Mirror Horizontal. Layers > Merge > Merge Down.
25 - Adjust > Add/Remove Noise > Add Noise: Uniform, 10%, Monochrome checked.
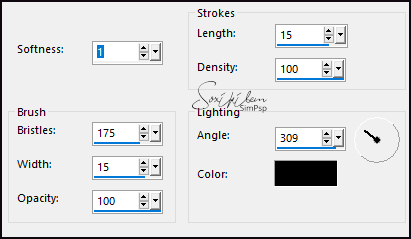
26 - Effects > Art Media Effects > Brush Strokes.
27 - Activate the Promoted Selection layer. Edit > Copy in the Landscape Misted. Edit > Paste a New Layer.
28 - Activate the Layer Raster 2. Effects > Image Effects > Seamless Tiling: Stutter Diagonal.
29 - Activate the TIRA layer. Layers > Arrange > Bring to Top. Objects > Align > Center in Canvas.
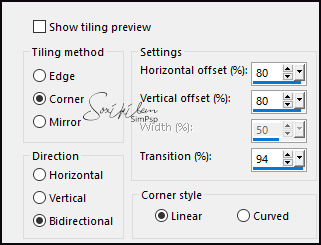
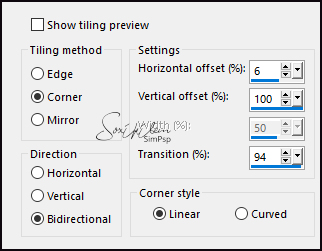
30 - Effects > Geometric Effects > Perspective Horizontal: 95, Transparent. Image > Mirror > Mirror Horizontal. Effects > Geometric Effects > Perspective Horizontal: 95, Transparent.
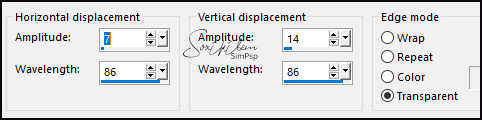
31 - Effects > Distortion Effects > Wave.
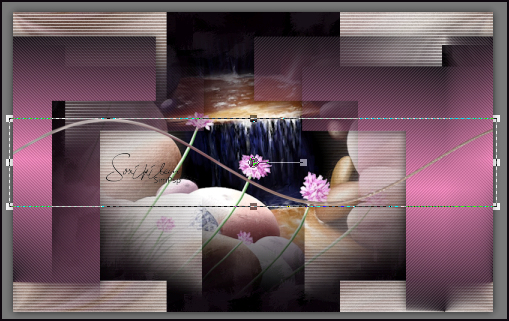
32 - With the pick tool, pull the sides to touch the edges of the work.
33 - Objects > Align > Top. Effects > 3D Effects > Drop Shadow: 0, 0, 80, 25.
34 - Layers > Duplicate. Image > Mirror > Mirror Vertical. Layers > Merge > Merge Down.
35 - Effects > Image Effects > Seamless Tiling: Side by Side.
36 - Image > Add Borders: 2px foreground color 2px background color 2px foreground color
37 - Selections > Select All. Edit > Copy.
38 - Image > Add Borders: 50px white color. Selections > Invert. Edit > Paste into Selection.
39 - Adjust > Blur > Gaussian Blur: 30.
40 - Plugin Graphics Plus > Cross Shadow: Default. Selections > Invert.
41 - Effects > 3D Effects > Drop Shadow: 0, 0, 80, 25. Selections > Select None.
42 - Edit > Copy in the Main Tube. Edit > Paste a New Layer. Position and apply Drop Shadow as you prefer.
43 - Image > Add Borders: 2px foreground color.
31 - If you wish, resize your work.Apply your watermark or signature. File > Export > Jpeg Optimizer.
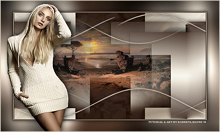
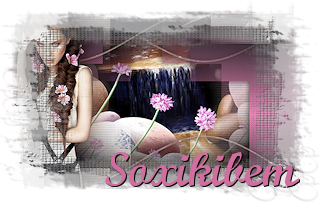
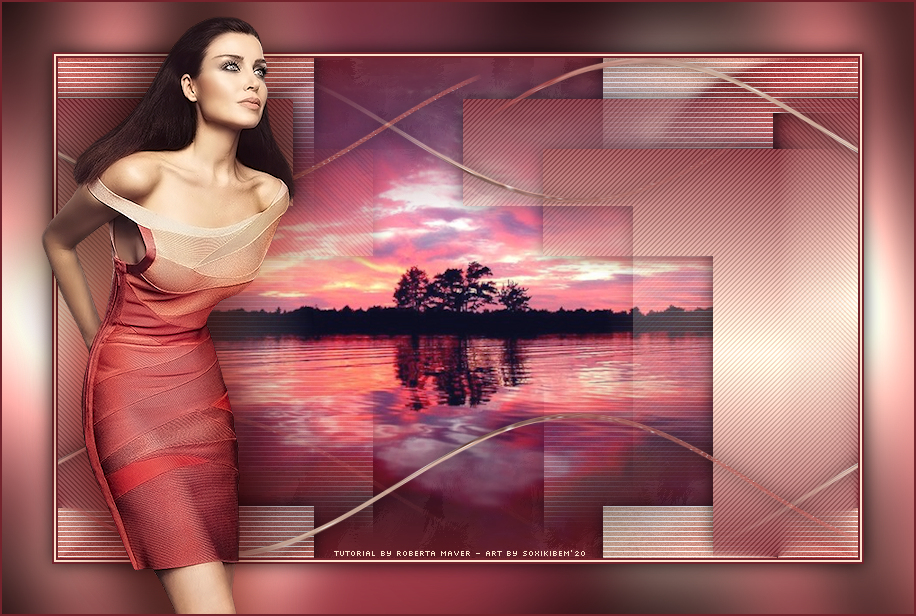
CREDITS: Tutorial by Roberta Maver - English Translation by Soxikibem Version 1: Main Tube by Maryse - Landscape by Lily - Mask by Narah Version 2: Main Tube and Landscape by Lily
Tutorial by Roberta Maver
Feel free to submit your versions. I'll be happy to post them on our site.
|