|
Tutorial By Roberta Maver English Translation by Soxikibem Original Tutorial
MATERIAL 1 Main tube of your choice 1 Landscape.jpg of your choice 1 Misted Landscape of your choice 1 Flower Tube Mask NarahMasks_1560
Pluguins Filters Unlimited 2.0 Plugin Galaxy
TUTORIAL 1 - Open the material on the PSP, duplicate and close the original.Choose two colors to work with. Here I used the colors: Foreground #535f65 Background #b68f28
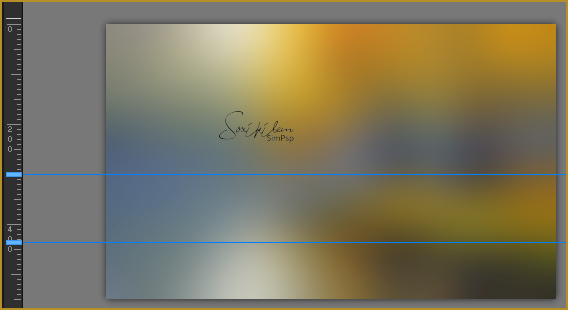
2 - Open a transparent 900 x550 px image. Selections > Select All.
3 - Edit> Copy on the Landscape.jpg. Edit > Paste Into Selections. Selections > Select None.
4 - Adjust > Blur > Gaussian Blur: 50.
5 - Place two guide lines horizontally, one at 300 and the other at measure 435.
With the Selection Tool, select between these lines. Selections > Promote Selection To Layer. Remove the guide lines. Selections > Select None.
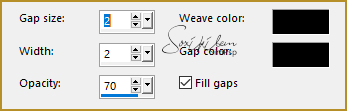
6 - Effects > Texture Effects > Weave. Weave and Gap color in Black.
7 - Filters Unlimited 2.0 > Toadies > Sucking Toad Bevel I: 44, 183, 201.
8 - Filters Unlimited 2.0 > Toadies > What Are You?... > Overdose 20.
9 - Effects > 3D Effects > Drop Shadow: 1, 1, 60, 20, black color.
10 - Layers > Duplicate.
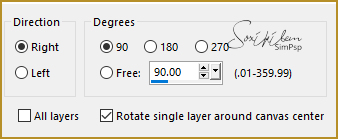
11 - Image > Free Rotate.
Layers > Merge > Merge Down.
12 - Layers > Duplicate.
13 - Image > Mirror > Mirror Vertical. Layers > Merge > Merge Down.
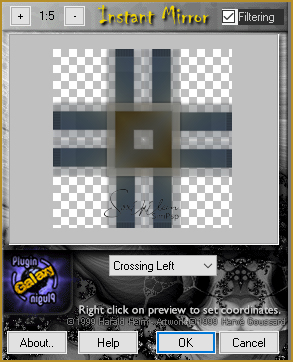
14 - Plugin Galaxy > Instant Mirror: Crossing Left.
15 - Activate Layer Raster 1.
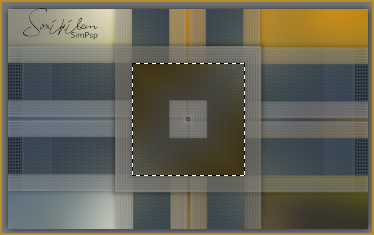
16 - With the Selection Tool, select as shown in the print below.
17 - Selections > Promote Selections to Layer. Layers > Arrange > Bring to Top.
18 - Layers > New Raster Layer. Edit> Copy in the landscape tube. Edit > Paste Into Selection.
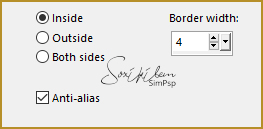
19 - Selections > Modify > Select Selection Borders.
20 - Paint with the color #FFFFF> White.
21 - Effects > 3D Effects > Inner Bevel.
22 - Selections > Select None. Effects > 3D Effects > Drop Shadow: 1, 1, 60, 20, black color. Layers > Merge > Merge Down.
23 - Layers > New Raster Layer. Paint this layer with the color # ffffff (white). Layers . New Mask Layer > From Image: NarahMask_1560. Layers > Merge > Merge Group. Image > Mirror > Mirror Horizontal. Layers > Properties: Blend Mode Overlay. Layers > Arrange > Move Down.
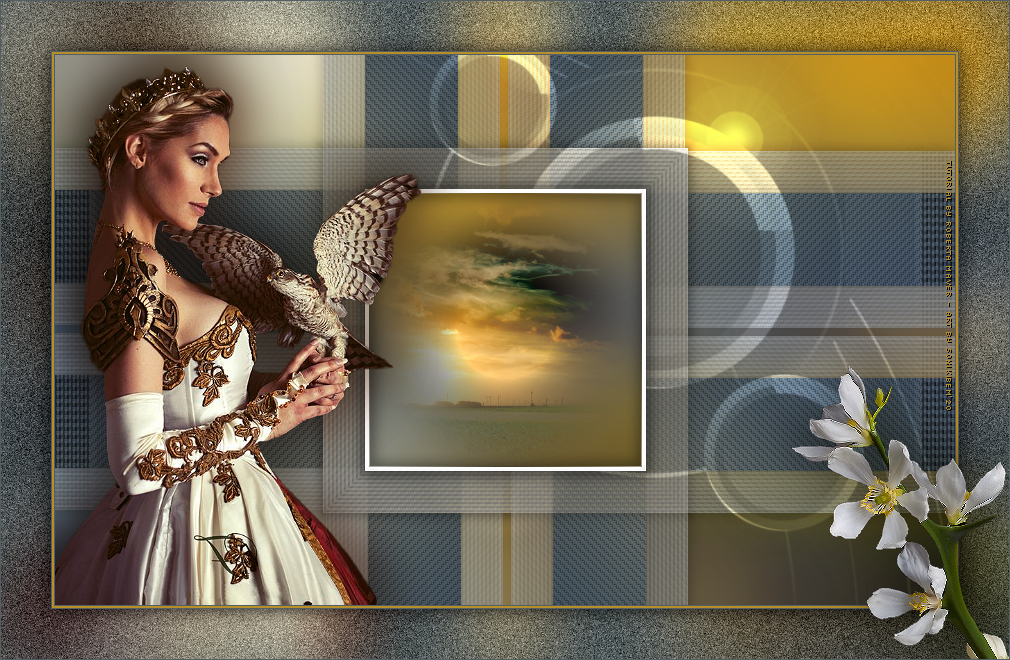
24 - Edit> Copy on the main Tube. Edit > Paste a New Layer. Position Left. Effects > 3D Effects > Drop Shadow as you prefer.
25 - Image > Add Borders: 1px foreground color 2px background color 1px foreground color Edit > Copy.
26 - Selections > Select All. Image > Add Borders: 50px with any color. Selections > Invert. Edit > Paste Into Selection.
27 - Adjust > Blur > Gaussian Blur:30.
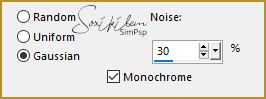
28 - Adjust > Add/Remove Noise > Add Noise.
Selections > Select None.
29 - Edit> Copy on Flower's Tube. Edit > Paste a New Layer. Position right. Effects > 3D Effects > Drop Shadow as you prefer.
30 - Image > Add Borders: 1px foreground color.
31 - If you wish, resize your work.Apply your watermark or signature. File > Export > Jpeg Optimizer.
CREDITS: Tutorial by Roberta Maver - English Translation by Soxikibem Main Tube, Flower Tube & Landscape by Nena Silva
Tutorial by Roberta Maver
Feel free to submit your versions. I'll be happy to post them on our site.
|