PLUGINS
Graphic Plus
Topaz Labs/adjust4 e detail2
Adjust/Variation
Alien Skin Eye Candy 5/Textures
Author's note
(difficulty level = challenge)
This tutorial becomes a little complicated
due to the materials, which will require some creativity to
the creation of new versions; the tip is to choose tubes IN
MOTION
to the main tube
Colors and blend modes, opacity etc will vary according to
the tubes they use for your version.
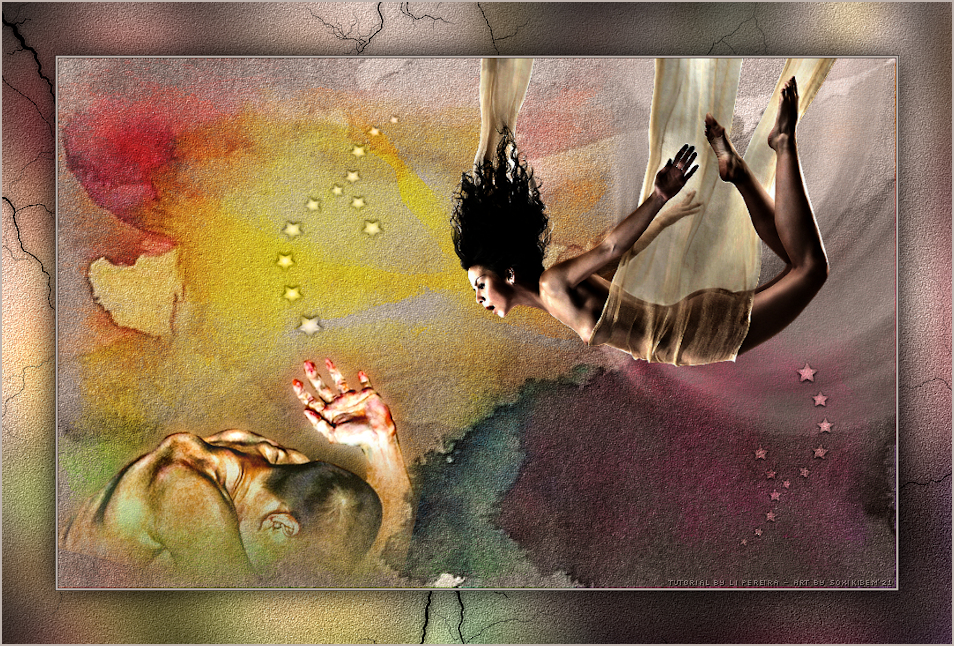
TUTORIAL
Colors used in the original tutorial:

Colors I used:

1. Open a new 950 x 600 layer
2. Open the fractal image, select everything and paste
the image in the selection
; colorize if necessary
obs:
(to color it, I open a new layer, paint it in a compatible
color
with the work and then I change the blend mode, in ways that
achieve an ideal color and visible merge)
3. adjust/add remove noise/ add noise
4. Plugin Graphic Plus/Emboss - default
5. Prepare a sunburst gradient with colors 1 and 2
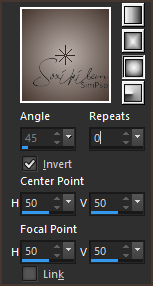
6. New layer and paint with the gradient
7. Apply the anna_li mask and merge group - change the blend
mode to color (L)
8. Open the corpo_li tube, copy and paste over the work;
resize 80%
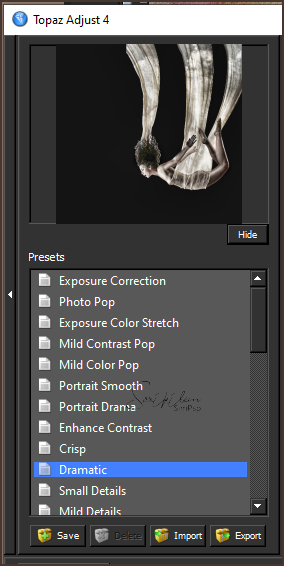
9. Apply topaze labs / adjust4 / dramatic as shown below
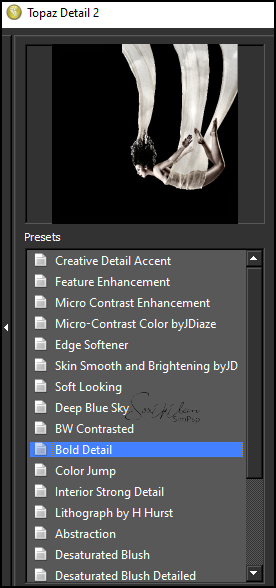
10. Apply topaze labs / detail2 / bold detail as printed
below
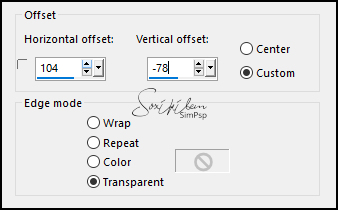
11. Effects / image effects / off set as in print (can be
modified depending on the chosen tube - should be
approximately
same as model)

12. With the "Warp brush" tool configured as in the print
below

give the girl's cape a ripple as you like;
13. Duplicate this layer and in the original, apply effects
/ image effects; off set as below; (may
be modified according to the location of your tube, creating
an effect close to the tutorial)
14. Adjust/blur/radial blur;
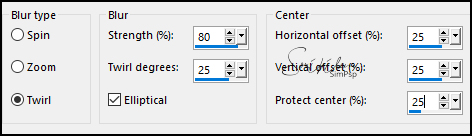
blend mode "luminance L" and change the opacity to 66%
15. Open the man_misted_li image, copy and paste over the
work; put on
lower left corner;
16. Plugin Ajust/variation/ORIGINAL/MORE YELOW/DARKER
17. Plugin Topaze labs/adjust4/dramatic (item 9)
18. Topaze Labs/detail2/bold detail (as in item 10)
19. Duplicate this layer and on the "ORIGINAL layer" apply
blur / radial blur as in the print
enhance more, change blend mode to "multiply" and reduce
opacity to 66%
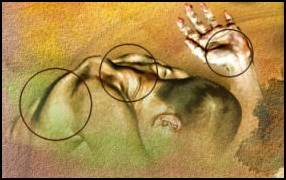
20. With the "lighten / Darken Brush" tool (L)
configured as in the print below,

give two clicks at the height of each circle as in the print
below
21. Open deco2_li, resize 80% and place it below
of the girl's feet, coloring if necessary;
22. Open the same deco again, resize 80%, mirror and flip
adjusting over the boy's hand, coloring or changing the
blend mode to taste.
Merge visible; edit copy and reserve to make the border;
Borders
Image > Add Borders:
1 px color 1
2 px color 2
1 px color 1
add 20 px white border, select with wand and paste the image
that is in the memory, in the selection
Plugin Graphic Plus/cross shadow default
Image > Add Borders:
1 px color 1
2 px color 2
1 px color 1
add a 60 px white border
select this border; copy the reserved image and paste in the
selection;
guassian blur 20;
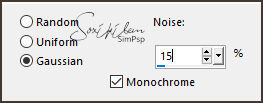
add remove noise / add noise: Gaussian, 15, monochrome
checked.
Graphic plus emboss plugin and then cross shadow;
new layer and apply Alien Skin
Eye Candy 5 / textures / marble - settings: fratured / black
and white
in the print settings below
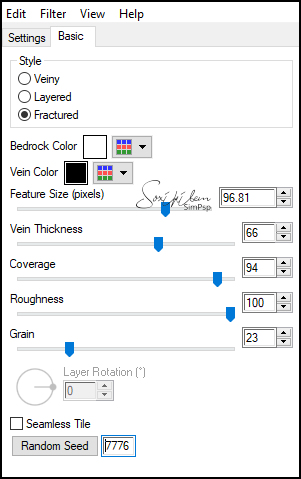
blend mode multiply - effects/edge effects/enhance
reverse the selection and apply drop shadow 0/0/100/50 -
select none
add 2px border color 2
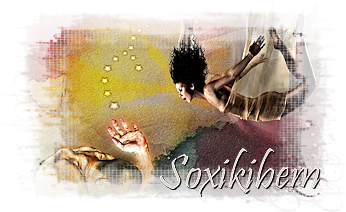
Apply my watermark and sign your work
Resize to 950px