|
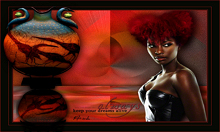
Tutorial By Li Pereira English Translation by Soxikibem Original Tutorial
MATERIAL 1 Main Tube of your choice 1 Misted Landscape 1 Decor of your choice Riet_Tekst always_489_ 240619
PLUGINS Adjust AP 01 Mehdi Mura's Meister Simple
Guidance for this tutorial by Li Pereira If you use other colors and other tubes, colorize and change the Blend Mode to your liking. Leave "ruller" enabled (in View).
TUTORIAL NOTE: The colors mentioned below are the original of the tutorial.
2. Choose two colors to work with. Foreground: #870218 Background: #a38e72
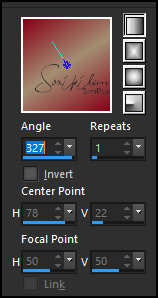
3. Prepare a Linear Gradient as shown below and paint the transparency.
3. Layers > New Raster layer. Selections > Select All. Edit > Copy in Misted champ_de_citrouilles_tubed_by_thafs. Edit > Paste Into Selection. Selections > Select None.
4. Effects > Image Effects > Seamles Tiles: Default.
5. Adjust > Blur > Guassian Blur: Radius 20. Layers > Merge > Merge Visible.
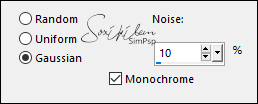
6. Adjust > Add/Remove Noise > Add Noise.
7. Plugin Graphics Plus > Emboss: Deafult.
8. Plugin Simple > Blintz.
9. Layers > New Raster Layer. Plugin Mehdi > Wavy Lab 1.1. Use the colors below: 1 - #b5a691 2 - #7c0312 3 - #e81c11 4 - #89565b
10. Layers > Properties: Blend Mode Saturation (L). Layers > Merge > Merge Visible.
11. Layers > Duplicate. Image > Mirror > Mirror Vertical. Layers > Properties: Blend Mode Lighten.
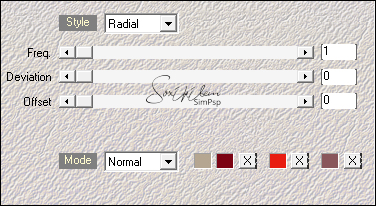
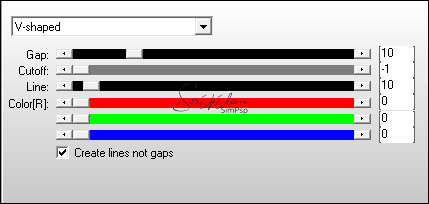
12. Plugin AP [Lines] > Lines SilverLining.
12. Layers > Merge > Merge Visible.
13. Layers > Duplicate. Plugin Mura's Meister > Pole Transform.
14. Layers > Properties: Blend Mode Luminance (L). Layers > Merge > Merge Visible.
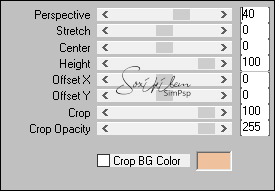
15. Layers > Duplicate. Plugin Mura's Meister > Perspective Tiling.
16. Activate the "raster deform" tool and pull it up and
down to the height of the 450 in the
17. Effects > 3D Effects > Drop Shadow: 0, 0, 80, 50, color #000000.
18. Activate the layer Merged. Plugin Adjust > Darken.
19. Activate the layer Copy of Merged. Edit > Copy in the main tube. Edit > Paste a New Layer. Position right. Duplicate this layer and on the "Original layer" apply Adjust > Blur > Guassian Blur: Radius 20. Layers > Properties: Blend Mode Multiply. Move this layer slightly to the right. Layers > Merge > Merge Visible.
19. Image > Resize: 90%, resize all layers checked.
Image > Add Borders:
20. Edit > Copy in nena-deco-5023. Edit > Paste a New Layer. Image > Resize: 80%, all layers unchecked. Arrange in the upper left, according to the model. Effects > 3D Effects > Drop shadow 0, 0, 80, 50 color #000000.
21. Layers > Duplicate. Image > Resize: 80%, All layers unchecked.
Image > Mirror > Mirror Vertical and Layers > Properties: Blend Mode Multiply.
22. Edit > copy in Riet_Tekst always_489_ 240619. Edit > Paste a New Layer, colorize if necessary. Image > Resize: 80% all layers unchecked, Twice. Position as in the model.
23. Plugin Adjust > Darken optional.
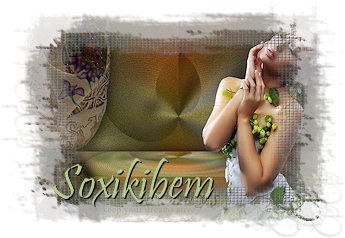
24. Apply your watermark or signature. Apply the watermark of the tutorial author. File > Export > Jpeg Optimizer.
Credits Main tube, Tube Vase and Misted Landscape by Nena Silva
Tutorial by Li Pereira
Feel free to send your versions. I will be happy to publish them on our website.
|