|
Tutorial By Li Pereira English Translation by Soxikibem Original Tutorial
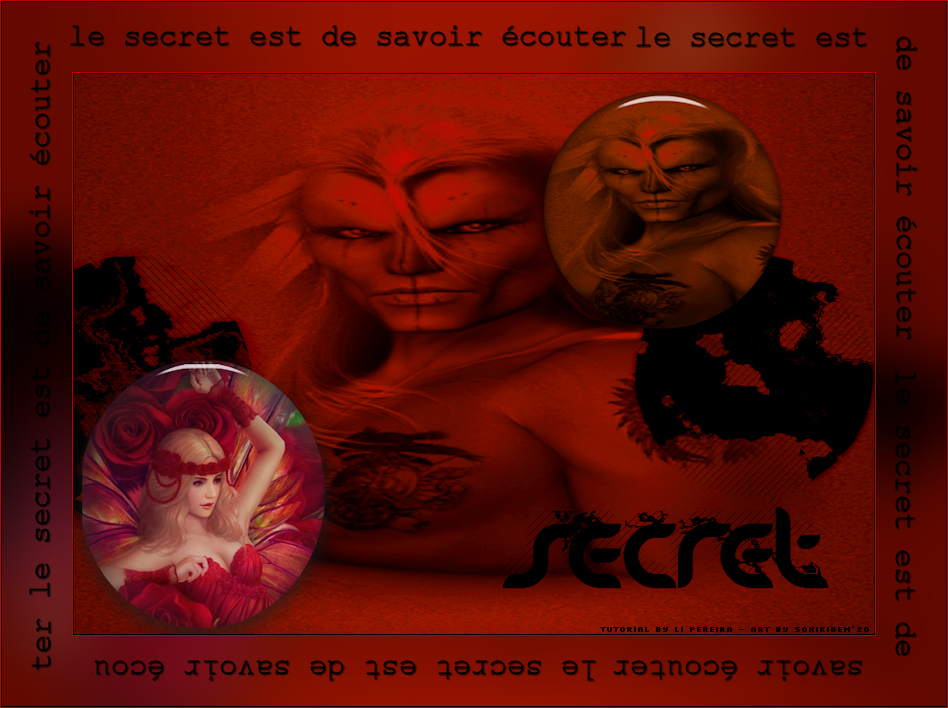
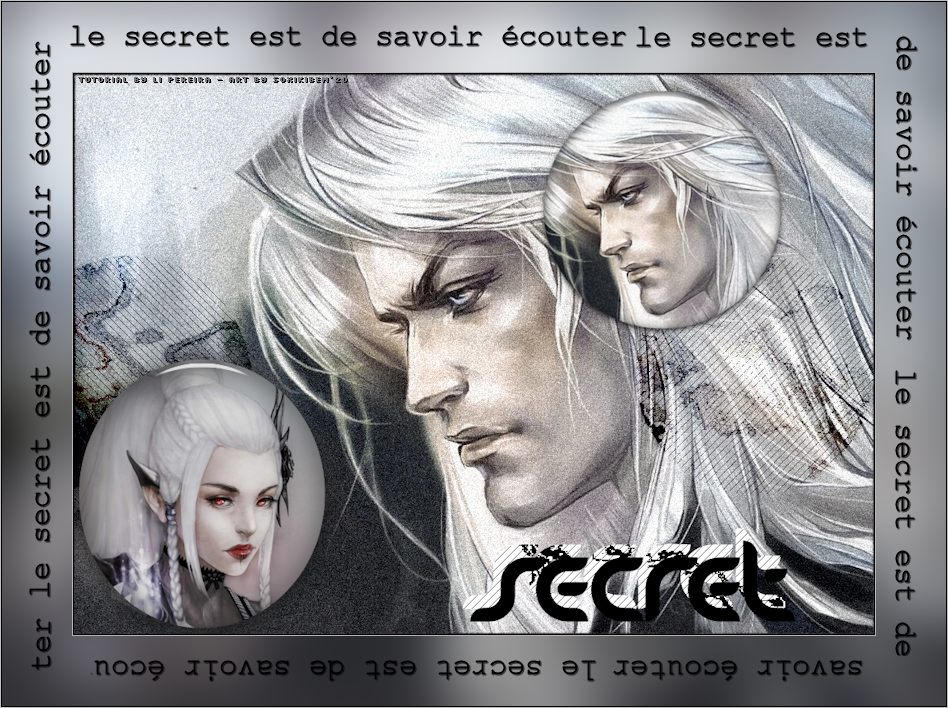
MATERIAL 1 Facial image of a man of your choice 1 Facial image of woman of your choice circle_li.PspSelection circle_li1.PspSelection deco1 glass1.f1s glass2.f1s text_secret
PLUGINS Alien Skin Eye Candy 5 Impact Andrews Filters 11 Unlimited 2.0
Guidance for this tutorial by Li Pereira
The challenge of this tutorial is to create color and
texture effects. So you must work on the image of the man of
your choice with add / remove noise or other smooth texture.
To create an interesting color effect, I used the Andrews
Filters 11 / glowing 1 plugin, but it is optional. You can
create other color effects on the image at your leisure. The
goal is to challenge the creativity of each one. In addition,
the tutorial is very simple to do.
TUTORIAL Selections > Select All. Edit > Copy in the image of man. Edit > Paste Into Selection. Selections > Select None.
2. Plugin Andrews Filters 11 > Glowing 1.
3. Layers > Duplicate. Image > Resize: 80%, all layers unchecked.
4. Selections > Load/Save Selections > Load Selection From Disk: circle li. Use the move tool to move and position the face within the selection. Selections > Invert. Press the delete key on the keyboard. Selections > Select None.
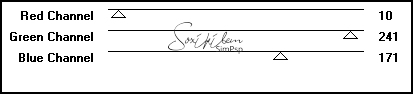
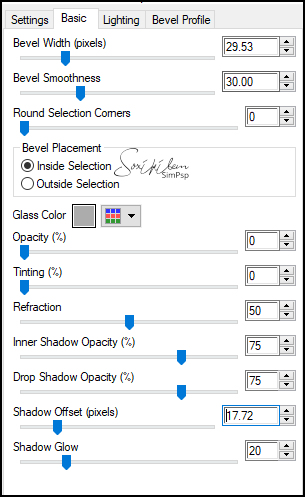
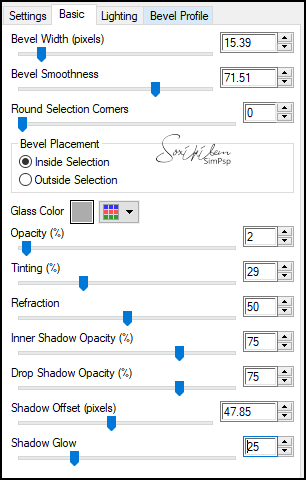
5. Plugin Alien Skin Eye Candy Impact > glass 1 (attached or as below).
Image > Resize: 80% twice.
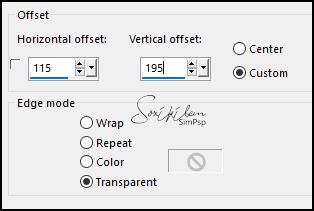
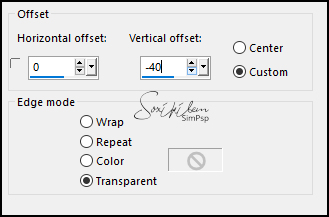
6. Effects > Image Effects > Offset.
7. Layers > Duplicate. Activate the Copy of Raster 1 layer. Plugin Unlimited Background Designers IV > Randon Smelter. Layers > Properties: Blend Mode Burn.
8. Effects > Image Effects > Offset.
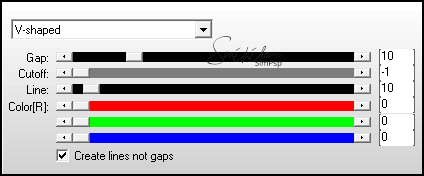
9. Plugin AP [Lines] > SilverLining.
10. Activate the Copy (2) of Raster 1 layer Selections > Load/Save Selections > Load Selection From Disk: circle_li1. Edit > Copy in the image of the woman. Edit > Paste a New Layer. With the Move tool, arrange the way you prefer. Selections > Invert. Press the delete key on the keyboard. Selections > Select None. Plugin Alien Skin Eye Candy Impact > glass 2 (attached or as below) Twice.
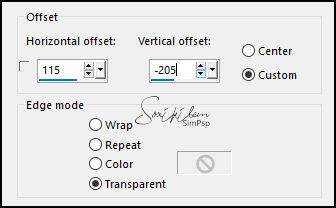
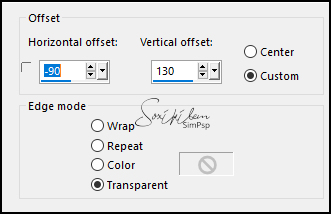
11. Effects > Image Effects > Offset.
12. Layers > Duplicate. Activate Layer Raster 2. Plugin Unlimited Background Designers IV > Ranadon Smelter. Layers > Properties: Blend Mode Burn.
13. Plugin AP [Lines] > SilverLining.
14. Effects > Image Effects > Offset.
With the help of the eraser tool, erase the lines that are on the man's face.
15.Activate Layer Copy of Raster 2. Effects > 3D Effects > Drop Shadow: 0, 0, 10, 40, black color.
16. Edit > Copy in the text_secret. Edit > Paste a New Layer. Position according to model. Layers > Properties: Blend Mode Burn. Layers > Merge > Merge Visible. Image > Resize: 80%, All layers checked. Edit > Copy.
Image > Add Borders: add borders 1 px #000000 add borders 1 px #c00000 add borders 70px #000000 Selections > Select All. Selections > Modify > Contract: 70. Selections > Invert. Edit > Paste Into Selection.
Adjust > Blur > Guassian Blur: 30. Effects > 3D Effects > Drop Shadow: 0, 0, 10, 40, black color. Selections > Select None. Edit > Copy in the deco 1. Edit > Paste a New Layer. Image > Add Borders: 1 px #000000 Image > Add Borders: 1 px #c00000
17. Apply your watermark or signature. Apply the watermark of the tutorial author. File > Export > Jpeg Optimizer.
Credits Imagens Here - Remaining material provided by Li Pereira
Tutorial by Li Pereira
Feel free to send your versions. I will be happy to publish them on our website.
|