|
|
|
|
|
English Translation by Soxikibem
Original Tutorial
Material
Main Tube
Misted Landscape
WordArt
 Plugins
FM Tile Tools >
Blend Emboss
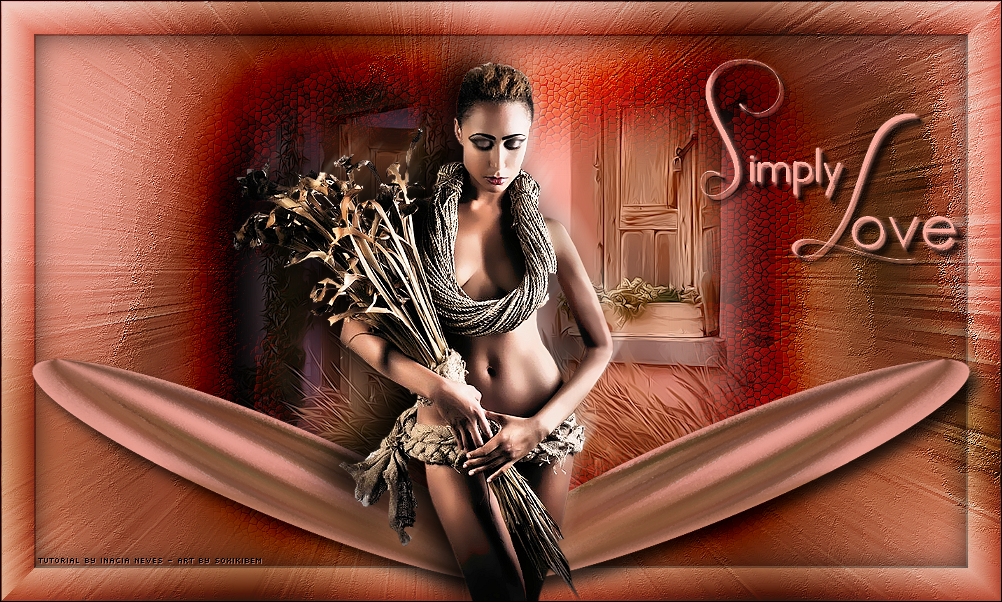
VM Natural >
Splash
ICNet Software >
Unlimited 2.0
TUTORIAL 1- Open a
1000x600px transparency.
2 - Activate
the Misted Landscape.
Edit >
Copy.
Pick up 2 colors
from the Landscape tube.
Here I used:
Foreground:
#faab9d
Background:#724531
Form a Gradient
Style Linear > Angle 45 > Repeats 5.
3 - Paint
transparency.
Selections >
Select All.
Edit > Paste Into
Selection.
Selections> Select None.
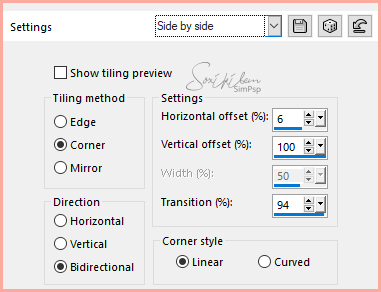
Effects > Image
Effects > Seamless Tiling > Side by Side.
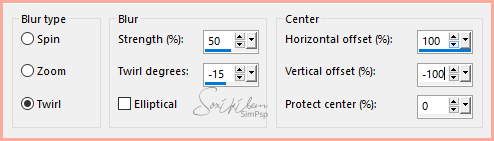
 4 - Adjust >
Blur > Radial Blur.
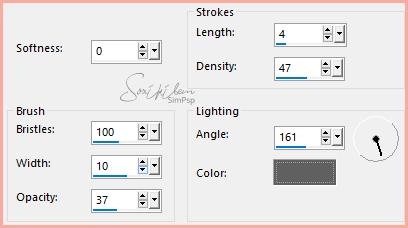
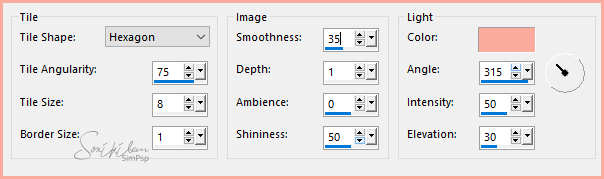
 5 - Effects > Art
Media Effects > Brush Strokes.
 6 - Effects > Plugin
> FM Tile Tools > Blend Emboss: Default.
7
- Layers >
Duplicate.
With the Copy layer enabled,
apply Effects> Geometric Effects> Circle: Transparent.
Image > Resize: 50%.
Effects >
Geometric Effects > Skew.
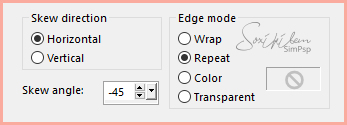 Edit > Repeat Skew.
Image > Resize: 75%
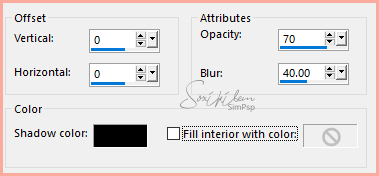
8
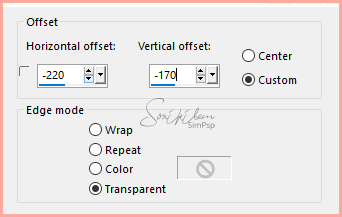
- Effects >
Image Effects > Offset.
 Layers > Duplicate.
Image >
Mirror > Mirror Horizontal.
Layers > Merge
> Merge
Down.
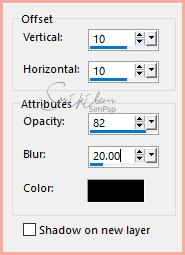
Effects > 3D > Drop Shadow.
 9 -
Enable Raster 1.
Layers > Duplicate.
In this duplicate
layer, apply the effects below:
Plugin
VM Natural > Splash.
 Plugin
> FM Tile Tools > Blend Emboss: Default.
Change Blend Mode to
Soft Light.
Plugin > ICNet
Software > Unlimited 2.0 > Buttons & Frames > 3D
Glass Frame 2.
 10 -
Layers > New Raster Layer..
Selections >
Select All.
Selections >
Modify > Contract > 33.
Effects > 3D
Effects > Cutout.
Selections >
None
11 -
Enable Misted Landscape.
Edit >
Copy.
Activate
the image being worked: Edit> Past> As New
Layer.
Effects > Texture
Effects > Tiles.
In Color, use
the light color in use.
Effects > Plugin
> FM Tile Tools > Saturation Emboss: Default.
*If
you wish, you can change the Blend Mode
of this layer. I used Blend Mode Burn to
get more depth.
12 -
Reapply Edit> Paste> as New Layer to
paste Landscape tube.
Image > Resize
> 80%
Adjust > Sharpness
> Sharpen
13 -
Enable top layer.
Edit > Copy
in the Main Tube.
Edit >
Paste a New Layer.
Apply
the effects you want on the tube or just
a Drop Shadow to your liking.
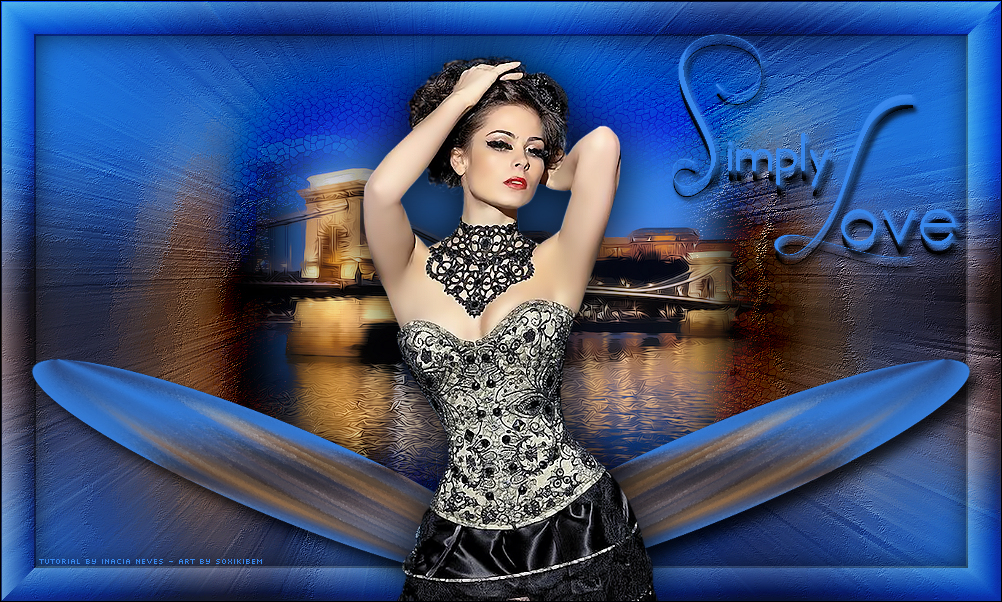
14 -
Decorate with
a wordart;
15 -
Sign your
work.
16 -
Image > Add Borders: 1 px,
back color.
17 -
Save in jpeg
 Créditos
Tutorial
by Inácia Neves
Version 1 &
2: Tube by Isa - Misted Landscape
by NenaSilva
WordArt:
Kahlan
|