|
Tutorial By Emilieta English Translation by Soxikibem Original Tutorial
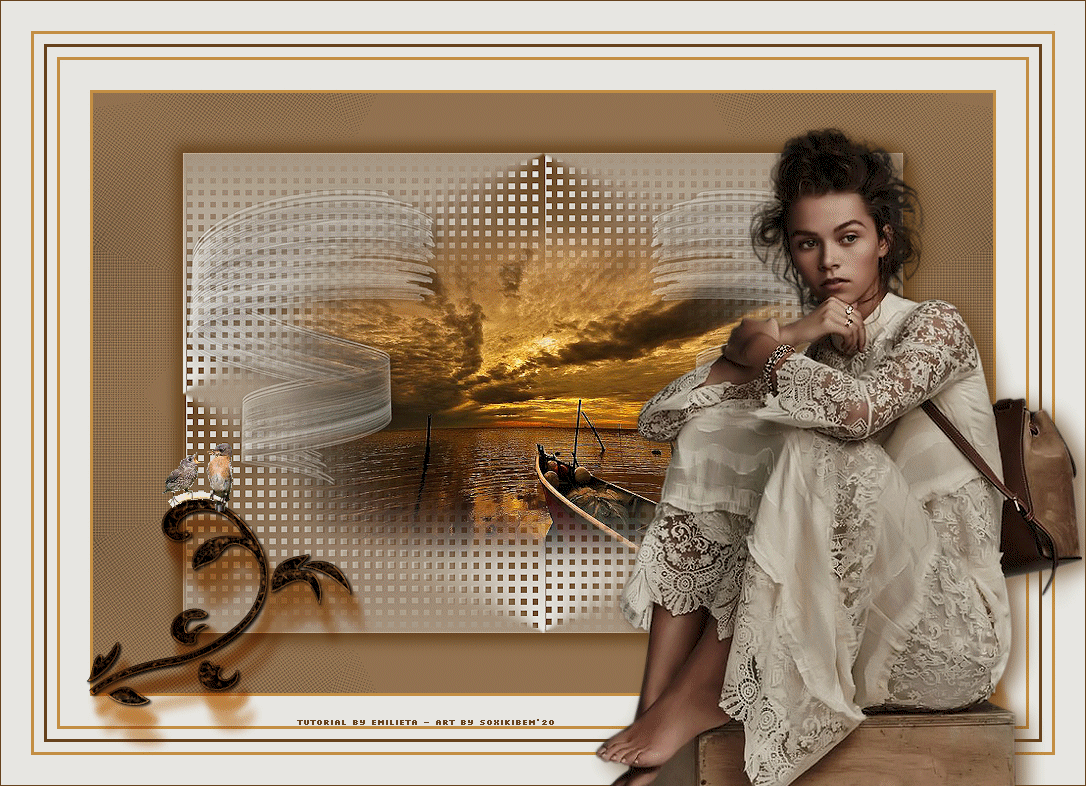
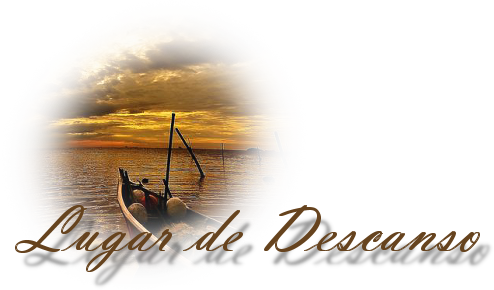
MATERIAL 1 Main tube of your choice 1 Landscape.jpg of your choice Adorno Floral Animación2.gif-Gorriones Mascara-Lia-911
Pluguins AP 01 Innovations Funhouse
TUTORIAL 1 - Open a 900x600px transparency.Choose three colors to work:
Color 1 - #e7e6e2 foreground Color 2 - #66431e background Color 3 - #c38e41
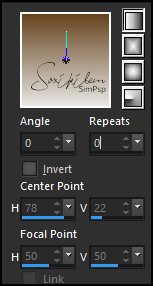
2 - Paint the transparency with a Linear gradient, Angle 0, Repeat 0.
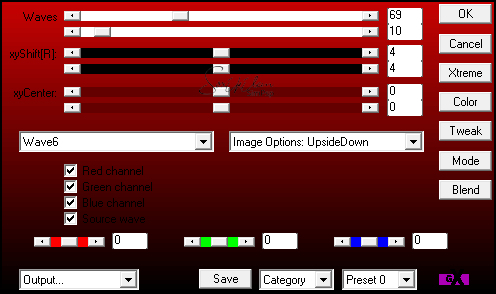
3 - Plugin AP 01 Innovation > Distort WavyCity.
Edit > Repeat Distort - WavyCity.
4 - Effects > Image Effects > Seamless Tiling: Default.
5 - Edit > Copy in Misted Landscape. Edit > Paste a New Layer. Adjust > Sharpness > Sharpen.
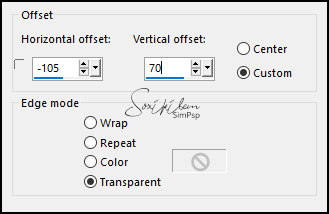
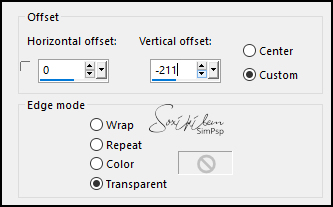
6 - Layers > new Raster Layer. Paint this layer with color 1 - foreground. Layers > New Mask Layer > From Image: Mascara-Lia-911. Layers > merge > Merge Group. Image > Resize: 80%, all layers unchecked. Effects > Image Effects > Offset.
7 - Layers > Duplicate. Image > Mirror > Mirror Horizontal. Layers > Merge > Merge Down. Layers > Properties: Opacity 75%. Effects > 3D Effects > Drop Shadow: 5, 5, 80, 30, black color.
8 - Layers > Merge > Merge Visibile.
9 - Image > Resize: 80%, all layers unchecked. Adjust > Sharpness > Sharpen.
10 - New Raster Layer. Paint with the Gradient. Image > Mirror > Mirror Vertical. Layers > Arrange > Move Down.
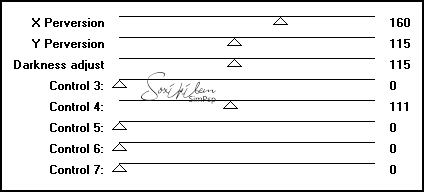
11 - Plugin Funhouse > Perverse.
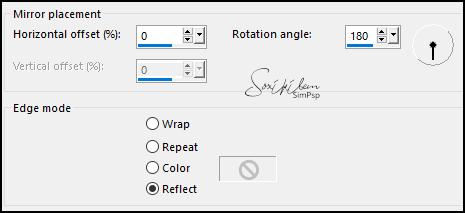
12 - Effects > Reflection Effects > Rotating Mirror.
13 - Effects > Edge Effects > Enhance. Effects > Edge Effects > Enhance More.
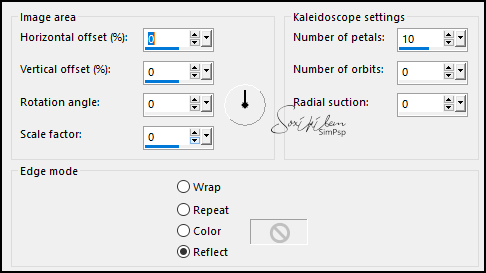
14 - Effects > Reflection Effects > Kaleidoscope.
15 - Activate the layer Merged. Effects > 3E Effects > Drop Shadow: 8, 8, 100, 20, with the dark color. Effects > 3E Effects > Drop Shadow: -8, -8, 100, 20, with the dark color.
16 - Image > Add Borders: 3px color 3 30px color 1 3px color 3 10px color 1 3px color 2 10px color 1 3px color 3 30px color 1 1px color 2
17 - Edit > Copy in Adorno Floral. Edit > Paste a New Layer. Layers > Duplicate. Layers > Properties: Blend Mode Multiply, Opacity 70%.
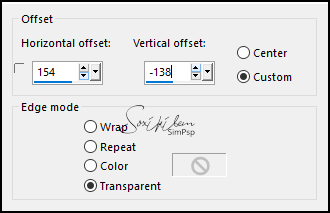
18 - Layers > Merge > Merge Down. Effects > 3D Effects > Drop Shadow: 19, 7, 65, 10, color 2. Edit > Repeat Drop Shadow. Layers > Properties: Blend Mode Hard Light. Effects > Image Effects > Offset.
19 - Edit> Copy in the Main Tube. Edit > Paste a New Layer. Effects > Image Effects > Offset.
Adjust > Sharpness > Sharpen.
20 - Effects > 3D Effects > Drop Shadow: 5, 10, 80, 30, color 2.
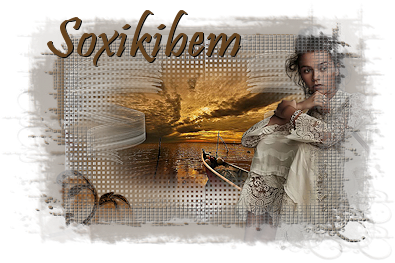
21 - Sign or apply your watermark.Layers > Merge > Merge All. File > Export > Jpeg Optimizer.
ANIMATION SHOP (Optional)
22 - Open Animación2.gif-Gorriones in the Animation Shop. Edit > Select All. Edit > Copy.
23 - Open your image in the Animation Shop. Edit > Dupliate Select until you have 9 frames of your work. Edit > Select All.
24 - Edit > Paste > Into Select Frame. Position as you wish.
25 - Animation > Frame Properties: 50 in display. Save your animation.
CREDITS: Main Tube & Misted Landscape by L&B Tubes - Remaining material provided by Emilieta
Tutorial by Emilieta
Feel free to submit your versions. I'll be happy to post them on our site.
|