|
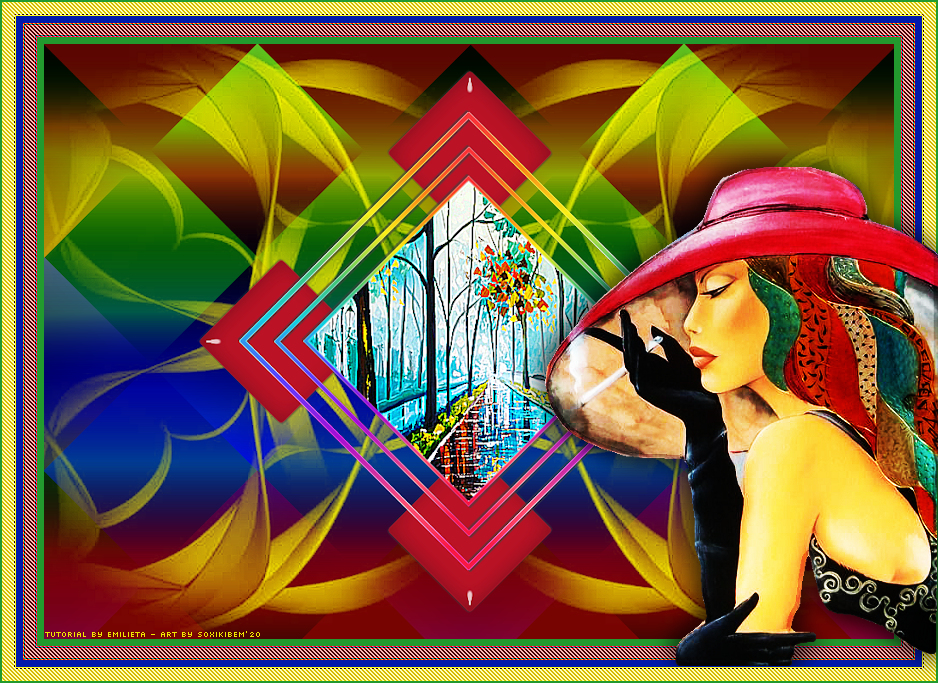
Tutorial By Emilieta English Translation by Soxikibem Original Tutorial
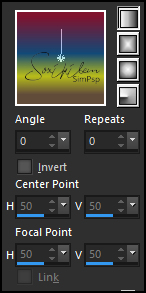
MATERIAL 1 Main tube of your choice 1 Landscape of your choice Canal_Alfa_ Cristal Lia-850 Gradients: revchak, SirenaMala-Xmax8
Pluguins Eye Candy 5 Mehdi Penta.com
TUTORIAL 1 - Open the Canal_Alfa_ Cristal.Duplicate (Shift + D) and close the original. Rename the Trama 1 Layer to Raster 1.
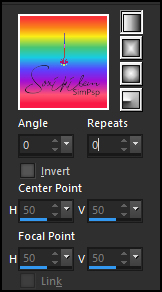
2 - Paint the alpha with the gradient revchak.
Effects > Edge Effects > Enhance.
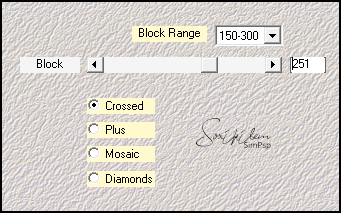
3 - Plugin Mehdi > Sortin Tiles.
4 - Layers > New Raster Layer. Paint the alpha with the gradient SirenaMala-Xmax8.
5 - Layers > Properties: Blend Mode Difference, Opacity 75%. Effects > Edge Effects > enhance.
6 - Layers > Merge > merge Visible.
7 - Layers > Duplicate. Layers > Properties: Blend Mode Multiply.
8 - Selections > Load/Save Selections > Load Selection From Alpha Channel: Selection 1. Layers > New Raster Layer.
9 - Paint this selection with the revchak gradient.
10 - Selection > Modify > Contract: 7. Press the Delete key on the keyboard. Selections > Select None.
11 - Effects > Edge Effects > Enhance.
12 - Layers > Duplicate. Image > Resize: 85%, all layers unchecked.
13 - Layers > Duplicate. Image > Resize: 85%, all layers unchecked.
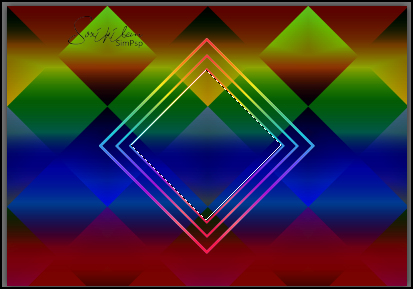
14 - With the Magic Wand tool select the center of the last square.
15 - Selections > Modify > Expand: 1px. Layers > New Raster Layer.
16 - Layers > Copy on the Landscape. Edit > Paste Into Selection. Adjust > Sharpness > Sharpen More. Layers > Arrange > Move Down.
17 - Adjust > Sharpness > Sharpen More. Adjust > Sharpness > Sharpen More. Selections > Select None.
18 - Activate Layer Copy (2) of Raster 1. Layers > Merge > Merge Down - 3 Times.
19 - Choose a color that you like and put it in the background. I used color #ca1a33.
20 - Selections > Load/Save Selections > Load Selection From Alpha Channel: Selection 2. Layers > New Raster Layer.
21 - Paint with the color you chose. Selecions > Select None.
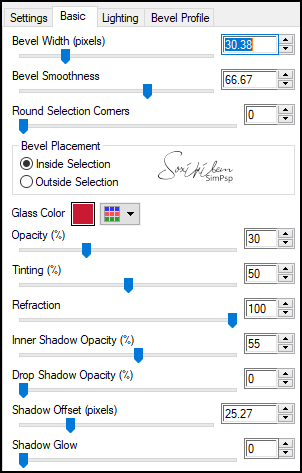
22 - Plugin Eye Candy 5 > Impact > Glass. In Settings choose Clear.
23 - Adjust > Sharpness > Sharpen.
24 - Effects > 3D Effects > Drop shadow: 1, 1, 60, 1, color #404040. Effects > 3D Effects > Drop shadow: -1, -1, 60, 1, color #404040.
25 - Layers > Duplicate. Image > Mirror > Mirror Vertical. Layers > Merge > Merge Down.
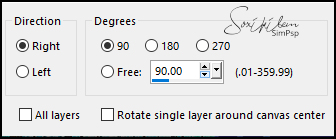
26 - Layers > Duplicate. Image > Free Rotate.
27 - Layers > Merge > Merge Down.
28 - Layers > Arrange > Move Down. Activate the Raster1 layer.
29 - Effects > 3D Effects > Drop Shadow: 2, 2, 60, 1, color #404040. Effects > 3D Effects > Drop Shadow: -2, -2, 60, 1, color #404040.
30 - ayers > Merge > Merge Down.
31 - Layers > New Raster Layer. Paint with the color # f1e800 (Yellow).
32 - Layers > New Mask Layer > From Image: Lia-850. Layers > Merge > Merge Group. Effects > Edge Effects > Enhance.
33 - Layers > Duplicate. Image > Mirror > Mirror Horizontal. Layers > Merge > Merge Down.
34 - Layers > Arrange > Move Down.
35 - Layers > Merge > Merge Visible.
36 - Image > Resize: 85%, Resize all layers checked.
37 - Image > Add Borders: 7px, color #239a2d Image > Add Borders: 14px, color #c00000 Image > Add Borders: 7px, color #0119ab Image > Add Borders: 14px, color #f1e800 Image > Add Borders: 2px, color #239a2d
38 - With the Magic Wand tool select the Red and yellow borders
39 - Effects > Edge effects > Enhance More: 2 Times.
40 - Plugin Penta.com > Jeans: Default. Effects > Edge effects > Enhance. Selections > Select None.
41 - Sign your work.
42 - Edit > Copy in the Main Tube. Edit Paste a New Layer. Image > Resize: 85%, all layers unchecked. Image > Mirror > Mirror Horizontal.
43 - Layers > Duplicate. Layers > Properties: Blend Mode Hard Light. Layers > Merge > Merge Down.
44 - Position it to the right and above the yellow border.
45 - Effects > 3D Effects > Drop Shadow: 7, 7, 60, 30, black color. Effects > 3D Effects > Drop Shadow: -7, -7, 60, 30, black color. Layers > Merge > Merge Visible.
46 - File > Export > Jpeg Optimizer.
CREDITS: Main Tube by Angel Star -Remainder of material provided by Emilieta
Tutorial by Emilieta
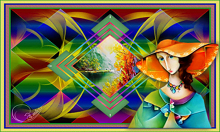
Feel free to submit your versions. I'll be happy to post them on our site.
|
