|
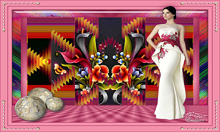
Tutorial By Emilieta English Translation by Soxikibem Original Tutorial
MATERIAL Floralia_ canal_Alfa 1 Main Tube of your choice Adorno bolas Adorno marco Floral
Pluguins Eye Candy 5 Flaming Pear Mura's Meister Unlimited 2.0
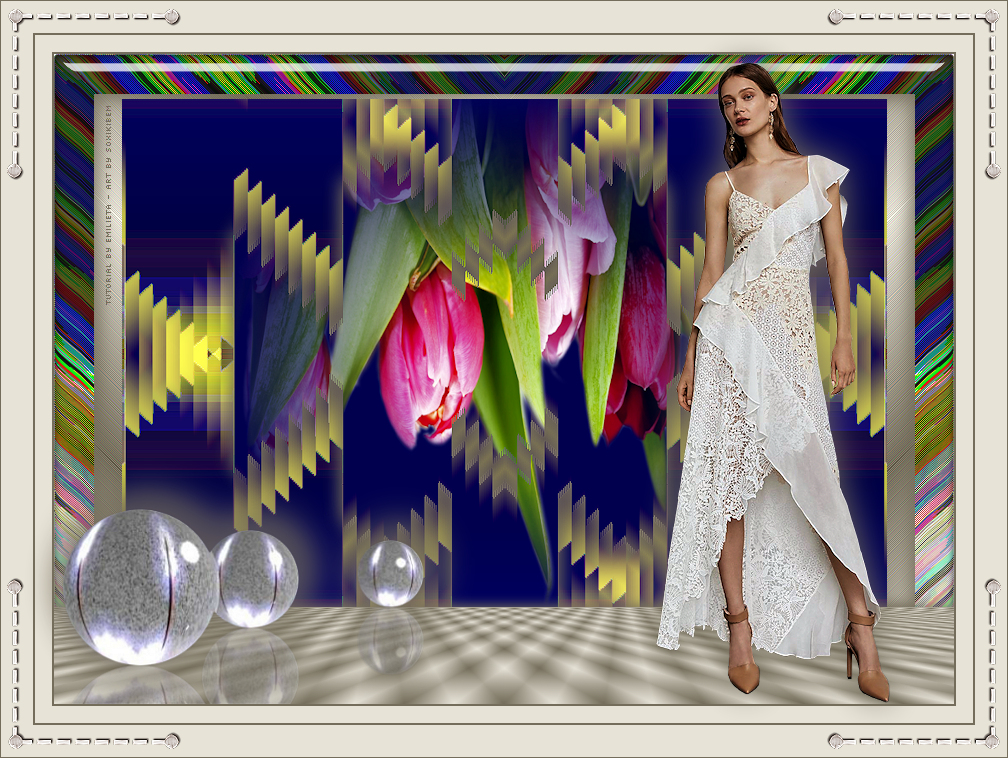
TUTORIAL 1 - Open the Floralia_ canal_Alfa.Duplicate (Shift + D) and close the original. Rename the Trama 1 Layer to Raster 1.
2 - Choose two colors to work. Foreground: #e7e3d7 Background: #746d5b
3 - Paint the alpha with a Linear gradient.
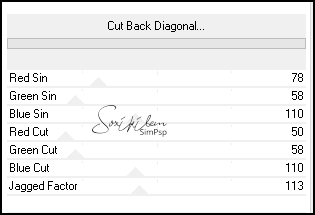
4 - Filters Unlimited 2.0 > AB-09 > Cut Back Diagonal.
5 - Image > Mirror > Mirror Horizontal.
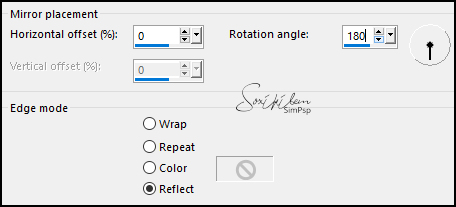
6 - Effects > Reflection Effects > Rotating Mirror.
7 - Selections > Load/Save Selections > Load Selection From Alpha Channel: floralia-1.
8 - Layers > New Raster Layer. Color all the yellow areas with the background color.
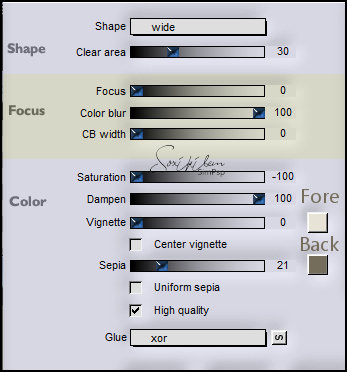
9 - Plugin Flaming Pear > Melancholintron.
10 - Effects > Edge Effects > Enhance. Selections > Select None. Layers > Merge > Merge Visible.
11 - Layers > Duplicate. Image > Mirror > Mirror Vertical. Layers > Properties: Opacity 50%.
12 - Layers > Merge > Merge Visible.
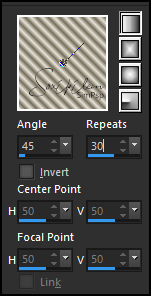
13 - Effects > Reflection Effects > Rotating Mirror.
14 - Layers > Duplicate. Layers > Properties: Blend Mode Screen.
15 - Selections > Load/Save Selections > Load Selection From Alpha Channel: floralia-2.
16 - Layers > New Raster Layer. Edit> Copy on Flores tube. Edit > Paste Into Selection.
17 - Effects > 3D Effects > Drop Shadow: 5, 5, 80, 30, background color. Effects > 3D Effects > Drop Shadow: -5, -5, 80, 30, background color. Selections > Select None.
18 - Adjust > Sharpness > Shapen. Layers > Merge > Merge Visible.
19 - Image > Resize: 85%, all layers unchecked.
20 - Set the gradient as the print.
21 - Layers > New Raster Layer. Paint with the gradient.
22 - Effects > Edge Effects > Enhance More. Edit > Repeat Enhance Edges More. Layers > Arrange > Move Down.
23 - Selections > Select All. Selections > Modify > Contract: 40px.
24 - Selections > Invert.
25 - Plugin Flaming Pear > Melancholintro.
23 - Effects > 3D Effects > Drop Shadow: 5, 5, 80, 30, background color. Effects > 3D Effects > Drop Shadow: -5, -5, 80, 30, background color. Selections > Select None.
24 - Effects > Reflection Effects > Rotaing Mirror.
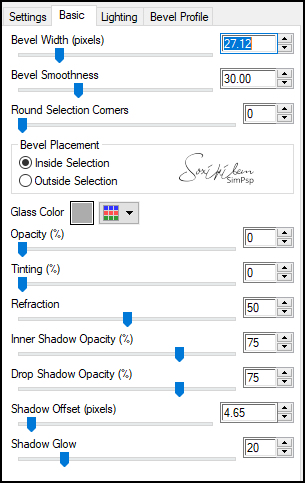
25 - Plugin Eye Candy 5 > Impact > Glass. In Settings choose Clear.
26 - Layers > Merge > Merge Visibile.
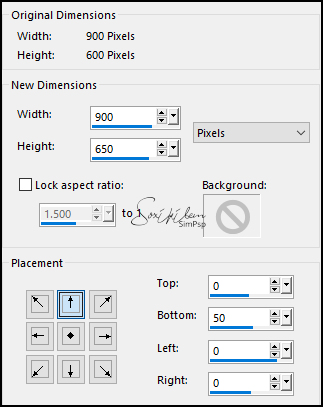
27 - Image > Canvas Size.
28 - Layers > New Raster Layer. Paint this layer with a gradient as below.
29 - Layers > Duplicate. Image . Mirror > Mirror Horizontal. Layers > Properties: Opacity 50%. Layers > Merge > Merge Down.
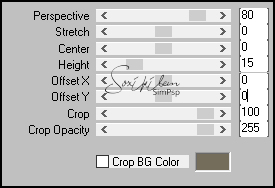
30 - Plugin Mura's Meister > Perspective Tiling.
31 - Effects > 3D Effects > Drop Shadow: -3, 0, 80, 15, bakground color.
32 - Image > Add Borders: 2px background color 17px foreground color 2px background color 32px foreground color 1px background color
33 - Edit > Copy on the Main Tube. Edit > Paste a New Layer.
34 - Image > Resize: 80% (It will depend on the size of your tube)
35 - Effects > Image Effects > Offset: Horizontal 270, Vertical 18, Transparent.
36 - Effects > 3D Effects > Drop Shadow: 0, 0, 100, 50, background color.
37 - Edit > Copy on Adorno bolas. Edit > Paste a New Layer. Effects > Image Effects > Offset: Horizontal -320, Vertical -226, Transparent.
38 - Edit > Copy on Adorno marco. Edit > Paste a New Layer.
39 - Sign your work.
40 - Layers . Merge > Merge All.
41 - File > Export > Jpeg Optimizer.
CREDITS: Main Tube by Nena Silva- Flower by Nikita -Remainder of material provided by Emilieta
Tutorial by Emilieta
Feel free to submit your versions. I'll be happy to post them on our site.
|