|
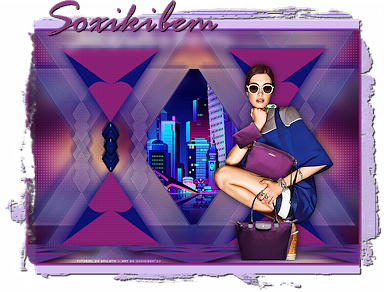
Tutorial By Emilieta English Translation by Soxikibem Original Tutorial
MATERIAL Arena-Seleccion_alfa 1 Main Tube of your choice Lia-beig.pspframe paisaje urbano Rombos cristal.png-arena 3
* Save the Lia-beige.pspframe in the PSP Picutre Frames folder.
Pluguins AP [Lines] I-Decay Mura's Meister Toadies Unlimited 2.0
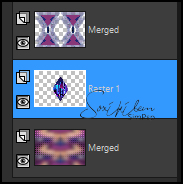
TUTORIAL 1 - Open the Arena-Seleccion_alfa.Duplicate (Shift + D) and close the original. Rename the Trama 1 Layer to Raster 1.
2 - Selections > Select All. Edit > Copy in the Main Tube. Edit > Paste Into selection. Selections > Select None.
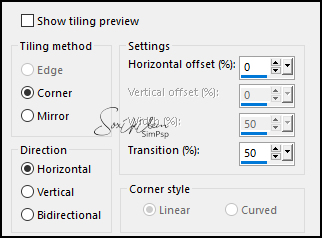
3 - Effects > Image Effects > Seamless Tiling: Default. Adjust > Blur > Gaussian Blu: 35.
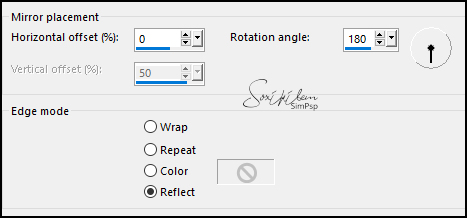
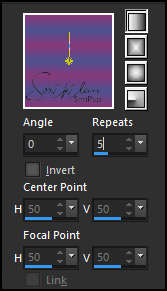
4 - Effects > Reflection Effects > Rotating Mirror,
5 - Layers > New Raster Layer. Choose two colors to work with. Foreground: #222975 Background: #883979
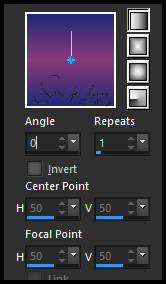
6 - Paint this layer with a linear gradient formed by the chosen colors.
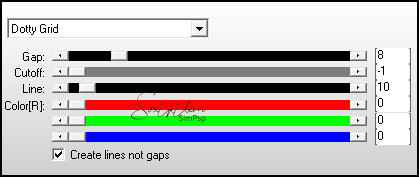
7 - Plugin AP [Lines] > Lines - SilverLining.
8 - Effects > Edge Effects > Enhance. Layers > Arrange > Send to Bottom.
9 - Layers > Merge > Merge Visible. Effects > Image Effects > Seamless Tiling.
10 - Selections > Load/Save Selection > Load Selection From Alpha Channel: Arena selection 1. Layers > New Raster Layer. Paint with the foreground color.
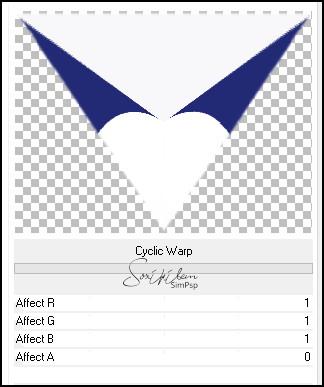
11 - Filters Unlimited 2.0 > I-Decay > Cyclic Warp. * I tried to do it without being imported by Unlimed 2.0 and it didn't work.
12 - Selections > Select None. Select the white parts of the image with the magic wand. Paint with the background color.
13 - Plugin AP [Lines] > Lines - SilverLining.
Selections > Select None.
14 - Effects > 3D Effects > Drop Shadow: 1, 1, 70, 30, foreground color. Effects > 3D Effects > Drop Shadow: -1, -1, 70, 30, foreground color.
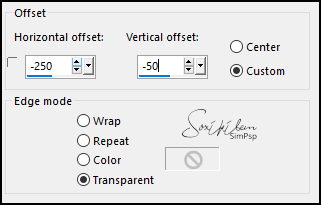
15 - Effects > Image Effects > Offset.
16 - Layers > Duplicate. Image > Mirror > Mirror Vertical.
17 - Edit > Copy in the Rombos cristal.png-arena 3. Edit > Paste a New Layer. Position between the triangles according to the model.
18 - Close visibility of Layer Merged. Layers > Merge > Merge Visible. Layers > Dupllicate. Image > Mirror > Mirror Horizontal. Layers > Merge > Merge Visibile.
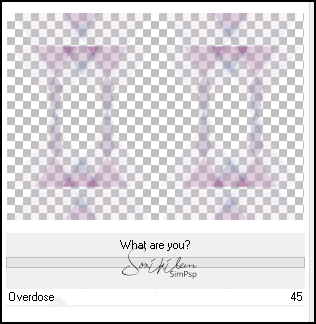
19 - Layers > Duplicate. Filters > Unlimited 2.0 > Toadies > What are you?
20 - Effects > Edge Effects > Enhance. Layers > Arrange > Move Down. Layers > Duplicate. Layers > Properties: Blend Mode Overlay.
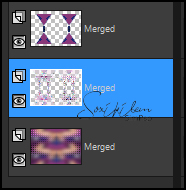
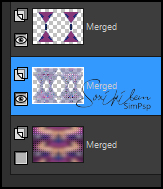
21 - Close the visibility of the new Layer Merged. Layers > Merge > Merge Visible.
22 - Open the visibility of the two layers Merged.
23 - In the layer Merged in the middle apply: Effects> Edge Effects> Enhance.
24 - Effects > 3D Effects > Drop Shadow: 10, 10, 70, 2, foreground color. Effects > 3D Effects > Drop Shadow: -10, -10, 70, 2, foreground color.
25 - Layers > Properties: Blend Mode Multiply, Opacity 75%.
26 - Close the visibility of the last layer Merged.
Layers > Merge > Merge Visibile.
27 - Effects > Reflection Effects > Rotating Mirror.
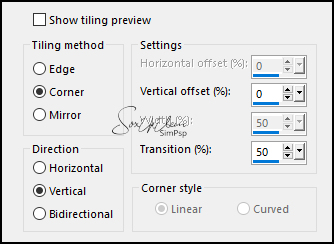
28 - Effects > Drop Shadow: -10, 0, 70, 2, foreground color.
29 - Open the visibility of the layer Merged.
30 - Selections > Load/Save Selections > Load Selection From Alpha Channel: selection 2. Layers > New Raster Layer. Edit > Copy in the paisaje urbano. Edit > Paste Into Selection.
31 - Selections > Select None. Layers > Arrange > Move Down. Adjust > Sharpness > Sharpne. Edit > Repeat Sharpen.
32 - Layers > Merge > Merge Visible.
33 - Selections > Load/Save Selections > Load Selection From Alpha Channel: selection 3. Layers > New Raster Layer. Paint this selection with the gradient as below.
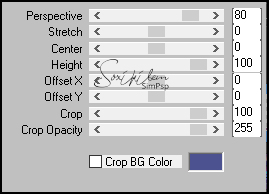
34 - Plugin Mura's Meister > Perspective Tiling.
35 - Effects > Image Effects > Seamless Tiling.
36 - Adjust > Sharpness > Sharpne. Selections > Select None. Effects > 3D Effects > Drop Shadow: 10, 10, 70, 30, black color.
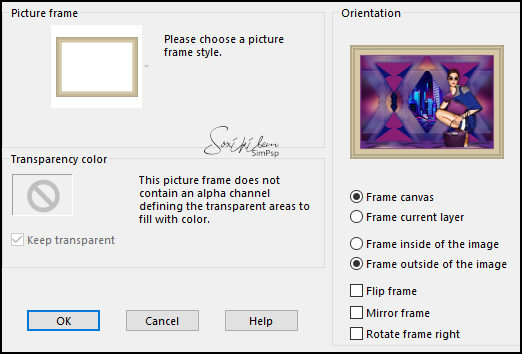
37 - Image > Add Borders: 2px foreground color 2px background color 6px foreground color.
38 - Image > Resize: 85%, all layer checked.
39 - Layers > Duplicate. Layers > Properties: Blend Mode Soft Light.
40 - Edit > Copy in the Main Tube. Edit > Paste a new Layer. Image > Resize: 85%, all layers unchecked. *It depends on the size of the tube you will be using*
41 - Effects > Image Effects > Offset: Horizontal 174, Vertical -132, Transparent. *It depends on the size of the tube you will be using* Adjust > Sharpness > Sharpen.
42 - Effects > Drop Shadow: 0, 0, 70, 30, foreground color. Sign your work.
43 - Image > Picture Frame: Lia-beig.
Colorize to match the colors you are using.
44 - Layers > Merge > Merge Visible.
45 - File > Export > Jpeg Optimizer.
CREDITS: Main Tube by Lily - Landscape received in exchange group - Remainder of material provided by Emilieta
Tutorial by Emilieta
Feel free to submit your versions. I'll be happy to post them on our site.
|