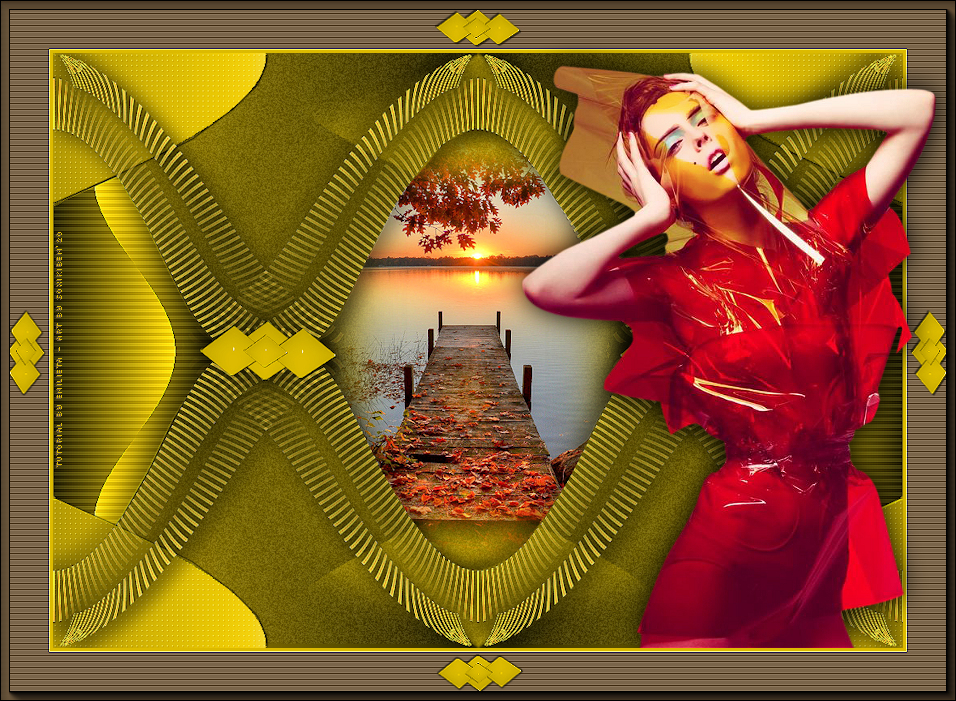
|
Tutorial By Emilieta English Translation by Soxikibem Original Tutorial
MATERIAL 1 Main Tube of your choice 1 Misted Landscape Belinda_Canal_alfa Rombos cristal Rombos marco
Pluguins AAA Frames Alf's Power Sines Carolaine and Sensibility Flaming Pear FM Tile Tools
TUTORIAL 1 - Choose two colors to work with.Here I used: Foreground: #f1ab2d Background: #705b40
2 - Open Belinda_Canal_alfa. Paint with foreground color.
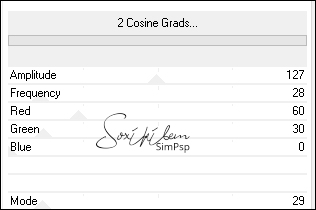
3 - Filters Unlimited 2.0 > Alf's Power Sines > 2 Cosine Grads.
*Colorize it to match the shade of the colors you are using.
4 - Effects > Image Effects > Seamless Tiling: Deafult.
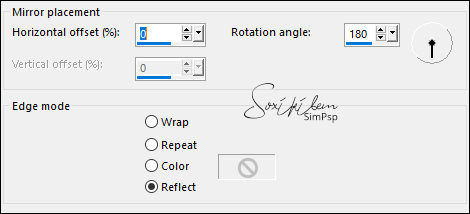
5 - Effects > Reflection Effects > Rotating Mirror.
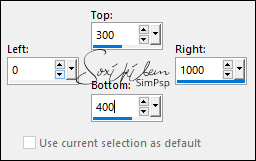
6 - Layers > New Raster Layer. Activate the Selection Tool > Custom Selection.
7 - Paint this selection with the foreground color. Selections > Select None.
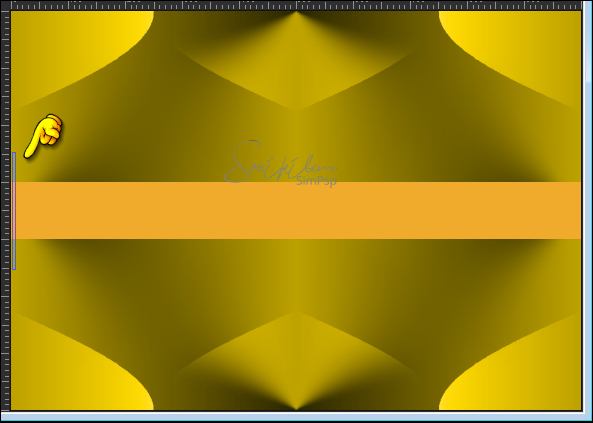
8 - Activate the Eraser Tool. Select the BrushTip_Línea vertical.
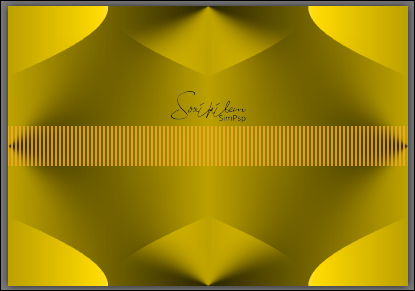
9 - Position the Eraser as shown in the print and delete this horizontal line until the end.
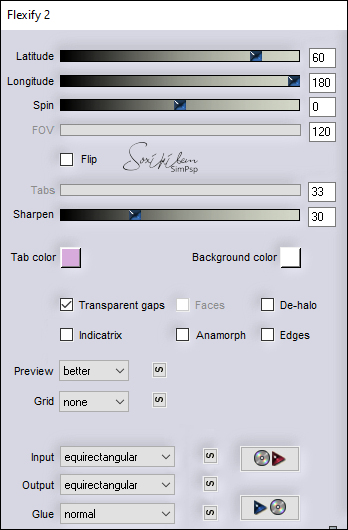
10 - Plugin Flaming Pear > Flexify 2.
11 - Image > Resize: 85%, all layer unchecked. Adjust > Sharpness > Sharpen. Effects > Edge Effects > Enhance.
12 - Effects > 3D Effects > Drop Shadow: 1, 1, 65, 1, black color. Effects > 3D Effects > Drop Shadow: -1, -1, 65, 1, black color.
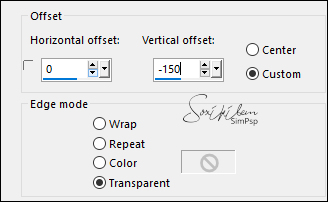
13 - Effects > Image Effects > Offset.
14 - Layers > Duplicate. Image > Mirror > Mirror Vertical. Layers > Merge > Merge Down.
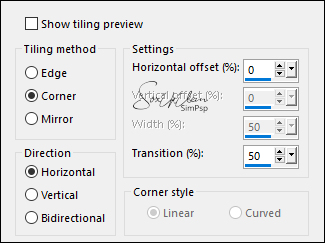
15 - Effects > Image Effects > Seamless Tiling: Default.
16 - Effects > Geometric Effects > Circle: Transparent.
17 - Effects > Image Effects > Seamless Tiling.
18 - Edit > Copy in the Rombos cristal. E dit > Paste a New Layer.Layers > Merge > Merge Down.
19 - Close the visibility of this layer. Activate the Raster 1 layer. Selections > Load/Save Selections > Load Selection From Alpha Channel: Belinda_canal_alfa_1. Selections > Promote Selectio to Layer.
20 - Plugin Carolaine and Sensibility > CS_LDots: 50, 3, 2. Effects > 3D Effects > Drop Shadow: 1, 1, 65, 1. Selections > Select None.
21 - Layers > Duplicate. Image > Mirror > Mirror Horizontal. Layers > Merge > Merge Down.
22 - Layers > Duplicate. Image > Mirror > Mirror Vertical. Layers > Merge > Merge Down.
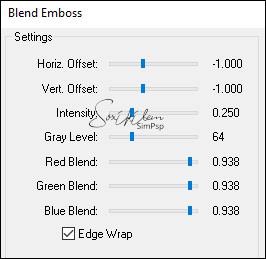
23 - Plugin FM Tile Tools > Blend Emboss: Default.
24 - Activate the Raster 1 layer. Selections > Load/Save Selections > Load Selection From Alpha Channel: Belinda_canal_alfa_2. Selections > Promote Selectio to Layer.
25 - Filters Unlimited 2.0 > Alf's Power Sines > 2 Cosine Grads.
*Colorize it to match the shade of the colors you are using.
26 - Plugin Carolaine and Sensibility > CS_HLines: 4, 0, 10. Effects > Edge Effects > Enhance.
27 - Effects > 3D Effects > Drop Shadow: 1, 1, 65, 1, black color. Effects > 3D Effects > Drop Shadow: -1, -1, 65, 1, black color. Selections > Select None.
28 - Layers > Duplicate. Image > Mirror > Mirror Horizontal. Layers > Merge > Merge Down.
29 - Activate the Raster 1 layer. Selections > Load/Save Selections > Load Selection From Alpha Channel: Belinda_canal_alfa_3. Adjust > Add/Remove > Add Noise.
Selections > Select None.
30 - Open and activate the visibility of the layer that is closed. Adjust > Sharpness > Sharpen. Effects > 3D Effects > Drop Shadow: 10, 10, 65, 30, black color. Effects > 3D Effects > Drop Shadow: -10, -10, 65, 30, black color.
31 - Selections > Load/Save Selections > Load Selection From Alpha Channel: Belinda_canal_alfa_4. Selections > promote Selection to Layer.
32 - Edit > Copy on the Misted Landscape. Edit > Paste Into Selection. Layers > Arrange > Move Down.
33 - Adjust > Sharpness > Sharpen. Edit > Repeat Sharpen. Selections > Select None.
34 - Layers > Merge > Merge Visibile. Image > Resize: 85%, all layers cheked.
35 - Image > Add Borders: 3px foreground color 50px background color
36 - Select this 50px border with the Magic Wand. Plugin Carolaine and Sensibility > CS_HLines: 2, 0, 10 Effects > Edge Effects > Dilate. Effects > Edge Effects > Enhance. Selections > Select None.
37 - Edit > Copy in the Rombos marco. E dit > Paste a New Layer.
38 - Edit > Copy in the Main Tube, Edit > Paste a New Layer.
39 - Effects > Image Effects > Offset: 270, -59, transparent. *It depends on the size of your tube you need to move manually.
40 - Adjust > Sharpness > Sharpen. Effects > 3D Effects > Drop Shadow: 0, 0, 100, 40, black color.
41 - With the Eraser Tool, erase the shadow below.
42 - Sign or apply your watermark. Layers > Merge > Merge Visibile.
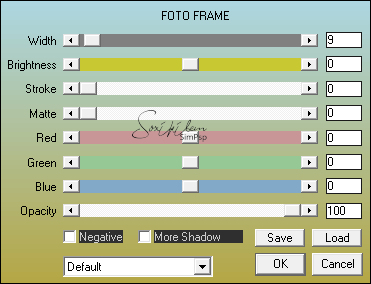
43 - Plugin AAA Frames > Foto Frame.
44 - File > Export > Jpeg Optimizer.
CREDITS: Main Tube & Landscape by Jewel - Remainder of material provided by Emilieta
Tutorial by Emilieta
Feel free to submit your versions. I'll be happy to post them on our site.
|
