|
Tutorial By Emilieta English Translation by Soxikibem Original Tutorial
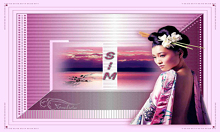
MATERIAL 1 Main Tube of your choice 1 Landscape Tube of your choice. Adorno cuadritos-vertical Adornos cuadritos en diagonal Adorno puntitos Adorno cuadros-derecha Esquinero Texto.png
Selections: Sel-Sim-1, Sel-Sim- 2, Sel-Sim-3, Sel-Pink- 4 *Save Selections to PSP Selections Folder
Pluguins Carolaine and Sensibility Filters Unlimited 2.0 FM Tile Tools
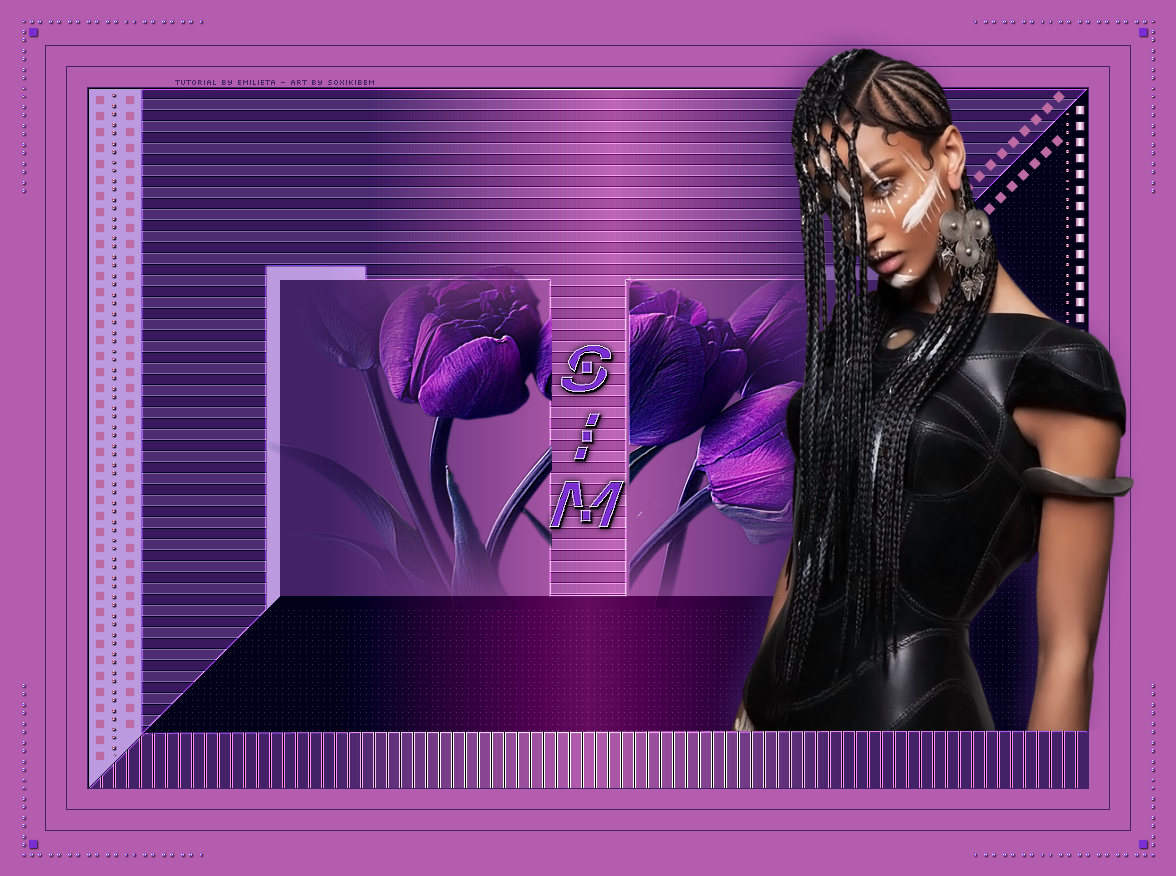
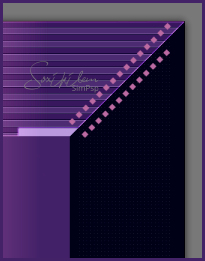
EXECUTION -1- Open your material, duplicate and close the originals. Choose two colors to work with .Here I used: Foreground: #432268 Background: #b45cad
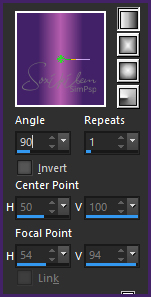
-2- Open a 1000x700px Transparency. Paint with a linear gradient formed by the chosen colors.
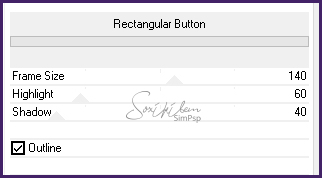
-3- Filters Unlimited 2.0 > Buttons & Frames > Rectangular Button.
Repeat Rectangular Button in the same settings as above.
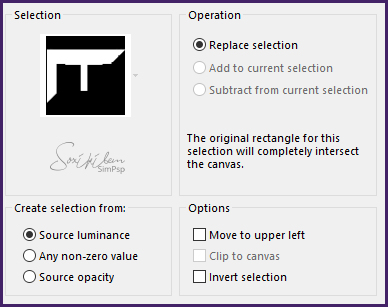
-4- Selections > Load/Save Selections > Load Selection From Disk: Sel-Sim-1.
Layers > New Raster Layer. Paint with the Gradient.
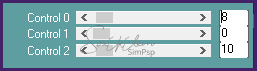
-5- Plugin Carolaine and Sensibility > CS_HLines.
Effects > Edge Effects > Enhance More. Selections > Select None.
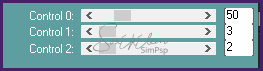
-6- Enable Layer Raster 1. Selections > Load/Save Selections > Load Selection From Disk: Sel-Sim-2. Plugin Carolaine and Sensibility > CS_LDots.
Selections > Select None.
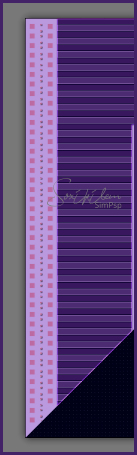
-7- Edit > copy in the Adorno cuadritos-vertical. Edit > Paste a New Layer. Position in the light part on the left according to the model.
Layers > Arrange > Bring To Top.
-8- Edit > copy in the Adornos cuadritos en diagonal. Edit > Paste a New Layer. Position the top right as the print below.
-9- Edit > copy in the Adorno puntitos. Edit > Paste a New Layer. Position in the center of the " Adorno cuadritos-vertical"
-10- Layers > Duplicate. Image > Mirror > Mirror Horizontal. Position as in print below.
-11- Edit > copy in the Adorno cuadros-derecha. Edit > Paste a New Layer. Position as in print below.
-12- Close Layer Visibility: Raster 1 and Raster 2. Layers > Merge > Merge Visibile. Open Layer Visibility: Raster 1 and Raster 2. Enable Layer Raster 1.
-13- Selections > Load/Save Selections > Load Selection From Disk: Sel-Sim-3. Layers > New Raster Layer. Edit > Copy in the Landscape tube. Edit > Paste Into Selection. Selections > Select None. Adjust > Sharpness > Sharpen More.
-14- Plugin FM Tile Tools > Saturation Emboss: Default.
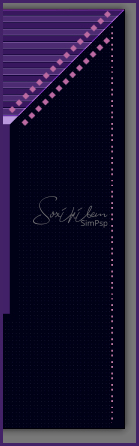
-15- Selections > Load/Save Selections > Load Selection From Disk: Sel-Pink- 4. Layers > New Raster Layer. Paint with the Gradient in use.
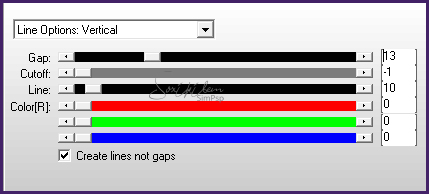
-16- Plugin AP [Lines] > SilverLining.
-17- Effects > Edge Effects > Enhance More. Selections > Select None.
-18- Image > Add Borders: 1px foreground color 20px background color 1px foreground color 20px background color 1px foreground color 45px background color
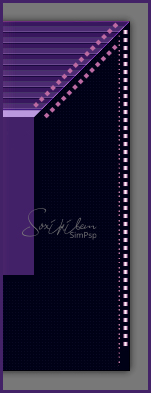
-19- Edit > Copy in the Esquinero. Edit > Paste a New Layer. Effects > 3D Effects > Drop Shadow: 1, 1, 80, 2.
-20- Edit > Copy in the Texto. Edit > Paste a New Layer. Colorize to match the colors you are using. Effects > 3D Effects > Drop Shadow: 0, 0, 80, 10.
-21- Edit > Copy in the Main Tube. Edit > Paste a New Layer. Resize if necessary. Adjust > Sharpness > Sharpen. Position by model. Effects > 3D Effects Drop Shadow: 0, -10, 65, 40, foreground color.
-22- Apply your watermark or signature. File > Export > JPEG Optimizer...
CREDITS: Main Tube by Colybrix - Tube Tulipas by LB Tubes - Remainder of material provided by Emilieta
Tutorial by Emilieta
Feel free to submit your versions. I'll be happy to post them on our site.
|