|
Tutorial By Emilieta English Translation by Soxikibem Original Tutorial
MATERIAL 1 Main Tube of your choice Sel-tuto-otoño.PspSelection (Save to PSP Selections folder) foreground_darker.PspGradient (Save to PSP Gradients folder) Animación7.gif-Hojas cayendo Hojas caidas Imagen3 Paisaje
Pluguins Mezzy > Rusty Eye Candy 5 Impact > Glass Ap {Lines] > SilverLining AAA Frames > Foto Frame
EXECUTION -1- Open your material, duplicate and close the originals. Choose two colors to work with .Here I used: Foreground: #391d1b Background: #e86812
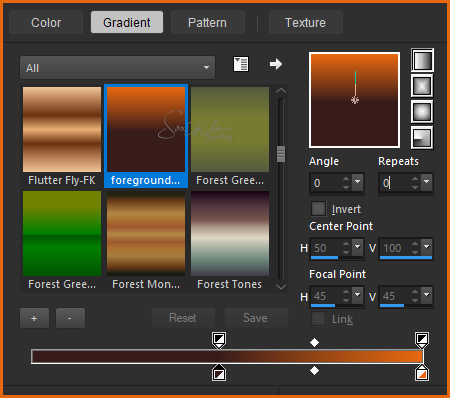
-2- Open a 1000x700px Transparency. Paint with a gradient "foreground_darker.PspGradient" formed by the colors you choose.
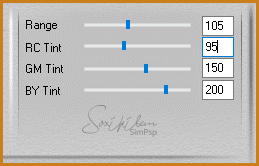
-3- Plugin Mezzy > Rusty .
-4- Effects > Edge Effects > Enhance. Image > Free Rotate: Left, 90.
-5- Effects > Reflections Effects > Rotating Mrirror.
Image > Free Rotate: Right, 90.
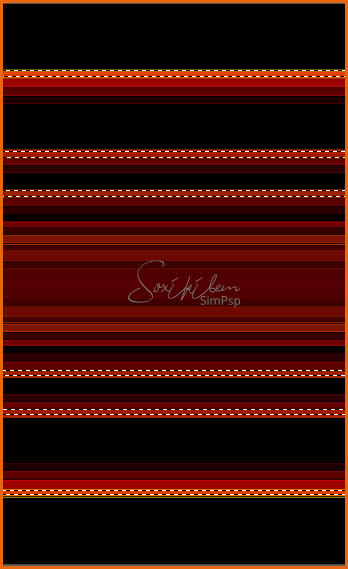
-6- With Magic Wand, select the stripes as shown below.
-7- Plugin Eye Candy 5 Impact > Glass.
Selections > Select None.
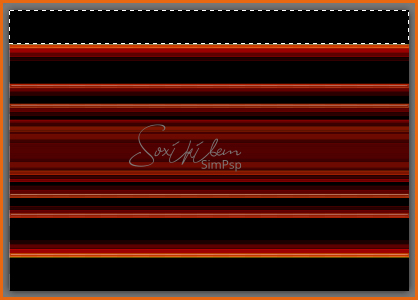
-8- With Magic Wand, select the dark top
-9- Layers > New Raster Layer. Paint with the Linear Gradient.
Selections > Select None.
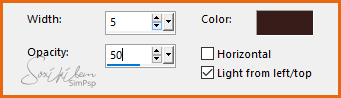
-10- Plugin AP [Line] > Lines > SilverLining.
-11- Layers > Duplicate. Image > Mirror > Mirror Vertical.
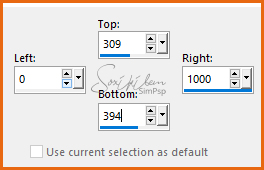
-12- Selection Tool > Custom Selection.
-13- Layers > New Raster Layer. Paint with the gradient in use.
-14- Plugin AP [Lines] > Line > SilverLining.
-15- Effects > Edge Effects > Enhance, 2 times. Keep Selection. Layers > New Raster Layer. Paint with background color.
-16- Seletions > Modify > Contract: 2px. Hit Delete key on keyboard. Layers > Merge > Merge Down. Selections > Select None.
-17- Effects > 3D Effects > Drop Shadow: 1, 1, 80, 40, black color. Effects > 3D Effects > Drop Shadow: -1, -1, 80, 40, black color. Layers > Merge > Merge Visibile.
-18- Selection Tool > Custom Selection.
Layers > New Raster Layer. Paint with the background color.
-19- Effects > Texture Effects > Blinds: Foreground color.
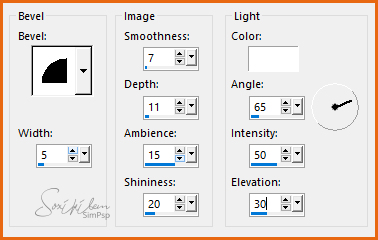
-20- Selections > Select None. Effects > 3D Effects > Inner Bevel.
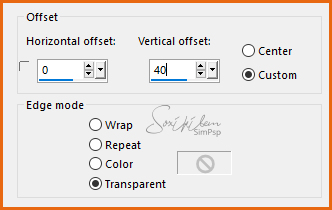
-21- Effects > Edge Effects > Ehance. Layers > Duplicate. Effects > Image Effects > Offset: 0, 40.
-22- Layers > Merge > Merge Down.
-23- Copy and paste as new layer the tube Imagen3.png. Position in center of two bars.
-24- Effects > 3D Effects > Drop Shadow: 1, 1, 80, 40, black color. Effects > 3D Effects > Drop Shadow: -1, -1, 80, 40, black color. Layers > Merge > Merge Down.
-25- Effects > Distortion Effects > Wave.
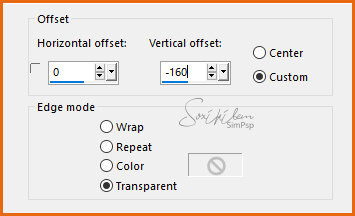
-26- Effects > Image Effects > Offset: 0, -160.
Effects > 3D Effects > Drop Shadow: 10, 10, 80, 40, black color. Effects > 3D Effects > Drop Shadow: -10, -10, 80, 40, black color.
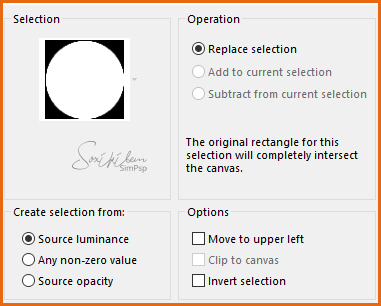
-27- Selections > Load/Save Selections > Load Selection from Disk: Sel-tuto-otoño.
-28- Layers > New Raster Layer. Paint with background color.
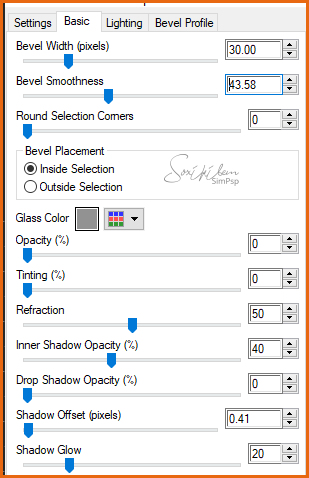
-29- Plugin Eye Candy 5 Impact > Glass.
Keep Selection. Effects > 3D Effects > Drop Shadow: 10, 10, 80, 40, black color. Effects > 3D Effects > Drop Shadow: -10, -10, 80, 40, black color.
-30- Selections > Modify > Contract: 25px. Layers > New Raster Layer. Copy and paste in the selection Paisaje tube.
-31- Adjust > Sharpness > Sharpen, 2 times. Selections > Select None. Layers > Merge > Merge Down.
-32- Edit > Copy. Edit > Paste a New Image. Minimize this copy, we will use later.
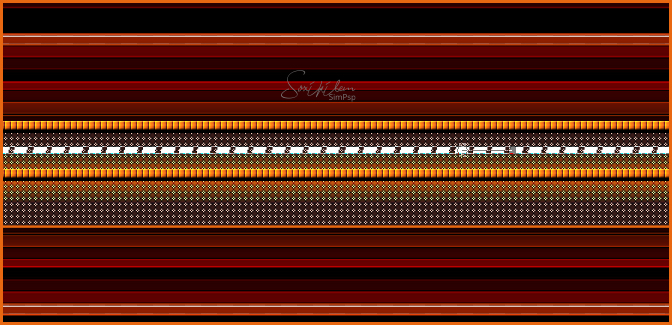
-33- Return to the work we are doing. Layers > Merge > Merge Visibile. Image > Resize: 85%, all layers checked.
-34- Copy and paste as new layer the main tube. Position according to the model shown. Adjust > Sharpness > Sharpen. Effects > 3D Effects > Drop Shadow: 10, 10, 80, 40, black color.
-35- Maximize image saved in item 32. Copy and paste as new layer. Image > Resize: 30%, all layer unchecked. Layers > Arrange > Move Down. Position according to the model shown.
-36- Copy and paste as new layer the tube "Hojas caidas". Position according to the model shown. Effects > 3D Effects > Drop Shadow: 10, 10, 80, 40, black color.
-37- Layers > New Raster Layer. Layers > Arrange > Bring to Top. Paint with background color. Selections > Select All. Selections > Modify > Contract: 3px. Press Delete on your keyboard. Selections > Select None.
-38- Image > Add Borders: 10px foreground color. Select this 10px border with Magic Wand. Plugin > AP [Lines] > Silver Line same as above. Effects > Edge Effects > Enhance. Selections > Select None.
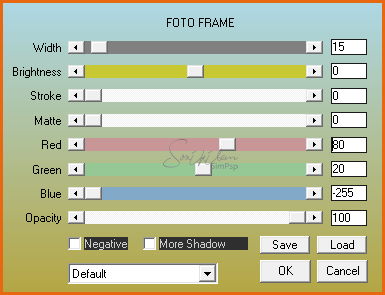
-39- Image > Add Borders: 3px, background color. Image > Add Borders: 45px, foreground color. Plugin AAA Frames > Foto Frame.
-40- Selectiosn > Select All. Selections > Modify > Contract: 15. Selections > invert. PluginAP [Lines] > Silver Lining as previously used. Effects > Edge Effects > Enhance More, 2 times. Selections > Select None.
-41- Image > Add Borders: 1px, background color.
-42- Apply your watermark or signature. Layers > Merge > Merge Visibile.
If you don't want the animation: Copy and paste as new layer tube "Animación7.gif-Hojas cayendo". File > Export > JPEG Optimizer...
ANIMATION SHOP (OPTIONAL) PSP
In the worked image, do not paste the tube (image-leaves-falling.pspimage).
Save as: .PSP animation Shop (*.psp) / Name
AS 1 - Open saved image in Animation Shop Edit > Select All.
2 - Open Animation Animación7.gif-Hojas cayendo.
3 - Edit > Select All. Edit > Copy.
4 - Activate your work. Edit > paste Into Selectted Frame.
5 - Animation > Frames Properties: Display 40.
6 - Save your work.
CREDITOS: Main Tube by Colybrix - Remainder of material provided by Emilieta
Tutorial by Emilieta
Feel free to submit your versions. I'll be happy to post them on our site.
|