|
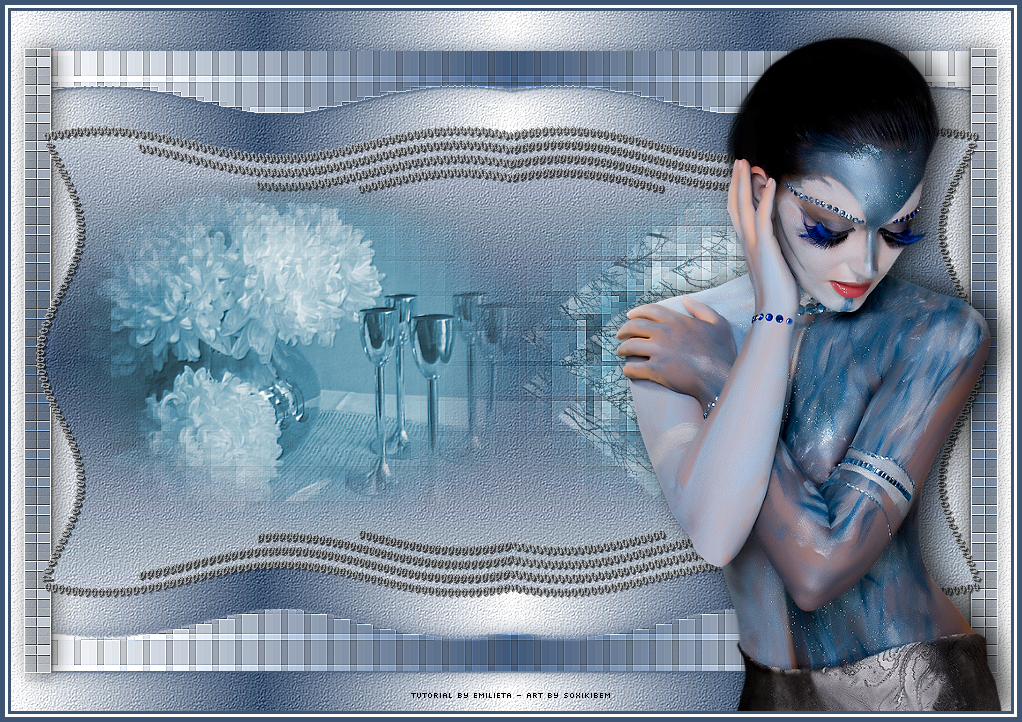
Tutorial By Emilieta English Translation by Soxikibem Original Tutorial
MATERIAL 1 Main Tube 1 Misted Paisage Mask 175.jpg-mask marco ondas.PspSelection (Save selection to PSP Selections folder)
Pluguins L & K's Texture FM Tile Tools
EXECUTION
-1- Open your material, duplicate and close the originals. Choose two colors . Here I used:Foreground: #ffffff (White) Background: #3d5473
-2- Open a 1000x700px Transparency. Paint with a Linear Gradient formed by the colors you choose.
-3- Plugin Texture > Texturizer.
-4- Effects > Edge Effects > Enhance.
-5- Edit > Copy in tube marco-ondas. Edit > Paste as New Layer.
-6- Effects > 3D Effects > Drop Shadow: 1, 1, 60, 0, color #404040
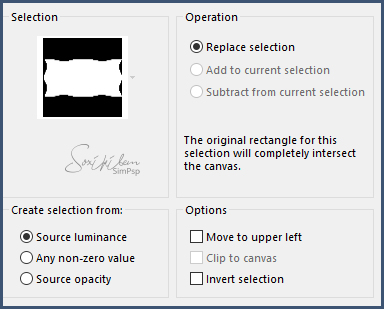
-7- Selections > Load Selection From Disk > Selection marco ondas
-8- Selections > Invert.
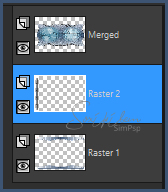
-9- Enable layer raster 1.
-10- Press Delete on your keyboard. Selections > Select None.
-11- Enable layer Raster 2. Effects > 3D Effects > Drop Sahdow: 1, 1, 60, 0, background color.
-12- Layers > Duplicate. Layers > Properties > Blend Mode: Multiply, Opacity 70. Layers > Merge > Merge Visible.
-13- Open the tube Crisantemos. Edit > Copy. Edit > Paste a New Layer.
-14- Image > Resize: 65%, all layers unchecked. Image > Mirror > Mirror Horizontal.
-15- Plugin FM Tile Tools > Blend Emboss: Default.
-16- Effects > Image Effects > Offset.
-17- Layers > Duplicate. Image > Mirror > Mirror Horizontal.
-18- Plugin L en K's > Jeffrey: 120.
-19- Effects > Edge Effects > Enhance. Layers > Duplicate. Image > Mirror > Mirror Horizontal.
-20- Layers > Properties > Opacity: 90%. Layers > Arrange > Move Down. Apply 2 times.
-21- Activate the Raster layer 1. Layers > Dupllicate. Layers > Merge > Merge Down.
-22- Open landscape image. Layers > New Mask Layer > From Image: 175.jpg-mask Layers > Merge > Merge Group.
-23- Image > Resize: 60%, all layers unchecked. Copy and paste to your work image. Layers > Arrange > Bring to top.
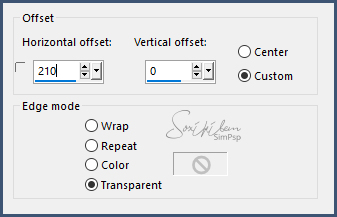
-24- Effects > Image Effects > Offset (210/0)
-25- Adjust > Sharpness > Sharpen. Layers > Properties > Opacity: 50%. Layers > Merge > Merge Visible.
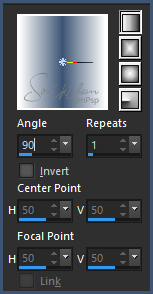
-26- Prepare a Linear Gradient with Initial Colors.
-27- Layers > New Raster Layer. Paint with the gradient. Layers > Arrange > Send To Bottom.
-28- Enable layer Merged. Selections > Select All. Selections > Float. Selections > Invert. Press Delete on your keyboard (will erase the shadow that protrudes from the sides).
-29- Selections > Modify > Contract: 40px
-30- Enable layer Raster 1. Selections > Invert. Press Delete on your keyboard (there were 2 pieces one above and one below). Selections > Invert.
-31- Effects > Plugins > L en K's > Jeffrey: 120.
-32- Effects > Edge Effects > Enhance. Effects > 3D Effects > Drop Shadow: 2, 2, 60, 2, background color. Effects > 3D Effects > Drop Shadow: 0, 0, 60, 30, background color.
-33- Selections > Select None. Layers > New Raster Layer.
-34- Activate the Selection Tool > Custom Selection and configure: top 38, Left 16, Right 37, Bottom 663.
-35- Change Gradient Angle to 0
Fill selection with gradient. Selections > Select None.
-36- Plugins L en K's > Jeffrey: 75
-37- Effects > Edge Effects > Enhance More. Effects > 3D Effects > Drop Shadow: 0, 2, 60, 2, black color. Effects > 3D Effects > Drop Shadow: 0, 4, 60, 30, black color.
-38- This layer must be above raster layer 1.
-39- Layers > Duplicate. Image > Mirror > Mirror Horizontal. Layers > Merge > Merge Down. Adjust > Sharpness > Sharpen.
-40- Change the gradient to angle 90 and repeats 3.
-41- Layers > New Raster Layer. Paint with the gradient. Layers > Arrange > Send to Bottom.
-42- Plugin > Texture > Texturizer.
-43- Effects > Edge Effects > Enhance. Enable top layer.
-44- Edit > Copy in the Main Tube. Edit > Paste a New Layer in your work. Position to the right according to model. Adjust > Sharpness > Sharpen. Apply 2 times (it will depend on the tube you are using).
-45- Effects > 3D Effects > Drop Shadow: 0, 10, 80, 40, black color.
-46- Image > Add Borders: 3px background color Image > Add Borders: 3px color #ffffff Image > Add Borders: 5px background color.
-47- Apply your watermark or signature. File > Export > JPEG Optimizer...
CREDITOS: Tube by Jv.d.E. - Remainder of material provided by Emilieta Tutorial by Emilieta
Feel free to submit your versions. I'll be happy to post them on our site.
|
