|
Tutorial By CidaBen English Translation by Soxikibem Original Tutorial
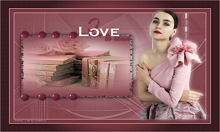
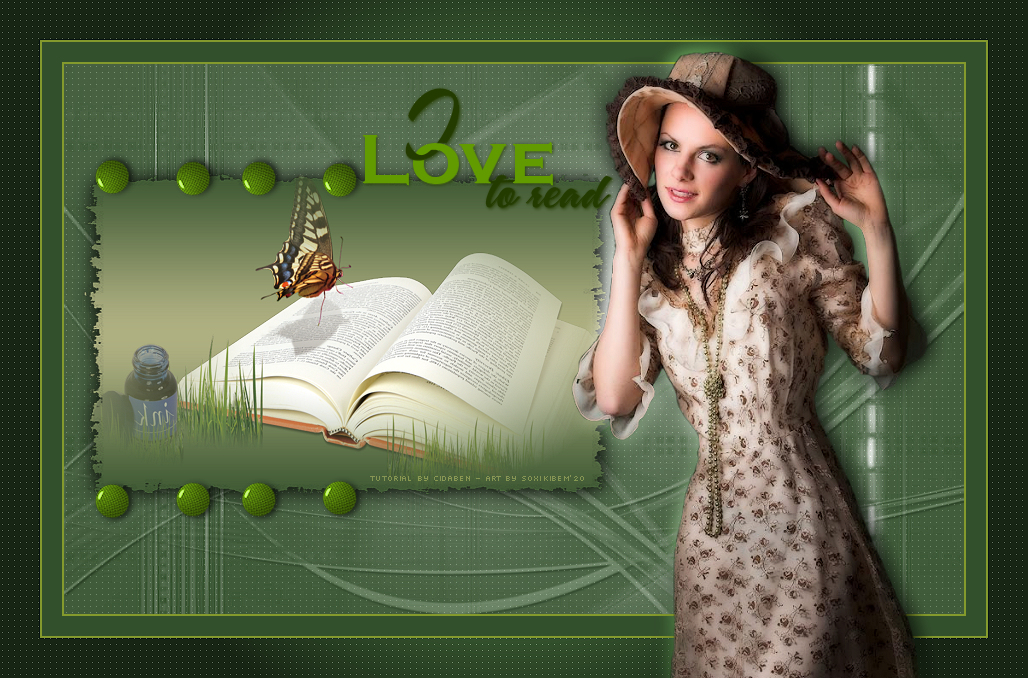
MATERIAL 1 Main Tube of your choice 1 Misted of your choice decor_gomb título04_i_love_to_read_bycidaben Mask: MD-054 Narah_mask_0348
PLUGINS Carolaine and Sensibility Filter Unlimited 2.0 > Edges,Square
TUTORIAL 1 - Open the material on the PSP, duplicate and close the original. Choose two colors to work with: Foreground #730a04 Background #fff2b5 Extra Color: #FFFFFF (White)
2 - Open a 900 X 550px transparent image.
3 - Paint with a gradient > Linear.
4 - Adjust > Blur > Gaussian Blur > Radius: 50.
5 - Plugin Filters Unlimited 2.0 > Edges, Square > Square Edge 04.
6 - Image > Resize > 60% - Resize all layers unchecked.
7 - Layers > New Raster Layer. Paint with white color (#FFFFFF).
8 - Layers > New Mask Layer > From Image: MASK-MD-054. Layers > Merge > Merge Group.
9 - Layers > New Raster Layer. Paint with Foreground color. Layers > Arrange > Move Down.
10 - Close Raster 1. Activate Raster 2. Layers > Merge > Merge Visible. Effects > Edge Effects > Enhance.
11 - Plugin Carolaine and Sensibility > CS-LDots.
12 - Activate and open the visibility of Raster 1. Layers > Arrange > Bring to Top.
13 - With the Magic Wand Tool click outside the rectangle. Selections > Invert.
14 - Edit > Copy in Misted. Edit Paste Into Selection. Selections > Select None.
15 - Effects > 3D Effects > Drop Shadow: 1, 1, 100, 30, black color.
16 - Use the Pick tool to position: Position X 5, Position Y 90.
17 - Adjust > Sharpness > Sharpen.
18 - Layers > New Raster Layer. Paint with white color (#FFFFFF).
19 - Layers > New Mask Layer > From Image: Narah_mask_0348. Layers > Merge > Merge Group.
20 - Layers > Arrange > Move Down.
21 - Layers > Properties: Bend Mode Soft Light.
22 - Effects > 3D Effects > Drop Shadow: 1, 1, 100, 3.
23 - Image > Add Borders: 2px Background color 20px Foreground color 2px Background color
24 - Selections > Seelect All. 25 - Image > Add Borders: 40px, Foreground color. 26 - Selection > Invert
27 - Plugin Carolaine and Sensibility > CS_Reflection. *** Dark color can change values
28 - Plugin Carolaine and Sensibility > CS-LDots.
29 - Adjust > Sharpness > Sharpen.
30 - Selections > Select None.
31 - Edit > Copy on the Main Tube. Edit > Paste as New Layer. Position right.
32 - Layers > Duplicate. Adjust Blur > Gaussian Blur: Radius 10. Layers > Arrange > Move Down.
33 - Edit > Copy in decor gomb. Edit > Paste as New Layer. Use the Pick tool to position: Position X 90, Position Y 150. Layers > Dplicate. Image > Mirror > Mirror Vertical.
34 - Edit > Copy on the título04_i_lov_to_read_bycidaben Edit > Paste New Layer Use the Pick tool to position: Position X 360, Position Y 85.
35 - Apply your Watermark or signature. File > Export > JPEG Optimizer

Credits
Version 1: Tube:
by Maryse - Misted
Here
Masks:
MASK-MD-054 and Narah_mask_0348 - Decor: gomb - title: by CidaBen
Version 2: Tube
by Nena Silva - Misted
Here
Masks:
MASK-MD-054 and Narah_mask_0348 - Decor: gomb - title: by CidaBen
Tutorial by CidaBen'20
Feel free to send your versions. I will be happy to publish them on our website.
|