|
TRADUÇÕES:
Obrigada aos nossos tradutores!
MATERIAL:
PLUGINS: Mehdi > Wavy Lab 1.1. Mehdi > Sorting Tiles Filter Factor Gallery G > Noise Emboss AAA Frames > Foto Frame Carolaine and Sensibility > CS-LDots L em K's > Katharina Alien Skin Eye Candy 5 Impact > Glass
Tutorial testado e revisado por Márcinha.
Cor Extra: Cor 3 > #70491a
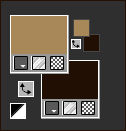
Cor Extra: Cor 4 > #ffffff Configuração da paleta Materiais:
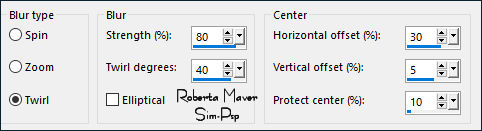
Effects > Plugins > Mehdi > Wavy Lab 1.1.
4 - Effects > Plugins > Mehdi > Sorting Tiles:
5 - Selections > Load/Save Selection > Load
Selection From Alpha Channel: Selection #1 Selections > Select None.
6 - Effects > Plugins > Filter Factor Gallery G > Noise Emboss:
7 - Layers > Properties > General > Blend Mode: Overlay - Opacity: 65% Ativar a layer Raster 1.
8 - Selections > Load/Save Selection > Load
Selection From Alpha Channel: Selection #2 Layers > Arrange > Bring to Top. Selections > Select None.
9 - Effects > Plugins > AAA Frames > Foto Frame:
10 - Layers > Duplicate por 2 vezes:
Layers > Merge > Merge Down.
Layers > Duplicate. Layers > Merge > Merge Down.
11 - Image Resize: 70%, all layers desmarcado. Effects > Image Effects > Seamless Tiling:
12 - Effects > Plugins > Carolaine and Sensibility > CS-LDots:
Effects > 3D Effects > Drop Shadow: 0, 0, 100,20, Color: #000000 Fechar a visibilidade dessa layer Copy of Promoted Selection 1.
13 - Ativar a layer Promoted Selection 1. Com figure na cor da paleta de cores o Background com a Cor 3 > #70491a.
14 - Effects > Plugins > L em K's > Katharina:
Layers > Duplicate. Layers > Merge > Merge Down.
Novamente Layers > Duplicate. Layers > Merge > Merge Down.
15 - Effects > 3D Effects > Drop Shadow: 0, 0, 100,20, Color: #000000 Abrir a visibilidade Copy of Promoted Selection 1. Ativar a Promoted Selection.
16 - Ativar o Decor01_NicolebyRobertaMaver. Edit > Paste as New Layer. Layers > Properties > General > Blend Mode: Luminance L - Opacity: 100%
17 - Ativar o arquivo Paisagem16_RobertaMaver. Edit > Copy. Volte ao trabalho... Edit > Paste as New Layer. Image > Resize 90% all layers desmarcado. Adjust > Sharpness > Sharpen. Posicionar bem ao centro.
Effects > Edge Effects > Enhance More. Effects > Texture Effects > Fine Leather:
19 - Ativar a Raster Copy of Promoted
Selection 1 (Topo) Selections > Load/Save Selection > Load Selection From Alpha Channel: Selection #3 Pintar com a Cor 4 > #ffffff (Branco) Selections > Modify > Contract: 2 Pintar com a Cor1 > #a88859.
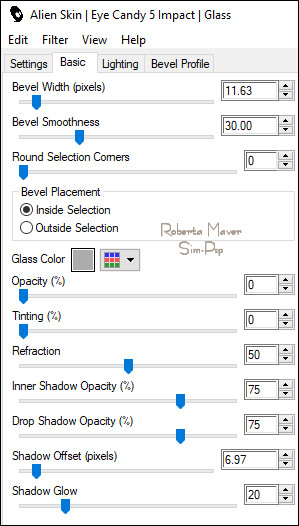
20 - Effects > Plugins > Alien Skin Eye
Candy 5 Impact > Glass.
Selections > Select None. Effects > 3D Effects > Drop Shadow: 1, 1, 100,1, Color: #000000 Layers > New Raster Layer.
Pintar com a Cor 4 > #ffffff (Branco) Selections > Modify > Contract: 2 Pintar com a Cor1 > #a88859.
22 - Effects > Plugins > Alien Skin Eye Candy
5 Impact > Glass.
Selections > Select None. Effects > 3D Effects > Drop Shadow: 1, 1, 100,1, Color: #000000
10 px - color: Cor 4 > #ffffff 1 px - color: Cor 2 > #241104
20 px - color: Cor 4 > #ffffff 30 px - color: Cor 4 > #ffffff
Edit > Copy. Volte ao trabalho... Edit > Paste as New Layer.
25 - Ative o arquivo Mulher064_RobertaMaver.
Edit > Copy. Volte ao trabalho... Adjust > Sharpness > Sharpen.
Posicionar à esquerda.
Edit > Copy. Volte ao trabalho... Effects > 3D Effects > Drop Shadow: 1, 3, 100,0, Color: Cor 3 > #70491a Layers > Duplicate. Layers > Arrange > Move Down. Effects > Distortion Effects > Wind:
Créditos:
Sinta-se à vontade para enviar suas versões. Terei todo o prazer em publicá-las em nosso site.
|