|
English Translation by Moderation SIM-PSP Original Tutorial
MATERIAL
1 Main Tube of your choice
Alpha_Thinking_Out_Loud_byRoberta
Titulo_Thinking_Out_Loud_byRoberta Alien Skin Eye Candy 5
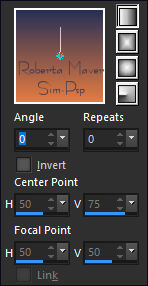
Impact Tramages Photo_Effex Extra Color: #14152d Paint with the Linear, Angle 0, Repeats 0 gradient, formed by the colors in use:
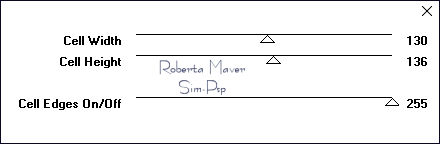
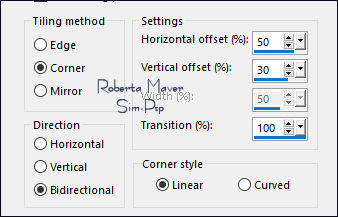
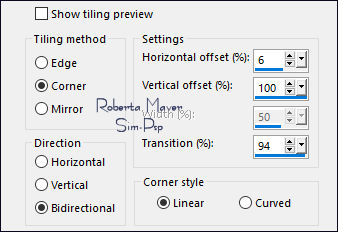
4 - Effects > Image Effects > Seamless Tiling:
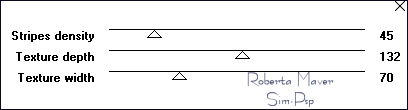
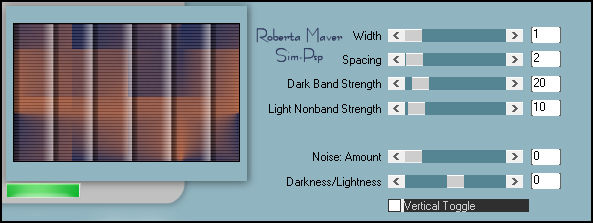
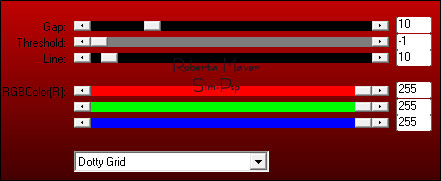
5 - Effects > Plugins > Tramages > Painel Stripes :
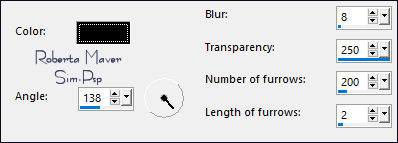
6 - Effects > Plugins > PhotoEffex > Scanlines :
7 - Layers > New Raster Layer. Selections > Select
All. Adjust > Sharpness >
Sharpen.
Layers > Properties > General > Blend Mode: Hard Light > Opacity: 30%
9 - Layers > New
Raster Layer. Layers > Duplicate. Layers > Merge > Merge Down. Activate the layer Raster 1
10 - Selections > Load/Save Selection > Load Selection From Alpha Channel: Selection #1 Selections > Promote Selection to Layer. Layer > Arrange > Move UP. Effects > Texture Effects > Fine Leather:
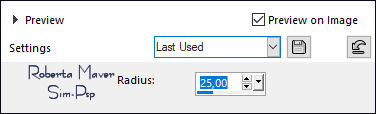
11 - Layers > New Raster Layer. Edit > Copy in Misted
Flower or Landscape Adjust > Blur > Gaussian Blur: 25 Effects > Texture Effects > Fine Leather:
Edit > Copy in Misted
Flower or Landscape Layers > Properties > General > Blend Mode: Hard Light > Opacity: 75% With the selection:
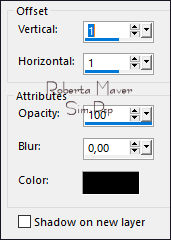
12- Layers > New Raster Layer. Effects > 3D Effects > Cutout:
Layers > Merge > Merge Down. 2 Vezes Activate the Layer Group - Raster 3 (Masks layer) Press the Delete key on the keyboard. Selections > Select None.
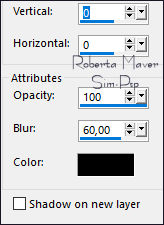
13 - Activate the Layer Promoted Selection. Effects > 3D Effects > Drop Shadow:
Activate the Layer Group - Raster 3 (Masks layer)
14 - Effects > Plugins > AP Lines > Lines - Silverlining: Dotty Grid
16 - Image > Add Borders > Symmetric: 2 px - color: Foreground
#e57b41 Adjust > Blur > Gaussian Blur: 25.
17- Effects > Plugins > Photo Effex > Scanlines :
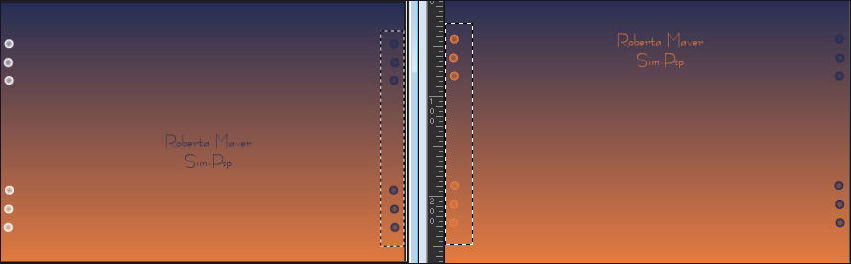
With the Select Tool,
select the buttons on the right;
Selections > Select None.
21 - Edit > Copy in the Main Tube.
Effects > 3D Effects > Drop Shadow: your choice. Colorize to your choice. Position of your choice.
Effects > 3D Effects > Drop Shadow: your choice.
CREDITS: Misted Flower: Tubed by Roberta Maver Mask: by Narah Mask
Feel free to send your versions. I will be happy to publish them on our website.
|