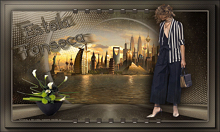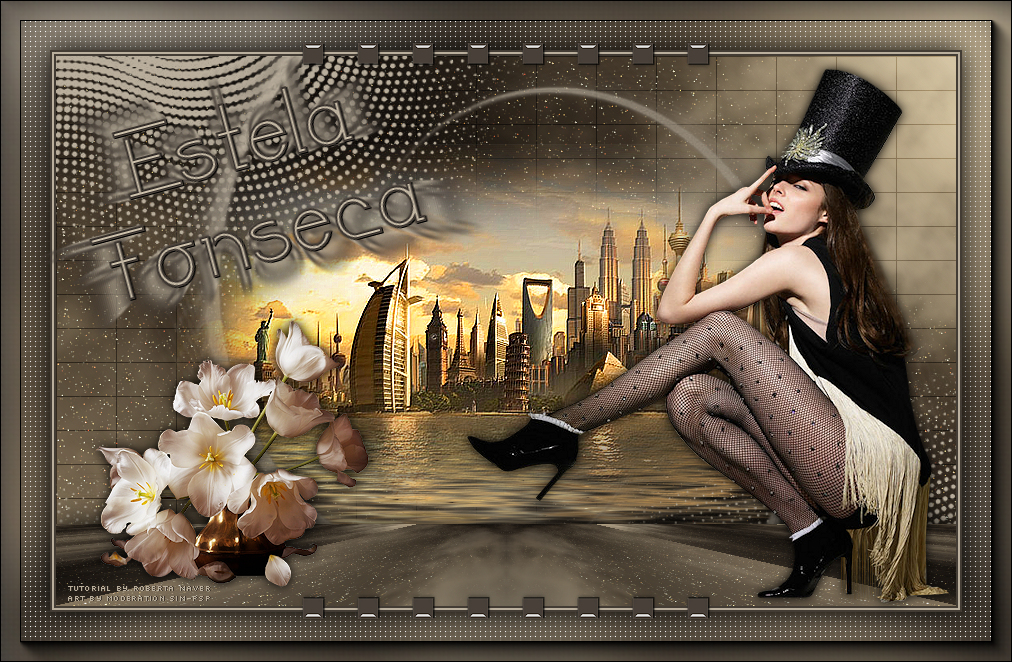 
Tutorial By RobertaMaver English Translation by SIM-PSP moderation Original Tutorial
"Tutorial dedicated to dear friend Estela Fonseca
MATERIAL 1 Main Tube of your choice 1 Misted Landscape of your choice 1 Decorative tube of your choice. Decor_Eslela_ Roberta NarahsMasks_1622 NarahsMasks_1623
PLUGINS AAA Frames Flaming Pear FM Tile Tools Plugin Toadies
TUTORIAL
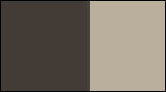
1 - Open the material on the PSP, duplicate and close the original. Choose two colors to work with. Foreground #433c36 Background #baaf9d
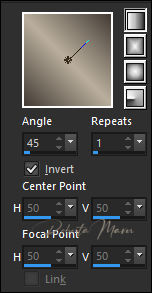
2 - Open a transparent image of 900 x 550 px. Paint with the gradient: Linear, Angle 45 , Repeats 1, Invert: Marked. formed by the colors in use.
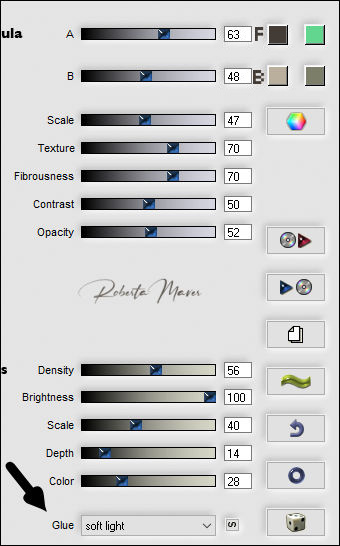
3 - Effects > Plugin Flaming Pear > Gliterato Change the color of square 1 and 3 to the colors in use: F: foreground color - B: Background color
4 - Adjust > Sharpness > Sharpen
5 - Layers > New Raster Layer. Paint with the gradient in use...
6- Effects > Plugin Toadies > ommadawn
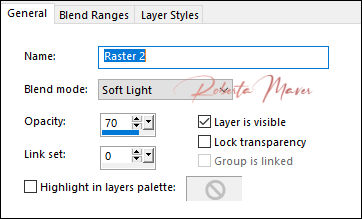
7 - Layers > Properties > General > Blend Mode: Soft light - Opacity: 70
8 - Edit > Copy in Misted Landscape. Edit > Paste as new layer. Adjust > Sharpness > Sharpen
9-
Layers > Duplicate.
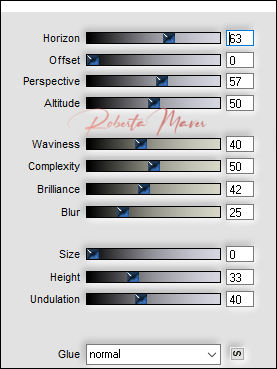
10- Effects > Plugins > Flaming Pear > Flood
Layers > Arrange > Move Down.
11- Layers > New Raster
Layer.
(this layer is between the original and the duplicate
Misted Landscape)
Paint
with the background color.
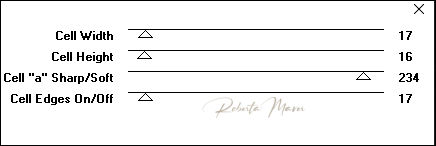
Layers > New Mask Layer > From Image:
NarahsMasks_1622.
Adjust > Sharpness >
Sharpen
Layers > Merge > Merge
Group.
12 - Layers > New
Raster Layer.
Paint with the background color.
Layers > New Mask Layer > From Image:
NarahsMasks_1623.
Layers > Duplicate.
Layers > Merge > Merge
Group.
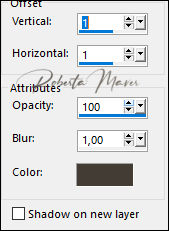
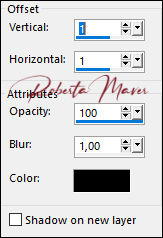
13 - Effects > 3D Effects > Drop Shadow: Color: Foreground #433c36
14 - Activate the Layer Raster 1. Layers > Duplicate.
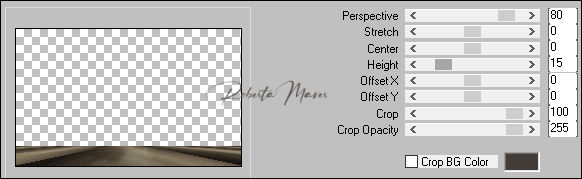
Layers > Arrange > Bring To Top. 15 - Effects > Plugins > MuRa's Filters Meister > Perspective Tiling:
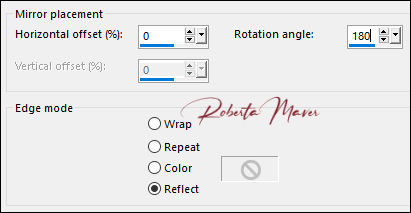
16- Effects > Reflection Effects > Rotation Mirror.
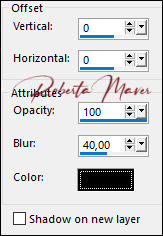
17 - Effects > 3D Effects > Drop Shadow:
18 -
Image > Add Borders:
2 px color: Foreground > #433c36 2 px color: Background > #baaf9d2 px color: Foreground> #433c36
19 - Selections > Select All.Edit > Copy Image > Add Bordes > 50px - simmetric - Any color. Selections > invert. Edit > paste into selection. Adjust > Blur > Gaussian Blur: 25
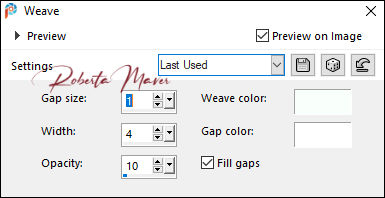
20 - Effects > Texture
Effects > Weave.
Weave color and Gap color:
#FFFFFF
21- Selections >
invert.
22 - Effects > 3D Effects > Drop
Shadow.
 Selections > Select
None.
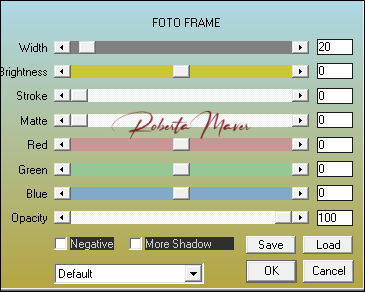
23 - Effects > Plugins
> AAA Frames > Foto Frame
 24 -
Edit > Copy
in the
decor_Estela_ByRoberta.
Edit > Paste a New Layer.
Adjust > Sharpness > Sharpen.
25 - Edit > Copy in the Main Tube. Edit > Paste a new Layer. Image > Resize > if necessary. Position.
Effects > 3D Effects > Drop Shadow:
your
choice
26- Layers > New Raster Layer. Write the text: Fonte LateNite - Size: 96 px - Direction: Text Flow
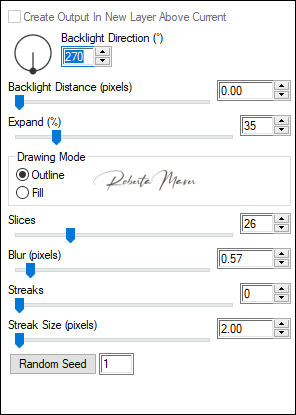
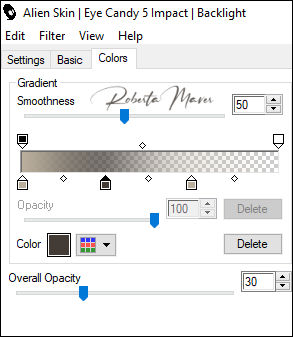
Selections > Promete Selection to layer. Selections > Select None Layers > Duplicate. I applied the effect of: Effects > Plugin Alien Skin Eye Candy 5 > Impact > Backlight
Layers > Arrange > Move Down.
27 - Activate the top layer Effects > 3D Effects > Drop Shadow:
Layers > Merge > Merge Down. Position to your choice. Layers > Merge > Merge All
28 -
If desired, resize your work.
Apply your watermark or signature. File > Export > JPEG Optimizer .
Crédits:
Tutorial by Roberta Maver
English Translation by Moderation SIM-PSP
Main Tube: Tubed by Leny
Decorative tube: Tubed by CibiBijoux
Misted Landscape: Tubed by Sônia Tubes
Masks: by NarahsMasks
Feel free to send your versions. I will be happy to publish them on our website.
|