|


TRADUÇÕES:


Obrigada aos nossos
Tradutores
MATERIAL:
1 Tube Principal à sua escolha
1 Misted Paisagem à sua escolha
Decor_byRobertaMaver
Titulo_byRoberta
PLUGINS:
Mehdi > Sorting Tiles
Toadies > Weaver
Filters Unlimited 2.0 > Distortion Filters> Refrator 2
AP Lines > Lines-Silverling: Dotty Grid
Mura's Meister > Perspective Tiling
Tutorial elaborado no PSP 2022
Obs.: Fique a vontade para mudar os Blends das layers,
pois dependendo das cores e imagens o resultado poderá mudar.
Execução
1 - Abrir o material no PSP, duplique e feche o original.
Escolher duas cores para trabalhar.
Foreground #588051
Background #c7dcbd

2 - Abra o arquivo AlphaChannel_HappyEaster_byRobertaMaver
Pintar com o gradiente Linear, Angle 90, Repeats 15, formado pelas
cores em uso:

3 - Selections > Select All.
Edit > Copy no Tube Principal.
Edit > Paste Into Selection.
Selections > Select None.
4 - Effects > Image Effects > Seamless Tiling: Default.
Adjust > Blur > Gaussian Blur: 25
Effects > Plugins > Mehdi > Sorting Tiles:

5 - Effects > Edge Effects > Enhance More.
Effects > Plugins > Toadies > Weaver:

6- Effects > Plugins > Filters Unlimited 2.0 > Distortion Filters >
Refrator 2:

7 - Adjust > Sharpness > Sharpen.
Layers > Duplicate.
Selections > Load/Save Selection > Load Selection From Alpha Channel:
Selection #1
Pressionar a tecla Delete no teclado.
Layer > Properties > General > Blend Mode: Multiply -
Opacity: 75%
Ainda Selecionada...
8 - Ativar a Layer Raster 1.
Selections > Promote Selection to layer.
Adjust > Blur > Gaussian Blur: 25
Effects > Texture Effects > Tiles.

9 - Edit > Copy no Misted Paisagem.
Edit > Paste as New Layer.
Image > Resize se necessário, no misted do material o
resize foi de 80%
Posicionar dentro da seleção.
Selections > Invert.
Pressionar a tecla Delete no teclado.
10 - Selections > Select None.
Ativar a layer topo.
Effects > 3D Effects > Drop Shadow: 0, 0, 100,30, Color: #000000
11 - Layers > New Raster Layer.
Selections > Load/Save Selection > Load Selection From Alpha Channel:
Selection #1
Selections > Modify > Select Selection Borders:

Pintar com a cor do
Foreground #588051
Selections > Select None.
12 - Effects > Plugins >AP Lines >
Lines-Silverling: Dotty Grid

Effects > 3D Effects > Drop Shadow: 0, 0, 100,30, Color: #000000
13 - Ativar a Raster 1.
Effects > Plugins >AP Lines > Lines-Silverling: Dotty
Grid
Effects > User Defined Filter: Emboss_3
14 - Edit > Copy no Misted Paisagem.
Edit > Paste As New Layer.
Image > Resize se necessário, no misted do material o
resize foi de 80%
Posicionar um pouco à direita.
Layer > Properties > General > Blend Mode: Opacity: 50%
15 - Ativar a layer Raster 1.
Layers > Duplicate.
Effects > Plugin > Mura's Meister > Perspective Tiling:

Effects > Reflection Effects > Rotating Mirror:
Default.
Effects > 3D Effects > Drop Shadow: 0, 0, 100,50, Color: #000000
Layer > Arrange > Move UP.
Posição da Layers:

16 - Image > Add Borders > Symmetric:
2 px - color: Background #c7dcbd
5 px - color: Foreground #588051
2 px - color: Background #c7dcbd
15 px - color: Foreground #588051
2 px - color: Background #c7dcbd
17 -
Selections > Select All.
Image > Add Borders > Symmetric: 30 px - color: Foreground
Selections > Invert.
18 - Effects > Plugins >AP Lines > Lines-Silverling: Dotty
Grid
Selections > Invert.
Effects > 3D Effects > Drop Shadow: 0, 0, 100,50, Color: #000000
Selections > Select None.
19 - Edit > Copy no Decor01_byRobertaMaver.
Edit > Paste as New Layer.
Layer > Properties > General > Blend Mode: Luminance
(Legacy) - Opacity: 100%
20 - Edit > Copy no Tube Principal.
Edit > Paste as New Layer.
Image > Resize se necessário, no tube do material o
Resize foi de 90%
e apliquei Image > Mirror > Mirror Horizontal.
Posicionar à direita.
Aplique Drop Shadow como preferir.
21 - Edit > Copy no Tube decorativo à sua escolha ou nos
tubes do material
Edit > Paste as New Layer.
Image > Resize se necessário:
5post (resize 50%) e Belscrap_Happy
Easter_El 51s (resize 50%)
Posicionar à esquerda como no modelo da tag
principal.
Aplique Drop Shadow como preferir.
22- Edit > Copy no Decor02_byRobertaMaver
Edit > Paste as New Layer.
Com a Ferramenta Pick Tool, posicionar: Position X: 53 Position Y:
17
23 - Edit > Copy no Titulo_byRobertaMaver
Edit > Paste as New Layer.
Colorize com a cor mais clara (background)
Posicionar onde preferir.
Aplique Drop Shadow à sua escolha ou nas
configurações: 1 / 3 / 100 / 0, com uma cor na
tonalidade mais escura do foreground (#10190f).
24- Image > Add Borders: 2 px - color: Background #c7dcbd
25- Se você desejar, redimensiona seu trabalho.
Aplicar sua marca d'água ou assinatura.
File > Export > JPEG Optimizer.
VERSÃO:


Créditos
Formatação e Tutorial by
Roberta Maver
Tube Principal : Tubed by
CibiBijoux
Misted Paisagem: by Violet
Tube Decorativo:
Bel Scrap
Créditos Versão
Tube Principal: Tubed by
Animabelle
Tube Coelho:
wieskes
Tube Decorativo:
Bel Scrap
Sinta-se à vontade para enviar suas versões.
Terei todo o prazer em publicá-las em nosso site.


|
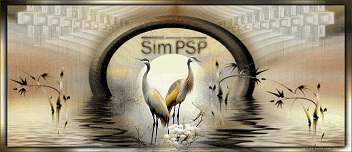
Tutorial criado por
Roberta Maver em Março/2023,
para
SIM-PSP.
Não poderá ser copiado, retirado de seu lugar, traduzido
ou utilizado em listas de aprendizados ou grupos sem o
consentimento prévio da autora. |
|