|
Por favor, reconheça e atribua os merecidos créditos àqueles que escrevem tutoriais, realizam traduções e criam os materiais.
Este Tutorial foi escrito por Márcinha, qualquer
semelhança é mera coincidência.
TRADUÇÕES:
Obrigada aos nossos tradutores!
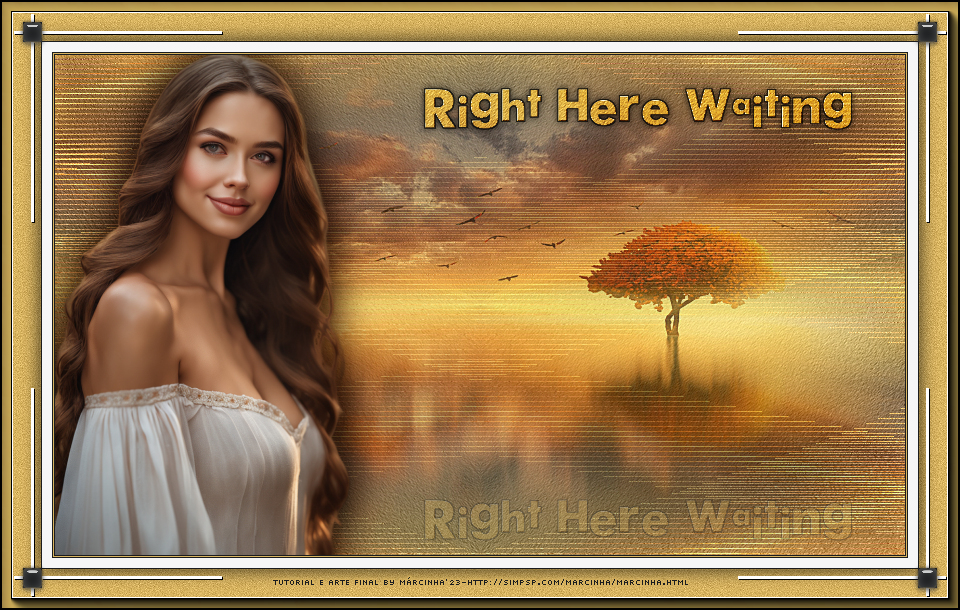
MATERIAL 1 Tube Principal à sua escolha 1 Misted Paisagem à sua escolha
Fique à vontade para mudar o Blend Mode e a Opaciade de acordo com as cores que estiver usando.
PLUGINS AAA Frames > Foto Frame MuRa's Seamless > Emboss Alien Skin Eye Candy 5: Impact > Glass
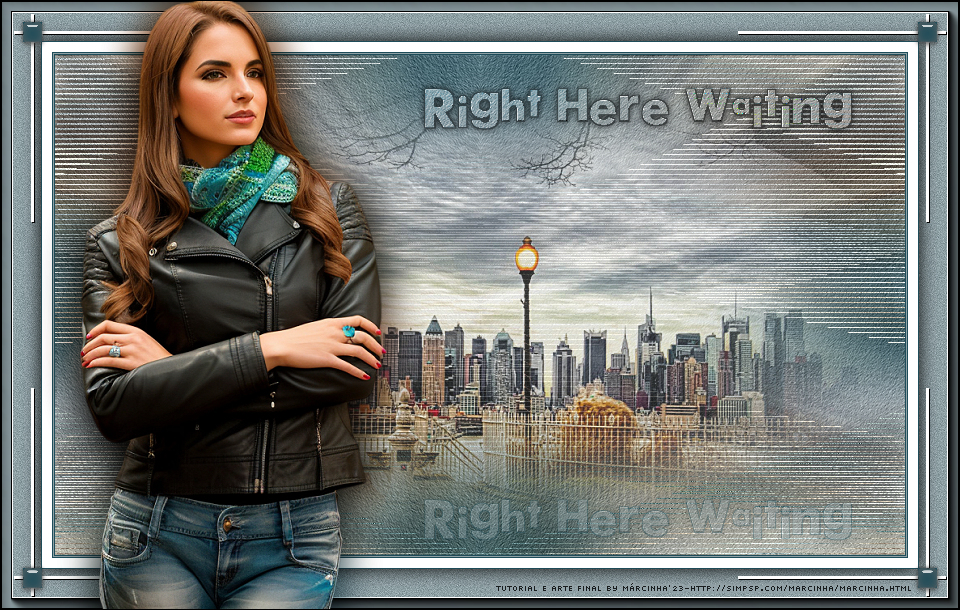
Tutorial elaborado no PSP 2020
TUTORIAL
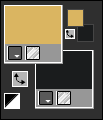
1 - Abrir o material no PSP, duplique e feche os originais. Escolher duas cores do Tube ou do Misted e mais a cores #ffffff (Branco) e #000000 (Preto).
Configure o Foreground e o Backgrdound Foreground: #dab561 - Background: #1c1d1e
2 - Abra uma Transparência de 850 x 500px. Pintar com a cor clara do Foreground. Selections > Select All.
3 - Edit > Copy no Misted paisagem.
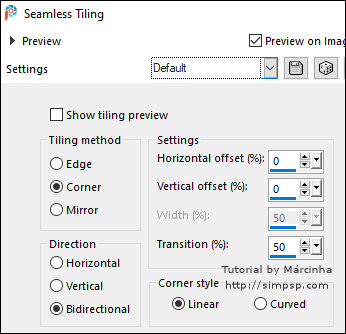
4 - Effects > Image Effects > Seamless Tiling: Default
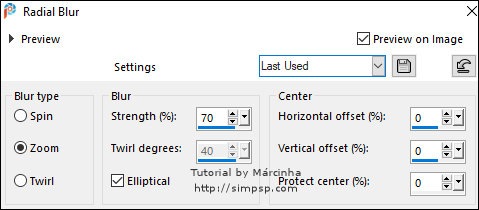
5 - Adjust > Blur > Radial Blur:
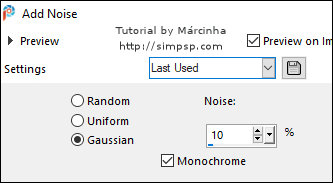
6 - Adjust > Add/Remove Noise > Add Noise:
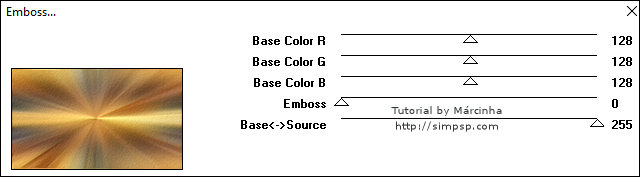
7 - Effects > Plugins > MuRa's Seamless > Emboss:
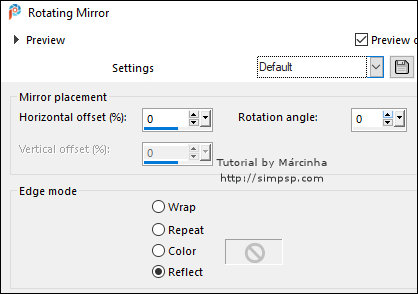
8 - Effects > Reflection Effects > Rotating Mirror: Default
9 - Layers > Duplicate.
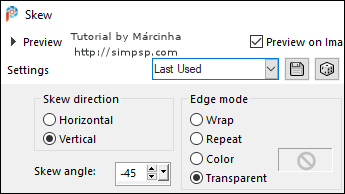
10 - Effects > Geometric Effects > Skew:
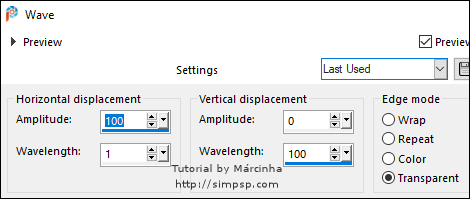
11- Effects > Distortion Effects > Wave:
12 - Effects > Reflection Effects > Rotating Mirror: Default
13 - Adjust > Sharpness > Sharpen. Effects > 3D Effects > Drop Shadow: 0 / 0 / 80 / 30 / Color: #000000 (Preto)
14 - Edit > Copy no Misted paisagem. Layers > Properties > General > Opacity: 65% Nota 1: Dependendo do Misted que usar o Opacity pode variar para mais ou para menos que 65%.Na 2ª Versão usei a opacidade em 70%
NOTA2: Se preferir colocar o Tube Principal depois de fazer as Bordas pule para o passo 16. Na minha 2ª Versão eu coloquei depois das bordas, antes de executar o passo 25.
15 - Edit > Copy no Tube Principal. Objects > Align > Bottom.
Objects > Align > Left. Layers > Duplicate. Adjust > Blur > Gaussian Blur: 20 Layers > Properties > General > Blend Mode: Multiply Layers > Arrange > Move Down.
10px - Color: cor Extra: #ffffff (Branco)
1px - Color: cor do Background. 17 - Image > Add Borders > Symmetric: 40px - Color: cor do Foreground. Selections > Invert.
19 - Selections > Invert. Effects > 3D Effects > Drop Shadow: 0 / 0 / 80 / 30 / Color: #000000 (Preto) Selections > Invert. Adjust > Sharpness > Sharpen. Selections > Select None.
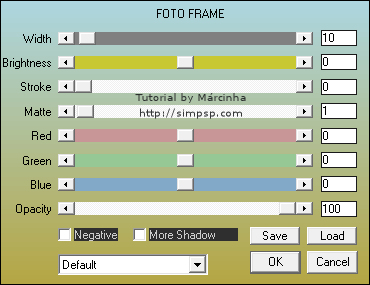
20 - Effects > Plugins > AAA Frames > Foto Frame:
21 - Layers > New Raster Layer. Selections > Load/Save Selections > Load Selection From Disk: Selection_01_RHW_byMarcinha Pintar as seleções com a cor #ffffff (Branco) ou outra cor à sua escolha. Selections > Select None. Effects > 3D Effects > Drop Shadow: 1 /1 / 100 / 0 / Color: #000000 (Preto)
22 - Layers > New Raster Layer. Selections > Load/Save Selections > Load Selection From Disk: Selection_02_RHW_byMarcinha Pintar as seleções com a cor do Background ou outra cor à sua escolha.
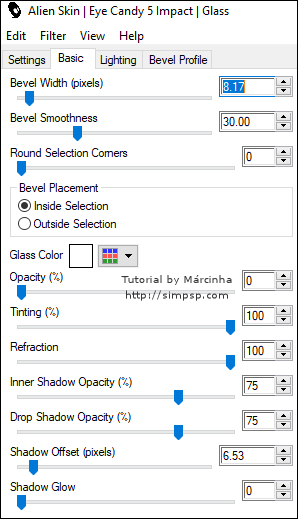
23 - Effects > Plugins > Alien Skin Eye Candy 5: Impact > Glass:
24 - Selections > Select None. Effects > 3D Effects > Drop Shadow: 0 /0 / 80 / 5 / Color: #000000 (Preto) Layers > Merge > Merge Down.
25 - Layers > New Raster Layer. Selections > Load/Save Selections > Load Selection From Disk: Selection_03_RHW_byMarcinha Pintar essas seleções com a cor do Foreground.
26 - Adjust > Add/Remove Noise > Add Noise:
27 - Effects > Plugins > MuRa's Seamless > Emboss:
28 - Layers > New Raster Layer. Selections > Modify > Expand: 1 Pintar essas seleções com a cor do Background. Selections > Select None.
29 - Layers > Arrange > Move Down. Ativar a layer Raster 2 (topo). Layers > Merge > Merge Down.
30 - Layers > Duplicate. Layers > Properties > General > Blend Mode: Hardy Light Nota3: Na 2ª Versão usei o Blend Mode: Luminance (L) Com a ferramenta Pick posicione: Position Y: 87 Effects > 3D Effects > Drop Shadow: 0 /0 / 40 / 10 / Color: #000000 (Preto)
31- Ativar a layer Raster 3. Layers > Properties > General > Blend Mode: Normal - Opacity: 30% Nota4: Na 2ª Versão usei o Opacity: 40%
32 - Image > Add Borders > Symmetric: 1px - Color: #000000 (Preto)
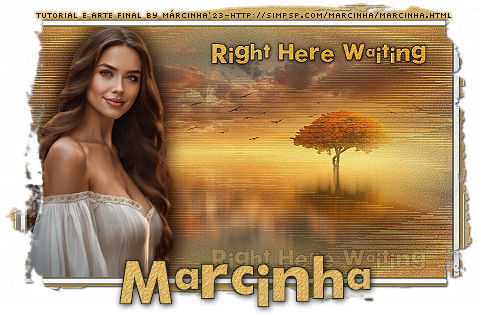
33 - Aplicar sua marca d'água ou assinatura. File > Export > JPEG Optimizer.
VERSÃO:
CRÉDITOS: Tutorial - Formatação e Arte Final by Márcinha Tube Principal e Misted Paisagem: Tubed by Pqna&Alice CRÉDITOS VERSÃO: Tube Principal e Misted Paisagem: Tubed by Pqna&Alice
Sinta-se à vontade para enviar suas versões. Terei todo o prazer em publicá-las em nosso site.
|