|
"Tutorial dedicado a minha querida vó e amiga virtual que se tornou real Vó Edith Gurgel. Obrigada por sua amizade, seu amor e tudo que fizeste por mim. Eu te amo!" Márcinha (PqnaAdoravel)
TRADUÇÕES:
Material: 1 tube principal à sua escolha. titulo_Edith
Plugins: Mehdi > Wavy Lab 1.1 Simple > Pizza Slice Mirror AAA Frames > Foto Frame MuRa's Meister > Perspective Tiling Carolaine and Sensibility > CS-Linear-H Alien Skin Eye Candy 5: Impact > Glass It@lian Editors Effect > EffettoFantasma
TUTORIAL:
01- Abra os materiais no PSP, duplique e feche os originais.
02- Escolha duas cores para o Foreground: #ff6776 - Background: #fdd8c8 e duas extras: #eee6c2 e #acb59e
03- Abra uma nova imagem de 900x500px. Effects > Plugin > Mehdi > Wavy Lab 1.1:
04- Effects > Image Effects > Seamless Tiling: Default. Adjust > Blur > Gaussian Blur: 30.
05- Plugin Simple > Pizza Slice Mirror. Layers > Duplicate. Image > Mirror > Mirror Horizontal. Layers > Properties > General > Opacity: 50 Layers > Merge > Merge Down. Effects > Edge Effect > Enhance.
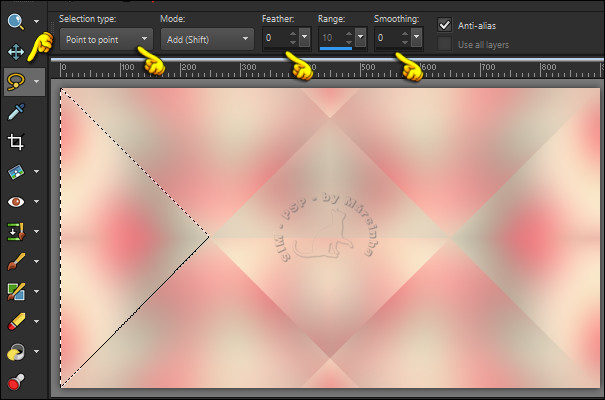
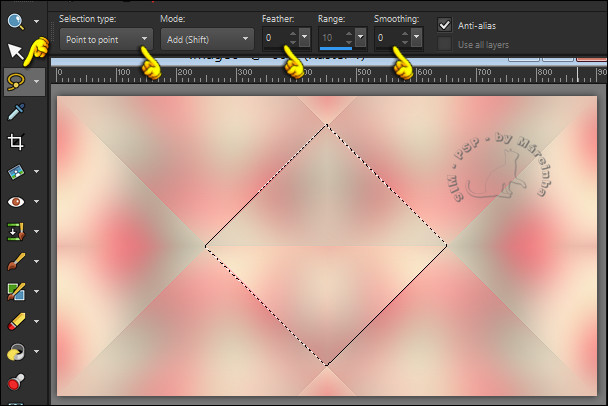
06- Layers > Duplicate. Fechar a visibilidade da layer Copy of Raster 1. Ativar a layer Raster 1. Com a Ferramenta Freehand Selection tool configurada como indicado, selecione o triângulo da esquerda:
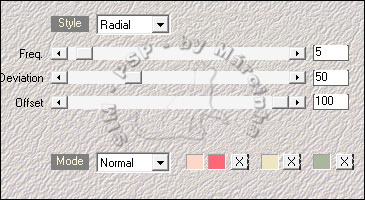
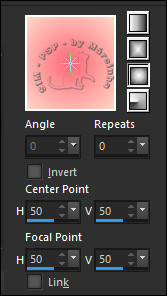
07- Layers > New Raster Layer. Selections > Modify > Expand: 02 Pintar essa seleção com o gradiente Sunburst, formado pelas cores do foreground e background:
08- Edit > Copy no tube principal. Edit > Paste as New Layer. Posicione parte do tube dentro da seleção:
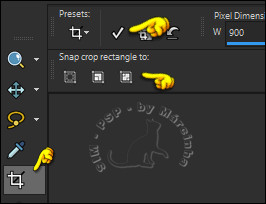
Selections > Invert. Aperte a tecla delete do teclado. Selections > Select None. Ferramenta Crop Tool > clique em Merged Opaque e em seguida Apply:
09- Layers > Properties > General > Blend Mode: Soft Light - Opacity: 70 Layers > Merge > Merge Down. Layers > Duplicate. Image > Mirror > Mirror Horizontal. Layers > Merge > Merge Down.
10- Fechar a visibilidade da layer Raster 2. Ativar a layer Raster 1. Com a Ferramenta Freehand Selection tool configurada como indicado, selecione o triângulo central:
11- Selections > Invert. Effects > 3D Effects > Drop Shadow: 0/0/100/50 color: Foreground: #ff6776 Repetir o Drop Shadow: 0/0/100/50 color: Foreground: #ff6776
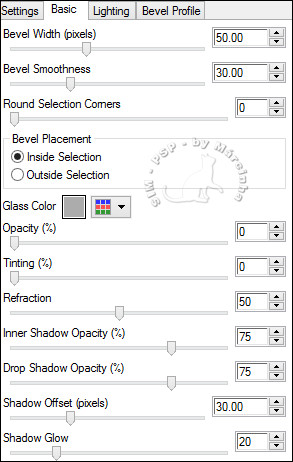
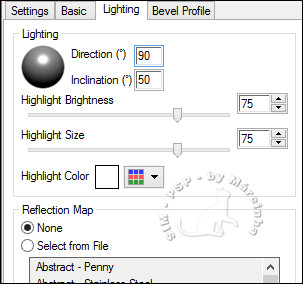
12- Selections > Invert. Effects > Plugins > Alien Skin Eye Candy 5: Impact > Glass Setting: Clear
13- Selections > Invert. Effects > Plugins > Carolaine and Sensibility > CS-Linear-H:
Adjust > Sharpness > Sharpen. Selections > Invert. Effects > 3D Effects > Drop Shadow: 0/0/100/50 color: #000000 Selections > Select None.
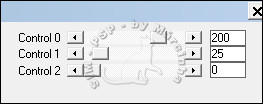
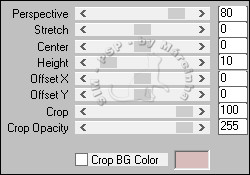
14- Ative e abra a visibilidade da layer Copy of Raster 1. Effects > Distortion Effects > Pinch: 100 Effects > Plugin MuRa's Meister > Perspective Tiling:
Effects > Edge Effect > Enhance. Effects > 3D Effects > Drop Shadow: 0/0/100/50, color: #000000
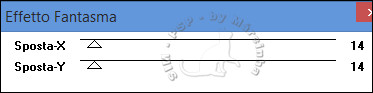
15- Ative e abra a visibilidade da layer Raster 2. Layers > Duplicate. Ative a layer Raster 2. Effects > Plugins > It@lian Editors Effect > EffettoFantasma:
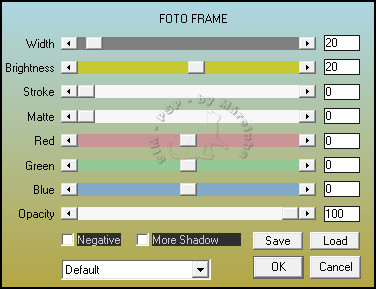
16- Layers > Merge > Merge All. Effects > Plugins > AAA Frames > Frame Foto:
17- Edit > copy no tube principal. Edit > Paste as New Layer. Posicione à sua escolha. Effects > 3d Effect > Drop Shadow: à sua escolha
18- Edit > copy no titulo_Edith Edit > Paste as New Layer. Posicione à sua escolha.
19- Image > Add Borders > Symmetric > 2px na cor #000000.
20- Se você desejar redimensione seu trabalho.
Créditos: Tube Mulher Tubed by Ana Ridzi Tuto by Marcinha'20
VERSÃO:
Créditos: Tube Mulher Tubed by NaraPamplona Tuto by Marcinha'20
Sinta-se à vontade para enviar suas versões. Terei todo o prazer em publicá-las em nosso site.
|