|
TRADUÇÕES
O Sim PSP valoriza e
reconhece o trabalho das tradutoras que tornam os tutoriais
acessíveis a diferentes idiomas.
Tutorial testado e revisado por Márcinha no PSP 2018
*********
Agradeço às Tubeiras pelos Tubes e Masks, pois sem eles não seria
possível criar este trabalho.
Sinta-se à vontade para adaptar os blends conforme as cores que
estiver utilizando.
Material: tema Ano Novo 1 Tube Principal - 1 Tube Decorativo e 1 Misted:
Plugins Mehdi > Sorting Tiles Simples > Top left Mirror Simples > Half Wrap AP_lines > Silver Lining > Dotty Grid Meister > Perspective Tiling Graphics Plus > Cross Shadow Cores #083eab Foreground #c2e7f7 Background
* Abrir o material no psp, fazer uma cópia e fechar o original. Escolha duas cores para trabalhar.
TUTORIAL
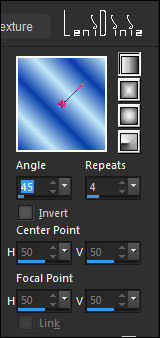
01- Abra a cópia da layer Alpha Channel, Pintar com um gradiente Linear formado pelas cores do foreground e background:
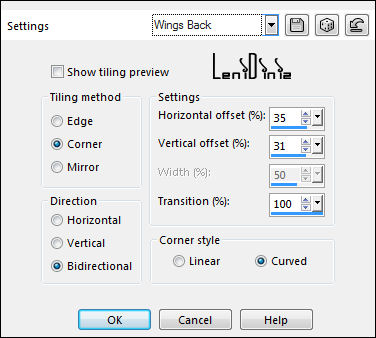
02- Effects > Image Effects > Seamless Tiling: Wings Back
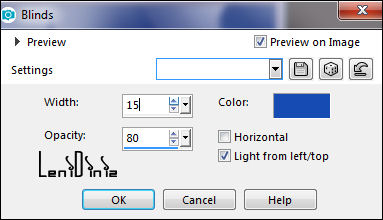
03- Adjust > Blur > Gaussian Blur: 25 Layers > Duplicate. Fechar a visibilidade da layer duplicada (Copy of Raster 1) 04- Ativar a layer Raster 1. Effects > Texture Effects > Blinds color #083eab Foreground
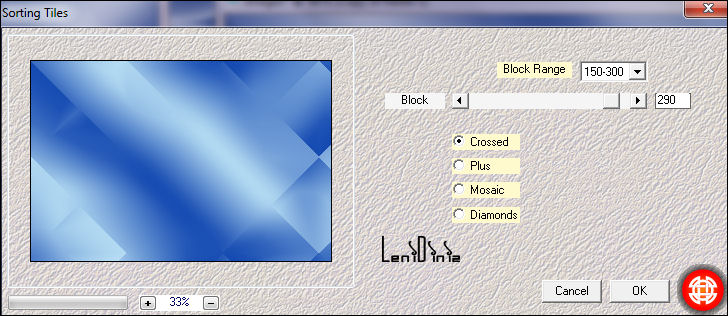
05- Abrir a visibilidade da layer duplicada (Copy of Raster 1) Effects > Plugins > Mehdi > Sorting Tiles:
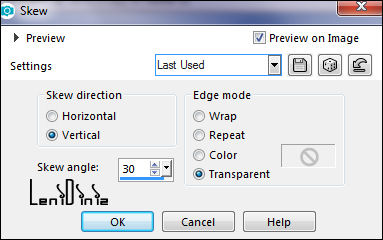
06- Effects > Edge Effects > Enhance More. Effects > Geometric Effects > Skew.
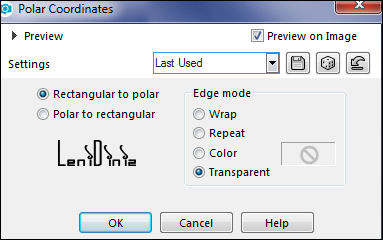
07- Effects > Distortion Effects > Polar Coordinates:
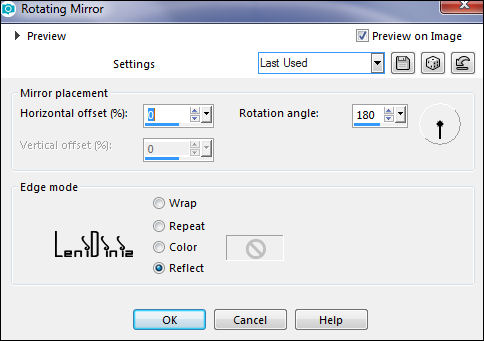
08- Effects > Reflection Effects > Rotating Mirror:
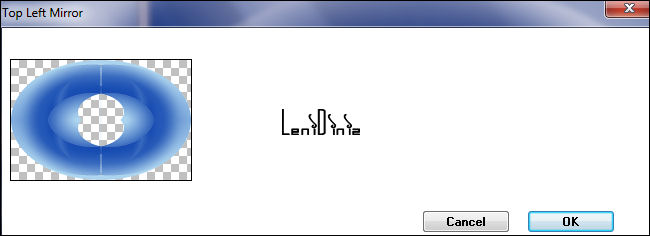
09- Effects > Plugins > Simples > Top left Mirror:
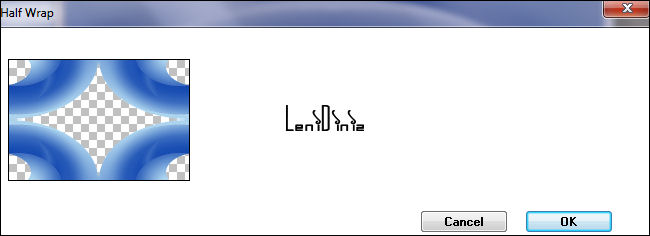
10- Effects > Plugins > Simples > Half Wrap:
11- Selections > Load/Save Selections > Load Selection from Alpha Channel > leni #1 Effects > Plugins > AP [Lines] Lines > SilverLining > Dotty Grid:
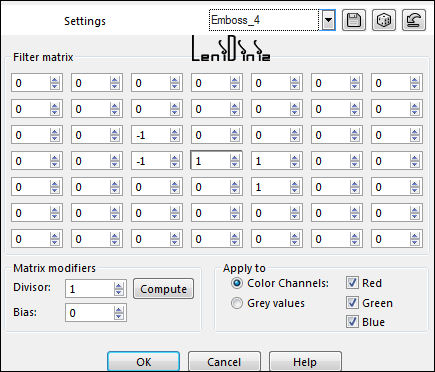
12- Effects > User Defined Filter: Emboss_4
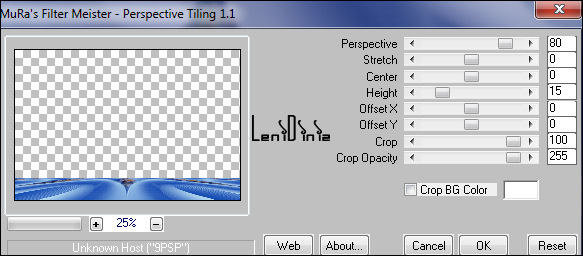
13- Selections > Select None. Effects > 3D Effects > Drop Shadow: 0, 0, 100, 30 color #083eab Foreground 14- Ativar a layer Raster 1. Edit > Copy no misted motivo Ano Novo ou paisagem Edit > Paste as New Layer. Image > Resize se for necessário, no misted do material resize foi de 65% Adjust > Sharpness > Sharpen. 15- Ativar a layer do topo. Edit > Copy Special > Copy Merged. Edit > Paste as New Layer. Effects > Plugins > Meister > Perspective Tiling:
16- Com a ferramenta Magic Wand Tool: Tolerance 0 e Feather 20,
clicar a na parte transparente dessa layer para selecionar. Aperte a tecla Delete do teclado 5 vezes. Selections > Select None. 17- Ativar a layer Copy of Raster 1. Edit > Copy no LeniDiniz-02_decor_snowflake.
Edit >
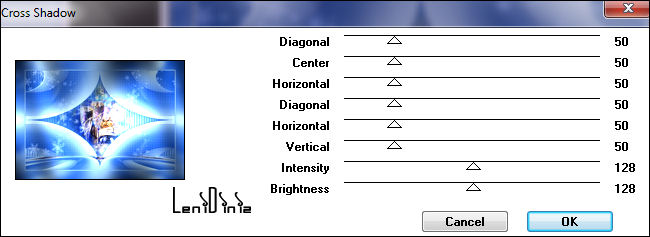
Paste as New Layer. 18- Ativar a layer do topo. Edit > Copy Special > Copy Merged. 19- Image > Add Borders > 1px - symmetric - color: #083eab Foreground 3px - symmetric - color: ##c2e7f7 Background 1px - symmetric - color: #083eab Foreground Selections > Select All. 20- Image > Add Borders > 50px - symmetric qualquer cor. Selections > Invert. 21- Edit > Paste Into Selection. Adjust > Blur > Gaussian Blur: 15 22- Effects > Plugins > Graphics Plus > Cross Shadow: Default
23- Selections > Invert. Selections > Select None. 24- Edit > Copy no tube principal. Edit > Paste as New Layer. Image > Resize se for necessário... no tube do material foi o resize de 137% com todas as layers desmarcadas Adjust > Sharpness > Sharpen. Posicionar à direita. Effects > 3D Effects > Drop Shadow: como preferir. 25- Edit > Copy no tube no decorativo. Edit > Paste as New Layer. Posicionar na parte superior à esquerda. Effects > 3D Effects > Drop Shadow: como preferir. 26- Edit > Copy no titulo_leni_happy_new_year Edit > Paste as New Layer. Posicionar onde preferir. Effects > 3D Effects > Drop Shadow: como preferir. 27- Image > Add Borders > 1px - symmetric - color: #083eab Foreground
28-
Aplicar sua marca d'água
ou assinatura. Leni Diniz VERSÃO:
Créditos: Formatação, Arte Final e Tutorial by LeniDiniz Tubes Principais - Decorativos e Misteds: Tubed by LeniDiniz
Sinta-se à vontade para
enviar suas versões.
Envie sua versão para o e-mail:
SimPSP Redes Sociais
|