TRADUÇÕES:
Este Tutorial foi escrito por Leni Dniz, qualquer
semelhança é mera coincidência. MATERIAL: 1 tube principal. Alpha_Channel_leni_olívia. Decor_leni_olívia. Título_leni_olívia
PLUGINS: VM Distortion > Circulator II Carolaine and Sensibility > CS-LDots VM Distortion > FlipChop FM Tiles Tool > Blend Emboss CORES: Foreground: #7d0f28 (cor escura) Background: #f5dac7 (cor clara)
Esteja à vontade pra mudar o Blend Mode de acordo com as cores que estiver usando. Abra os materiais no PSP. Duplique, minimize e feche os originais. Escolha duas cores para trabalhar.
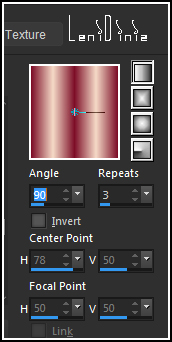
TUTORIAL 01- Ative a cópia alpha_channel_leni_olivia. Pintar com o gradiente Linear, formado pelas cores escolhidas: Angle: 90 Repeats: 3
02- Layers > Duplicate.
Permanecendo com a layer Copy
Raster 1 ativada...
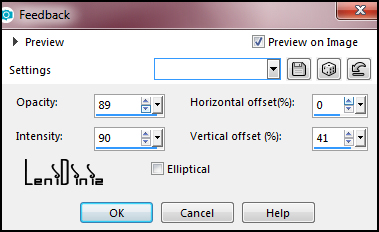
03- Effects > Reflections Effects > Feedback:
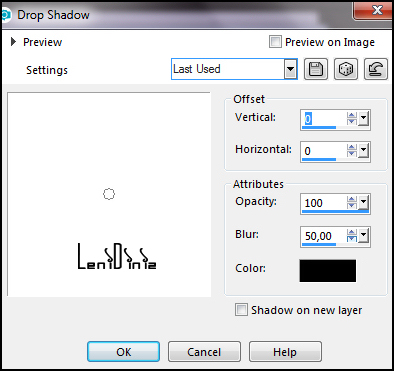
04- Effects > 3D Effects > Drop Shadow: 0, 0, 100, 50. color #000000
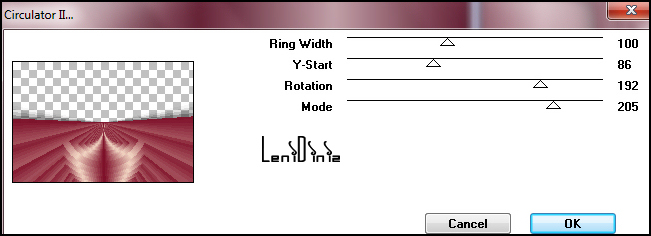
05- Effects > Plugins > VM Distortion > Circulator II
06- Effects > Edge effects > Enhance.
Ativar a layer
Raster 1.
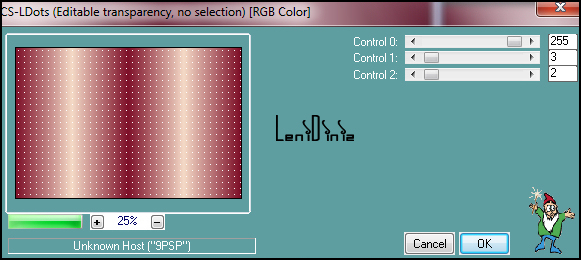
07- Effects > Plugins > Carolaine and Sensibility > CS-LDots:
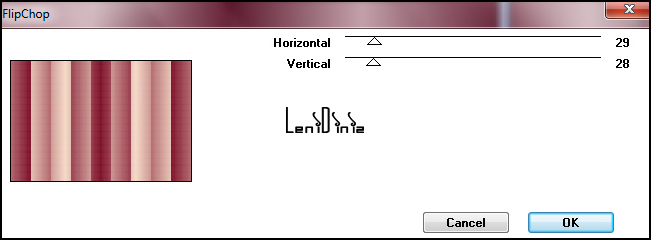
08- Effects > Plugins > VM Distortion > FlipChop:
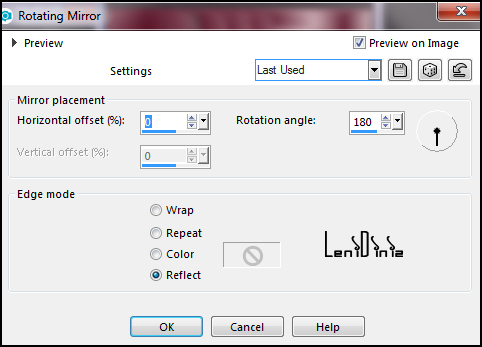
09- Effects > Reflection Effects > Rotating Mirror:
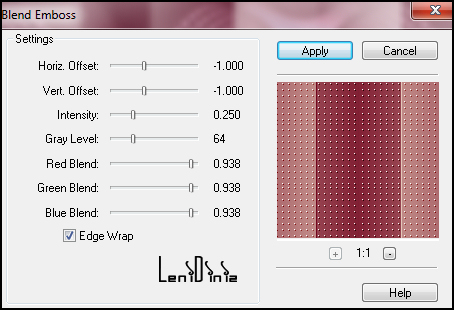
10- Effects > Plugins > FM Tiles Tool > Blend Emboss:
11- Layers > New Raster Layer
Selections > Load/Save
Selections > Load Selection from Alpha Channel: leni
#1 Edit > Copy. Voltando ao trabalho... Edit > Paste Into Selection.
12- Layers > Properties > General > Blend Mode: Luminance (L) > Opacity: 100% Ativar a layer Copy of Raster 1.
13- Edit > Copy Special > Copy Merged.
14- Image > Add Borders: 2px - symmetric - color #f5dac7 Background (cor clara) 4px - symmetric - color #7d0f28 Foreground (cor escura)
2px -
symmetric - color #f5dac7 Background (cor
clara) 15- Selections > Select All. Image > Add Borders > 50px - symmetric qualquer cor Selections > Invert.
Edit >
Paste Into Selection.
16- Effects > Plugins > Carolaine and Sensibility > CS-LDots
17- Selections > Invert. Effects > 3D Effects > Drop Shadow: 0, 0, 100, 50. color #000000
Selections > Select None.
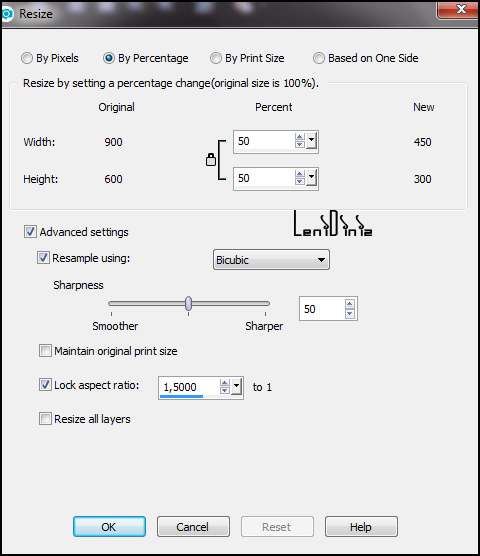
18- Ativar a cópia do tube principal Edit > Copy . Voltando ao trabalho... Edit > Paste as New Layer. Image > Resize: no tube do material o resize foi de 76%. Posicionar como exemplo, à esquerda. Adjust > Sharpness > Sharpen. Aplique Drop Shdow como preferir. 19- Ativar a cópia do título_leni_olívia. Edit > Copy. Voltando ao trabalho... Edit > Paste as New Layer. Posicione e aplique Drop Shadow como preferir.
20- Image > Add Borders: 2px - symmetric - color #f5dac7 Background (cor clara) 2px - symmetric - color #7d0f28 Foreground (cor escura)
21- Aplicar sua marca d'água ou assinatura. Aplicar a marca dos créditos Credit-Tuto_byLeniDiniz. Leni Diniz, 31-03-2025
Versão:
Créditos: Formatação, Arte Final e Tutorial by LeniDiniz Tubes Principais: Tubed by LeniDiniz
Sinta-se à vontade para enviar suas versões. Terei todo o prazer em publicá-las em nosso site.
|