|
TRADUÇÕES
Obrigada aos nossos tradutores!
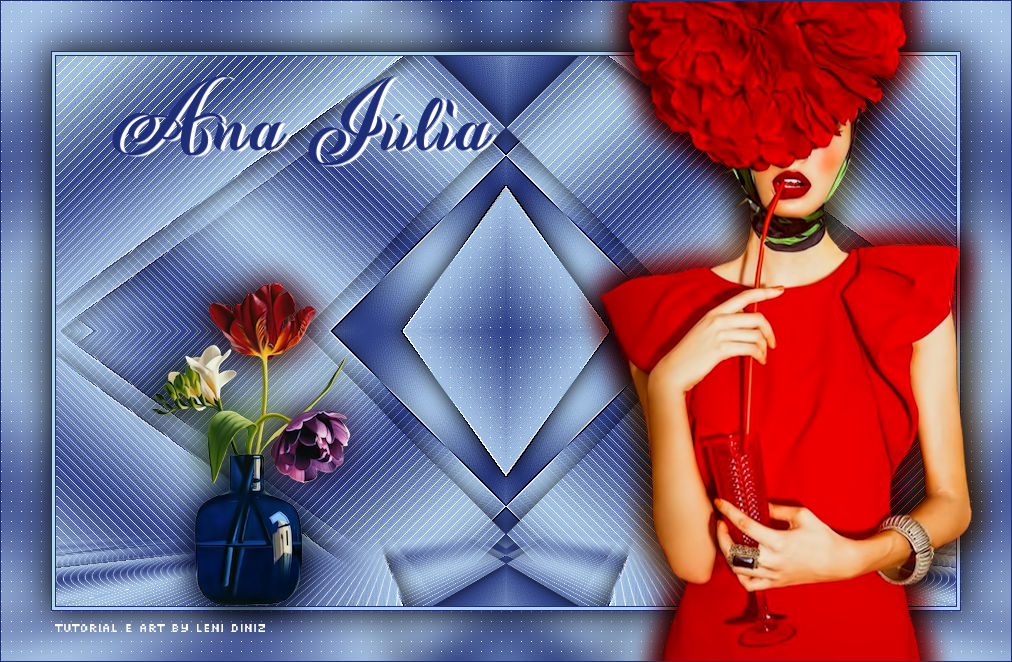
Material 1 tube principal à sua escolha 1 tube decoração à sua escolha alpha_channel_leni_ana_julia titulo_leni_ana_julia
Plugins Filters Unlimited 2 > &<Background Designers IV > @Kalesdoscope Simple > Top Left Mirror Simples > Blintz Simples > Left Right Wrap AP Lines > Lines-SilverLining Mura's Seamless > Emboss at Alpha Mura's Meister > Perspective Tiling Cores #1d2d78 (Forenground cor escura) #b5d5f1 (Background cor clara)
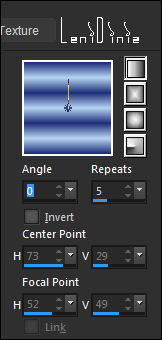
TUTORIAL 01- Escolha 2 cores para trabalhar. 02- Abrir o material no psp, copie e feche o original. Ativar a cópia do alpha_channel_leni_ana_julia. Pintar com um gradiente Linear, formado pelas cores escolhidas:
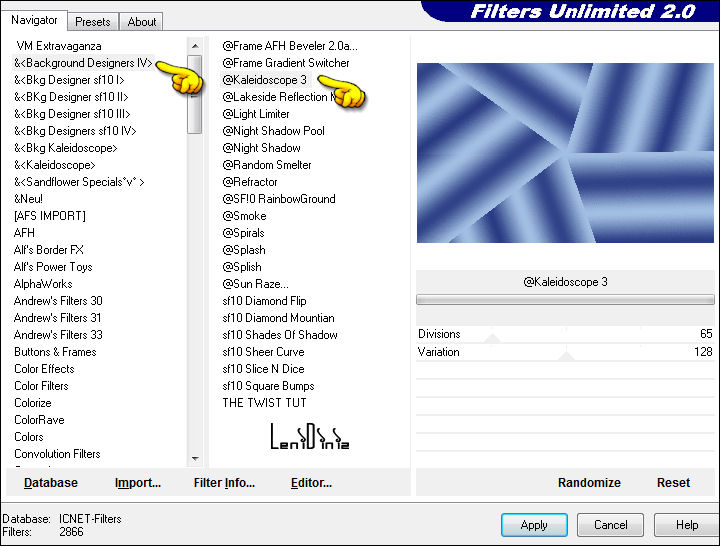
03- Adjust > Blur > Gaussian Blur: 15. 04- Effects > Plugins > Filters Unlimited 2 > &<Background Designers IV > @Kalesdoscope 3: Default
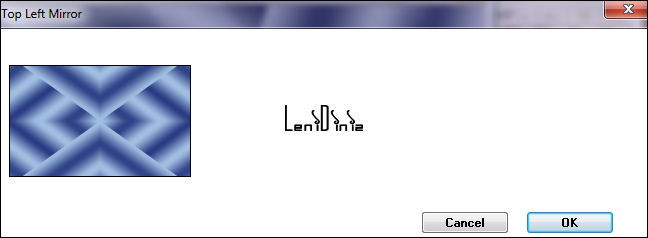
05- Effects > Plugins > Simple > Top Left Mirror:
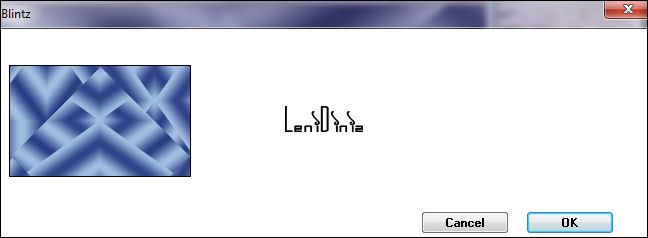
06- Effects > Plugins > Simples > Blintz:
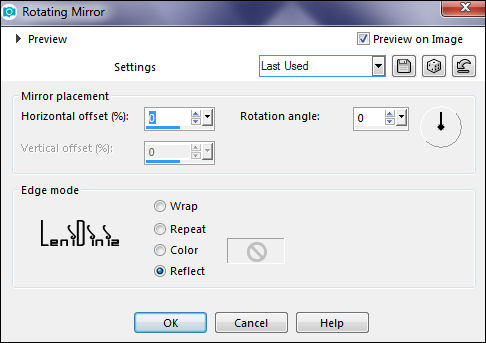
07- Effects > Reflection Effects > Rotating Mirror: Default
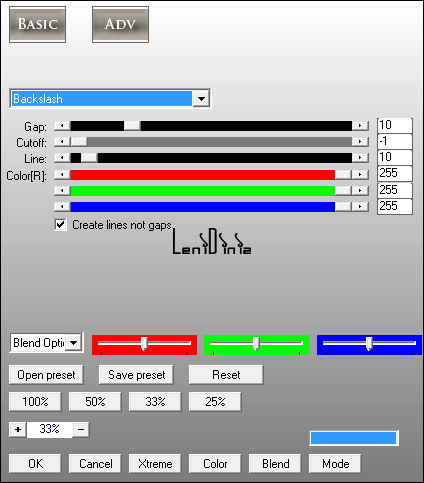
08- Image > Mirror > Mirror Vertical. Effects > Edge Effects > Enhance More. 09- Selections > Load/Save Selections > Load Selection from Alpha Channel: leni #1 Selections > Promote Selection to layer. 10- Effects > Plugins > AP Lines > Lines-SilverLining: Backslash
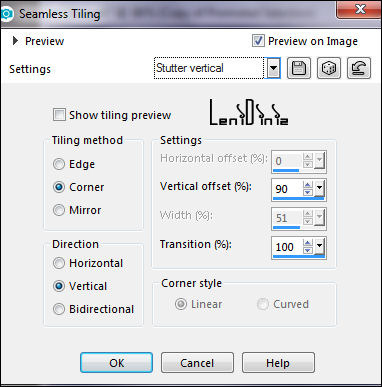
11- Effects > 3D Effects > Drop Shadow: 0 > 0 > 100 > 30, Color: #000000 Selections > Select None. 12- Effects > Image Effects > Seamless Tiling: Stuter Vertical:
13- Fechar a visibilidade da layer Promoted Selection Ativar a layer Raster 1. 14- Selections > Load/Save Selections > Load Selection from Alpha Channel: leni #2
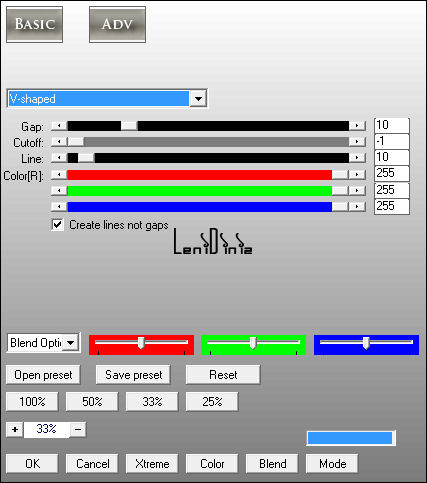
Selections > Promote Selection to layer. 15- Effects > Plugins > AP Lines > Lines-SilverLining: V-shaped
16- Effects > 3D Effects > Drop Shadow: 0 > 0 > 100 > 30, Color: #000000 Selections > Select None. 17- Effects > Image Effects > Seamless Tiling: Stuter Vertical:
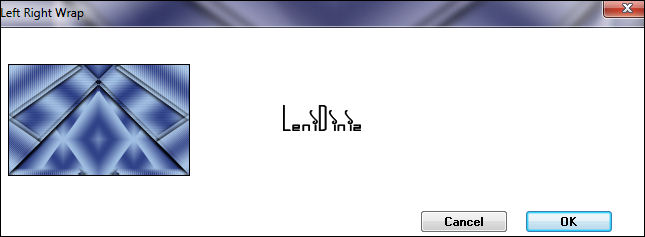
18- Abrir a visibilidade da layer Promoted Selection. 19- Layers > Merge > Merge Visibile. 20- Effects > Plugins > Simple > Left Right Wrap:
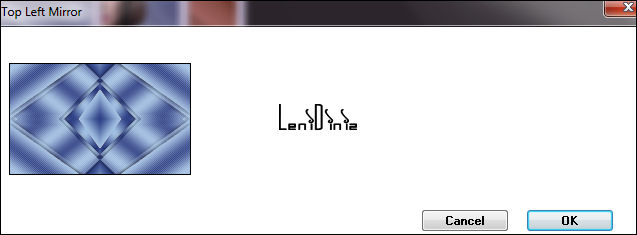
21- Effects > Plugins > Simple > Top Left Mirror:
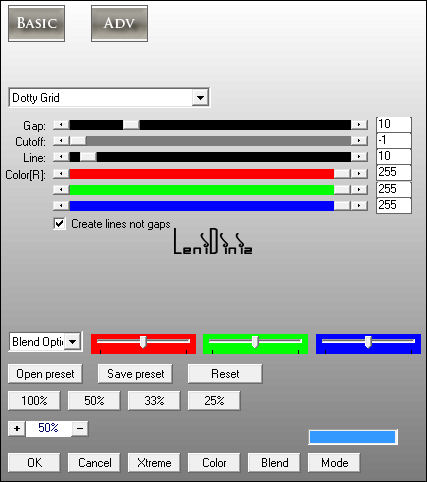
22- Selections > Load/Save Selections > Load Selection from Alpha Channel: leni #3 Effects > Plugins > AP Lines > Lines-SilverLining: Dotty Grid
23- Effects > Plugins > Mura's Seamless > Emboss at Alpha: Default. Effects > 3D Effects > Drop Shadow: 0 > 0 > 100 > 30, Color: #000000
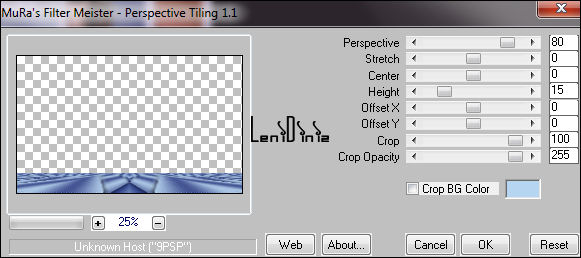
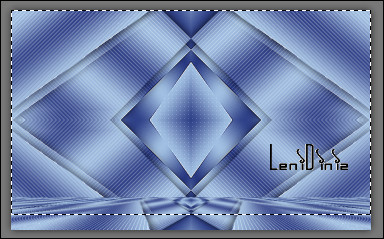
24- Selections > Select None. Layers > Duplicate. 25- Effects > Plugins > Mura's Meister > Perspective Tiling:
26- Com a ferramenta Magic Wand: Tolerance 0 e Faether 40:
clicar na parte transparente para selecionar:
Pressionar a tecla deleta no teclado por 7 vezes. 27- Selections > Select None. 28- Edit > Copy Special > Copy Merged. 29- Image > Add Bordes: 1px - symmetric - color: #1d2d78 (Foreground cor escura) 3px - symmetric - color: #b5d5f1 (Background cor clara) 1px - symmetric - color: #1d2d78 (Foreground cor escura) 30- Selections > Select All. Image > Add Bordes > 50px - symmetric qualquer cor Selections > Invert. 31- Edit > Paste into Selection. Adjust > Blur > Gaussian Blur: 15. 32- Effects > Plugins > AP Lines > Lines-SilverLining: Dotty Grid
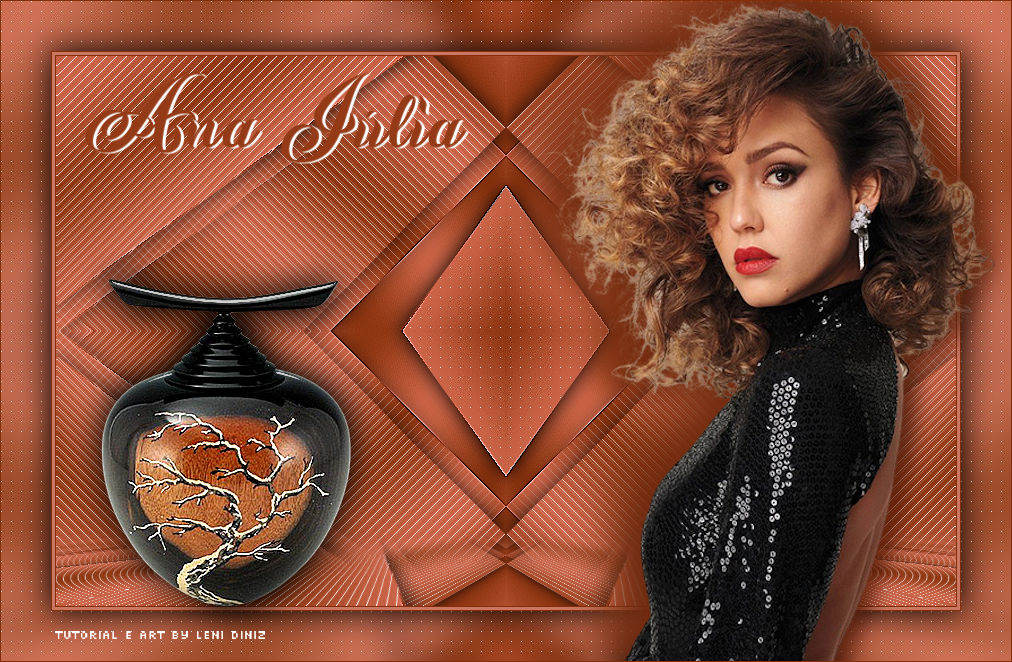
33- Effects > Plugins > Mura's Seamless > Emboss at Alpha: Default 34- Selections > Invert. Effects > 3D Effects > Drop Shadow: 0 > 0 > 100 > 45, Color: #000000 35- Selections > Select None. 36- Edit > Copy no tube principal. Edit > Paste as New Layer. Image > Resize se for necessário. Posicionar à sua escolha. Effects > 3D Effects > Drop Shadow à sua escolha. 37- Edit > Copy no tube decoração. Edit > Paste as New Layer. Image > Resize se for necessário. Posicionar à sua escolha. Effects > 3D Effects > Drop Shadow à sua escolha. 38- Edit > Copy no título_leni_ana_julia. Edit > Paste as New Layer. Posicionar à sua escolha. Effects > 3D Effects > Drop Shadow à sua escolha. 39- Image > Add Bordes > 1px - symmetric - color: #1d2d78 (Foreground cor escura) 40- Aplicar sua marca d'água ou assinatura. Leni Diniz, Agosto de 2022.
VERSÃO:
Créditos: Formatação, Arte Final e Tutorial by LeniDiniz Tube Principal: Tubed by Callitubes Tubes decoração: Tubed by LeniDiniz Créditos Versão: Tubes Principal e Decoração: Tubed by LeniDiniz
Sinta-se à vontade para
enviar suas versões.
|