|
Tutorial By
LeniDiniz
MATERIAL 1 Main Tube of your choice 1 Misted Landscape of your choice Decor_leni_michelinne alpha_leni_michelinne
PLUGINS Mehdi > Wavy Lab Filters Unlimited > Plugins AB 01 > Fragments of Last Nights Dream Filters Unlimited > & Bkg Designer sf 10 I > Cruncher Carolaine and Sensibility
COLORS Color 1 > #89190d (Foreground Dark color) Color 2 > #fbe47c (Background Light color) Color 3 > #df6428
TUTORIAL
01- Open the material on the psp, copy and close the original.
Change the Blend Mode according to the colors you are working with.
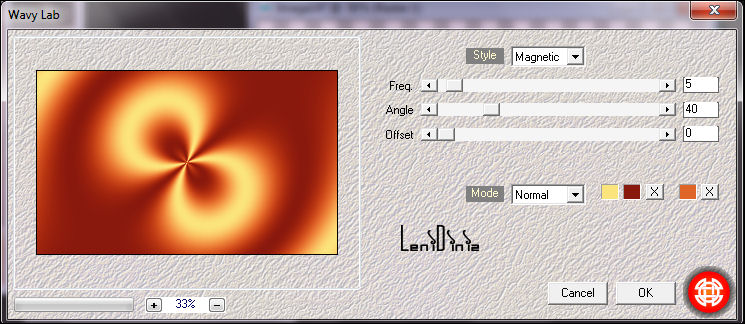
02 - Choose 3 colors to work with. Activate the alpha_leni_michelinne. Effects > Plugins > Mehdi > Wavy Lab: Following the sequence of colors 2 - 1 - 3
03 - Effects > Image Effects > Seamless Tiling: Default.
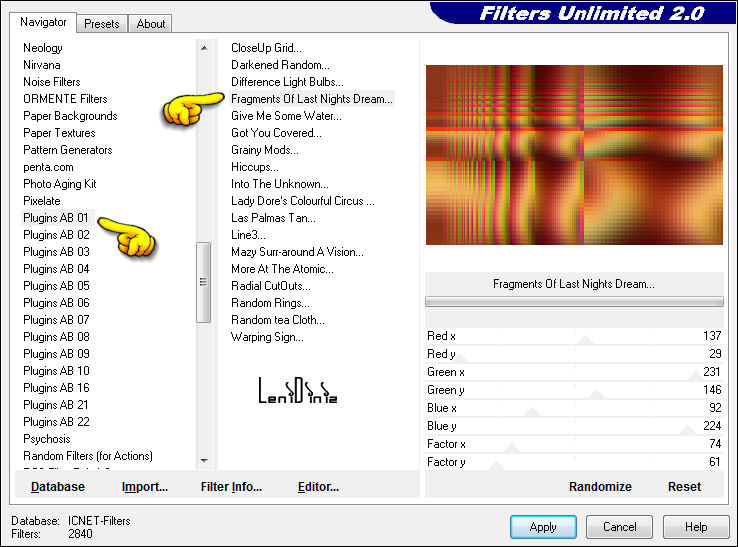
04 - Adjust > Blur > Gaussian Blur: 35 05 - Effects > Plugins > Filters Unlimited > Plugins AB 01 > Fragments of Last Nights Dream
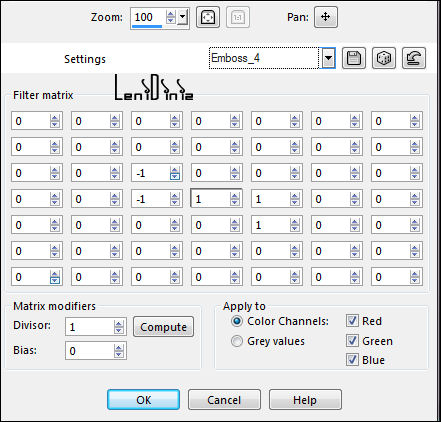
06 - Effects > User Defined Filter: Emboss 4
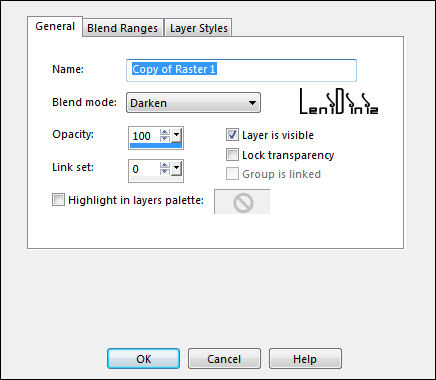
07 - Layers > Duplicate. Image > Mirror > Mirror Horizontal. 08 - Layers > Properties > General > Blend Mode: Darken - Opacity: 100
09 -
Form a Linear gradient formed by the
Foreground and Background colors:
10 - Layers > New Raster Layer. Selections > Load/Save Selections > Load Selection from Alpha Channel: leni #1
Paint the selection with the Linear gradient.
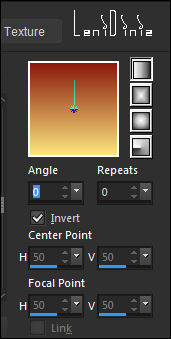
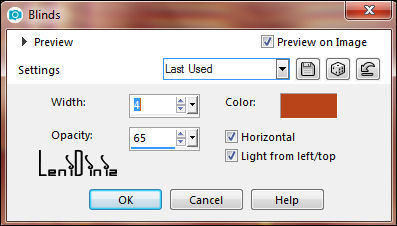
11- Effects > Texture Effects > Blinds Color #89190d (Foreground)
12 - Effects > User Defined Filter: Emboss_4
13 - Effects > 3D Effects > Drop Shadow: 0 > 0 > 100 > 30, Color: #000000. Still selected... Layers > New Raster Layer. 14 - Edit > Copy the Misted Landscape.
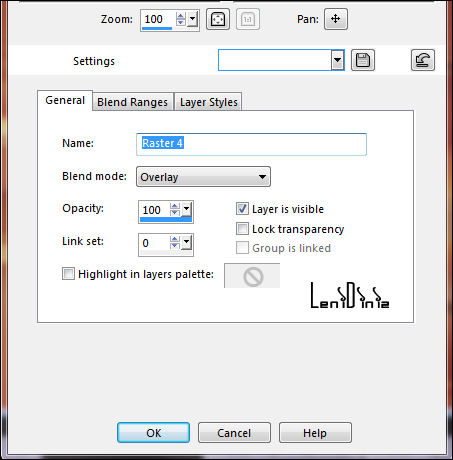
Edit > Paste Into Selection. Layers > New Raster Layer.
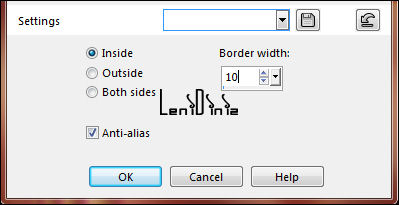
15 - Selections > Modify > Select Selection Borders:
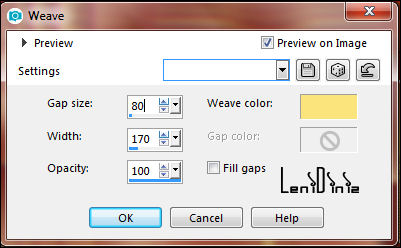
16 - Paint the selection with the Foreground color. 17 - Effects > Texture Effects > Weave: Weave color: Background color
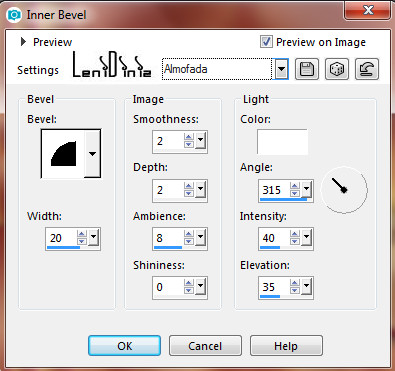
18 - Effects > 3D Effects > Inner Bevel:
Layers > Merge > Merge Down. Edit > repeat Merge Down. 19 - Selections > Select None. 20 - Edit > Copy the decor_leni_michelinne. Edit > Paste as New Layer. Layers > Duplicate. Layers > Merge > Merge Down. 21- Effects > User Defined Filter: Emboss_4
22 - Layers > Properties > General > Blend Mode: Overlay - Opacity: 100
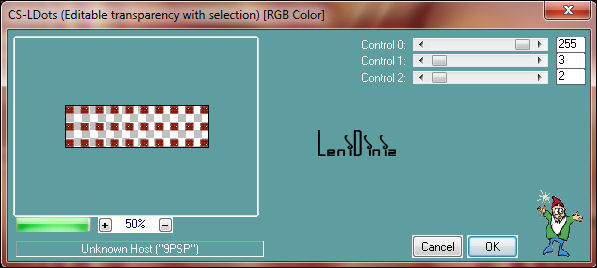
23 - Layers > New Raster Layer. Selections > Load/Save Selections > Load Selection from Alpha Channel: leni #2 Paint the selection with the Foreground color. Effects > Plugins > Carolaine and Sensibility > CS-LDots:
Selections - Select None
24 - Effects > 3D Effects > Drop Shadow: 1 > 1 > 60 > 2, Color: #000000 25 - Layers > Duplicate. Pick Tool: Position X: 126 Position Y: 421 26 - Image > Add Borders: 1px - symmetric - color #89190d (Foreground) 3px - symmetric - color #fbe47c (Background) 1px - symmetric - color #89190d (Foreground) 27 - Selections > Select All. 28 - Image > Add Borders > Symmetric: 50px with any color. Selections > Invert. 29 - Effects > Plugins > Mehdi > Wavy Lab: Following the sequence of colors 2 - 1 - 3
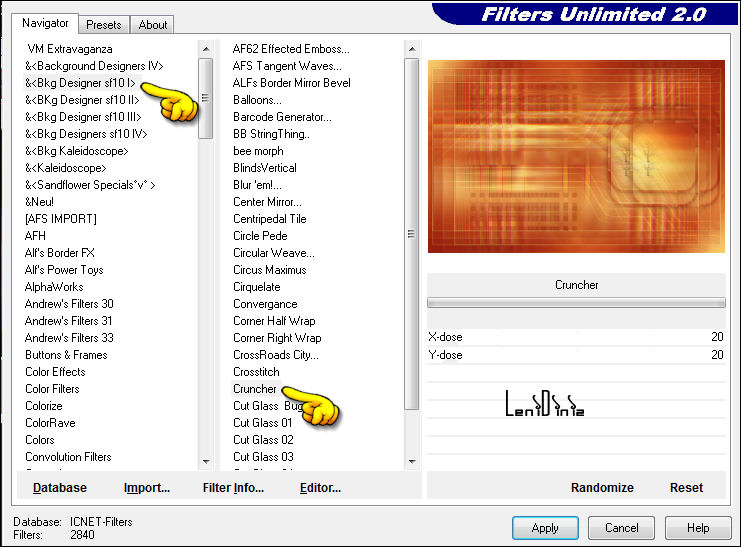
30- Effects > Plugins > Filters Unlimited > & Bkg Designer sf 10 I > Cruncher :
31 - Selections > Invert. Effects > 3D Effects > Drop Shadow: 0, 0, 100, 45, color: #000000. Selections > Select None. 32 - Edit > Copy the Main Tube. Edit > Paste as New Layer. Image > Resize if necessary. Adjust > Sharpness > Sharpen. Effects > 3D Effects > Drop Shadow: your choice. 33 - Edit > Copy no titulo_leni. Edit > Paste as New Layer. Position at your choice. Effects > 3D Effects > Drop Shadow: your choice. 34 - Image > Add Borders > Symmetric: 1px - color #89190d (Foreground) 35 -
Apply your watermark or signature.
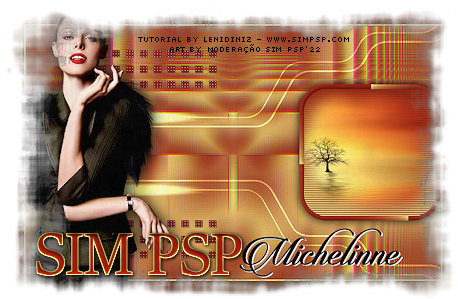
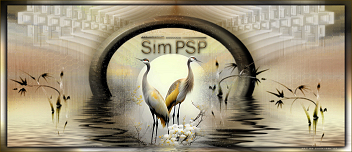
CREDITS: Tutorial by LeniDiniz English Translation by Moderation SIM-PSP Main Tube: Tubed by Luz Cristina Misted Landscape: by LeniDiniz
Feel free to send your versions.
|