|
Tutorial By
LeniDiniz
English Translation by SIM-PSP moderation
Original Tutorial
Material
1
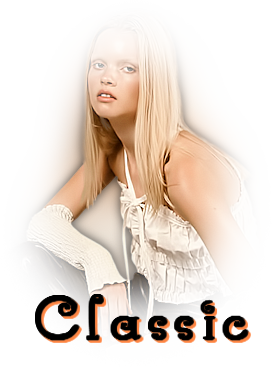
Main Tube of your choice.
1
Decorative Tube of your choice.
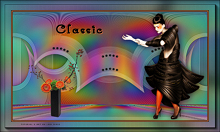
fractal_grafico
Decor_leni_classic.
tituo_leni_classic.
Plugins
Filter Unlimited
Toadies
Carolaine e Sensibility
Flamig Pear
Mura's Meister
Colors
Foreground:
#000000
Background: #ff8543

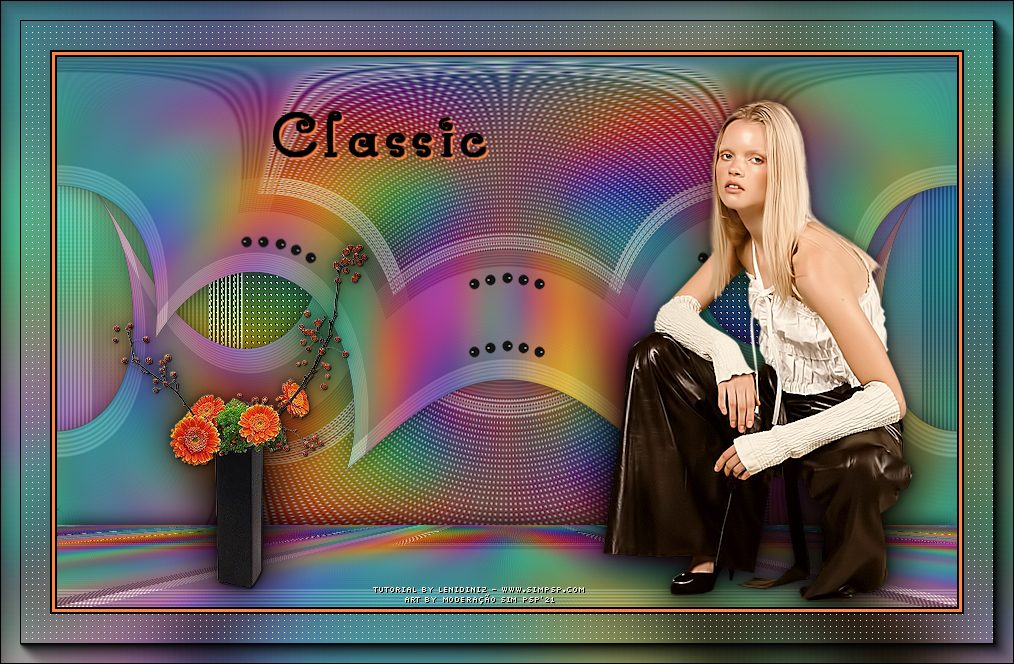
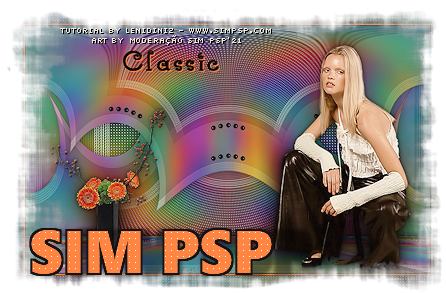
TUTORIAL
01- Open the
material in PSP, duplicate and close the original.
Activate the file alphachanel_classic_leni.
Selections > Select All.
Edit > Copy the fractal_grafico.
Edit > Paste Into Selection.
Selections > Select None.
02- Effects > Image Effects > Seamless Tiling: Default.
Adjust > Blur > Gaussian Blur: 25

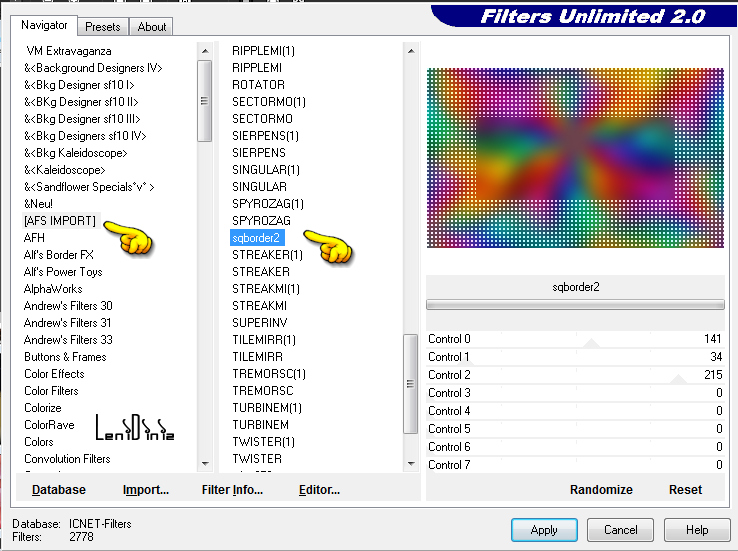
03- Effects > Plugins > Filter Unlimited > AFS Import > sqborder:
Default
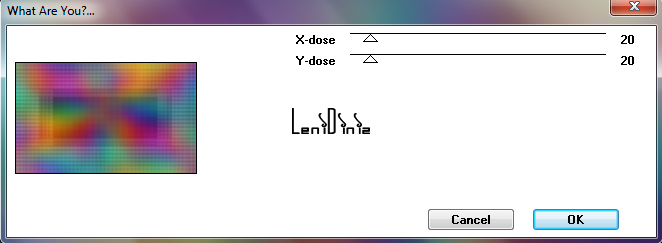
04- Effects > Plugins > Toadies > What Are You?...:
Default
05- Selections > Load/Save Selection > Load Selection from Alpha
Chanel: classic_leni
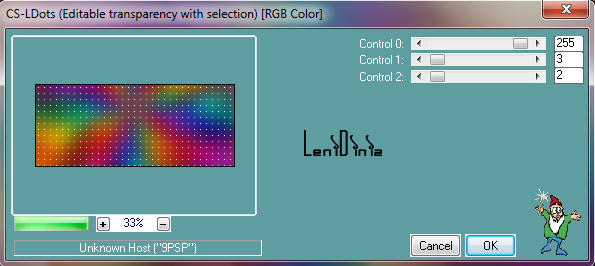
Effects > Plugins > Carolaine and Sensibility > CS-LDots:
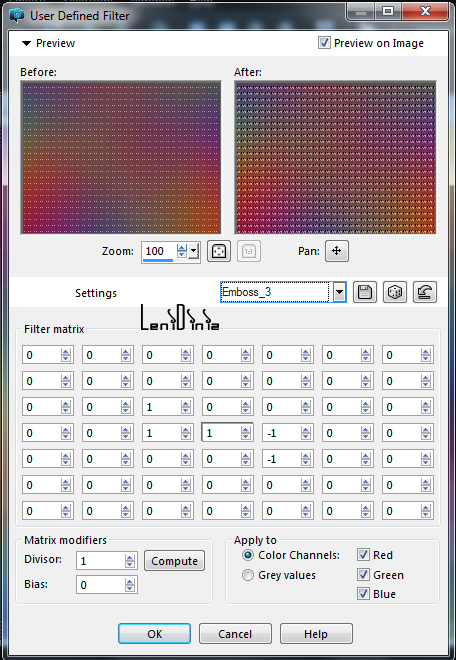
06- Effects > User Defined Filter > Emboss 3:
07- Adjust > Sharpness > Sharpen.
Selections > Select > None.
08- Layers > Duplicate.
Image > Resize 60% with all layers unchecked.
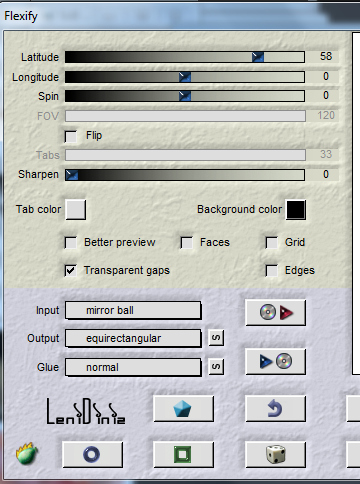
09- Effects > Plugins > Flamig Pear > Flexify:
10- Image > Mirror > Mirror Vertical.
Effects > 3D Effects > Drop Shadow:
0 > 0 > 40 > 30, Color: #000000
11- Activate the Layer Raster 1.
Layers > Duplicate.
Image > Resize > 70% with all layers unchecked.
12- Effects > Plugin Flamig Pear > Flexify:
Effects > 3D Effects > Drop Shadow:
0 > 0 > 40 > 30, Color: #000000
13- Activate the Layer Raster 1.
Layers > Duplicate.
Layers > Arrange > Bring to top.
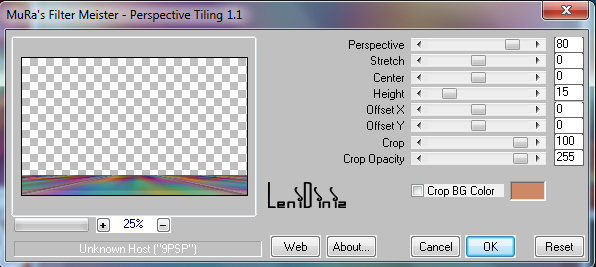
14- Effects > Plugin Mura's > Perspective Tiling:
Effects > 3D Effects > Drop Shadow: 0 > 0 >
100 > 30, Color: #000000
15- Edit > Copy the decor_leni_classic.
Edit > Paste as New Layer.
With the Pick Tool tool, position: Position X: 183 Position Y: 178
16- Edit > Copy the Main Tube.
Edit > Paste as New Layers.
Image > Resize: if necessary.
Adjust > Sharpness > Sharpen.
Position to the right or of your choice.
17- Edit > Copy the Decorative Tube.
Edit > Paste as New Layers.
Image > Resize: if necessary.
Adjust > Sharpness > Sharpen.
Position to the left or of your choice.
18- Edit > Copy no titulo_leni_classic.
Edit > Paste as New Layer.
Position of your choice.
Effects > 3D Effects > Drop Shadow: 2 > 2 >
100 > 0, Color: background
Edit > Copy Special > Copy Merged.
19- Image > Add Borders
> Symmetric:
2 px - color: foreground
3 px - color: background
2 px
- color: foreground
20- Selections > Select All.
Image > Add Borders
> Symmetric:
50 px with any color.
Edit > Paste into Selection.
21- Adjust > Blur > Gaussian Blur: 25.
22- Effects > Plugins > Carolaine and Sensibility > CS-LDots:
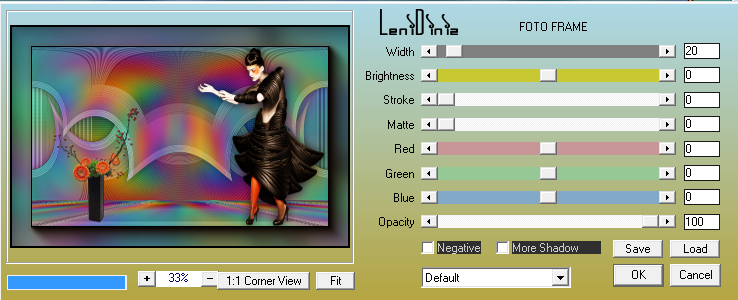
23- Effects > Plugins > AAA Frames > Foto Frame:
24- Selections > Select None.
25- Apply your watermark or signature.
File > Export > JPEG Optimizer.
CREDITS:
Tutorial by
LeniDiniz
English Translation by
Moderation SIM-PSP
Main Tube: tubed by
CibiBijoux
Decorative Tube: tubed by LeniDiniz
Feel free to send your versions.
I will be happy to publish them on our website.
Tutorial created by Leni Diniz,
in September/2021 for SIM-PSP. Translated into English in
October/21, by the Moderation of SIM-PSP. It cannot
be copied, removed from its place,
translated or used in learning lists or
groups without the author's prior consent.
|
|