|
MATERIAL 1 Main tube of your choice 1 Misted autumn landscape of your choice título_the_magic_of_auntumn_leni decor_bolinhas_pretas_leni-2 Decor_leni-1 Narah_mask_0670 mask_GP
PLUGINS:
Filter Unlimetd 2.0 > Bkg Designer sf 10 I AP [Lines] > Lines SilverLining
Colors: #613006 foreground #a75d0a background #d2a443 color 3 # 000000 color 4
TUTORIAL:
1- Open the material on the PSP, duplicate and close the original.
2- Open a transparent image of
800x500px.
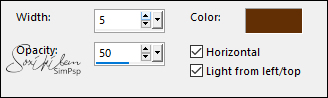
2- Adjust > Blur > Gaussian Blur: 35. 3- Effects > Texture Blinds with foreground color:
4- Layers > New Raster Layer Selections > Select All. Selections > Modify > Contract 35 Selections > Invert. Paint with the color of the foreground. Selections > None. Layers > Merge Down.
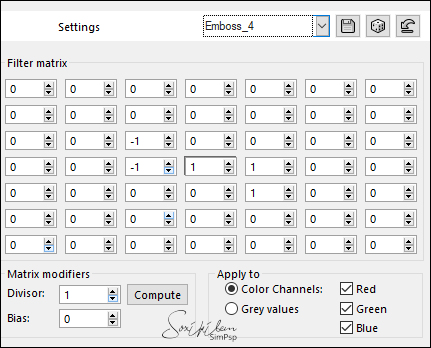
5- Effects > Plugin Filter Unlimetd 2.0 > Bkg Designer sf 10 I > Cruncher: 20, 20. Repeat Plugin Filter Unlimetd 2.0 > Bkg Designer sf 10 I > Cruncher 20 > 20. 6- Effects > User Defined Filter > Emboss 4:
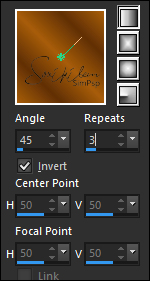
7- Plugin AP [Lines] > Lines SilverLining.
8- Layers > New Raster Layer, Paint with color 3: #d2a443. Image > Resize: 70%, Resize all layers unchecked:
9- Layers > New Mask Layer > From Image: mask_GP Image > Merge > Merge Group. Image > Mirror > Mirror Horizontal. Com a ferramenta Pick posicione conforme print:
10- Layers > Properties > General > Blend Mode: Overlay:
11- Effects > User Defined Filter > Emboss 4:
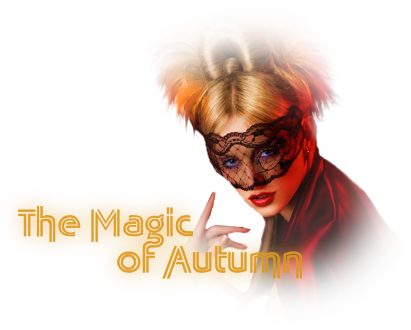
12- Layers > New Raster Layer, Paint with color 3: #d2a443. Layers > > New Mask Layer > From Image > Narah_mask_0670 Image > Merge > Merge Group.
13- Layers > Properties > General > Blend Mode: Overlay:
14- Effects > User Defined Filter > Emboss 4:
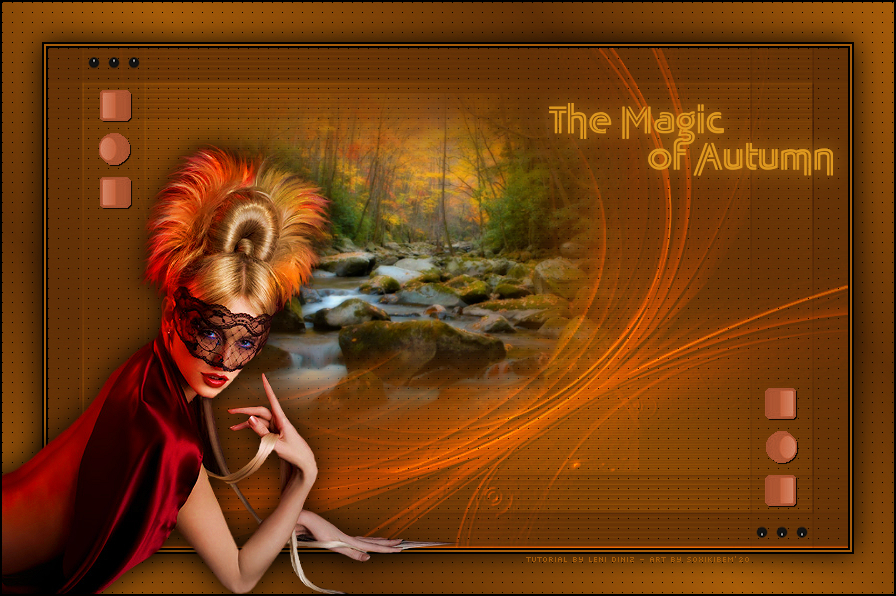
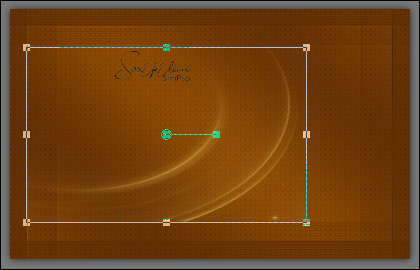
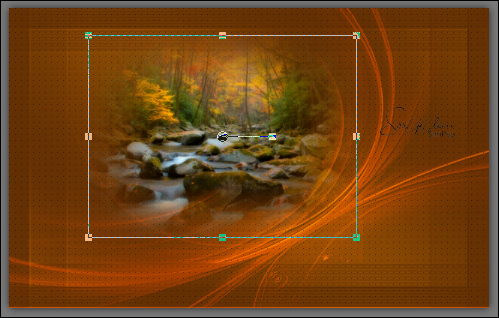
15- Edit > Copy in the Misted Landscape. Edit > Paste As New Layer, Image > Resize if necessary, Adjust > Sharpness > Sharpen, Position it in the central part of the image, indicated on the print.
16- Edit > Copy in the decor decor_bolinhas_pretas_leni-2 Edit > Paste As New Layer.
17- Edit > Copy in the decor Decor_lenidiniz1. Edit > As Paste New Layer. Effects > 3D Effects > Drop Shadow: 1, 1. 90, 1, black color.
18- Image > Add Border: 2 px black color. 2 px background color 2 px black color.
19- Selections > Select All. Imagem > Add Border: 40 px with any color. Selctions > Invert. Paint with the gradient in use.
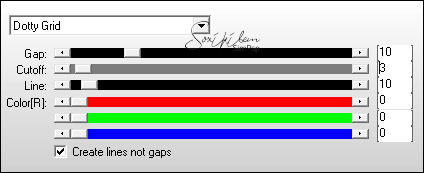
20- Effects > Plugin > AP [Lines] > Lines SilverLining > Dotty Grid:
21- Selections > Invert. Effects > 3D Effects > Drop Shadow: 0, 0, 90, 40, black color. Selections > None.
22- Edit > Copy in the Main tube. Edit > Paste As New Layer Image > Resize if necessary Adjust > Sharpness > Sharpen. Position as you prefer. Effects > 3D Effects > Drop Shadow as you wish.
23- Edit > Copy in the título_the_magic_of_auntumn_leni Edit > Paste AS New Layer Activate the Pick tool: Position X 529, Position Y 82 24- Image > Add Border: 2 px black color.
25- Sign or place your watermark on a new layer.
26- File > Export > JPG Optimizer.
Tutorial by Leni Diniz 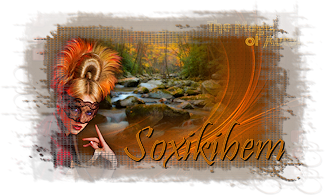 Credits: Tutorial by Leni Diniz - Art by Soxikibem Main Tube & Misted Landscape by Ana Ridzi Masks: mask_GP - Narah_mask_0670 Decor_leni-1 - decor_bolinhas_pretas_leni-2 título_the_magic_of_autumn_leni
Feel free to send your versions.
|