  MATERIAL
1 Main Tube of your choice 1 Misted Landscape or Flower of your choice Brush:
BGRoundTheBlock8
Brush:
Calligraphy_Inacia
 Plugins
Winnies 006 >
Win_60
Transparency > Eliminate
Black
Mura's Meister > Pole
Transform
Greg's Factory Output Vol.II > Pool
Shadow
AAA Frames > Foto Frame
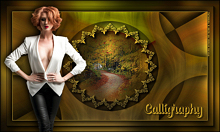
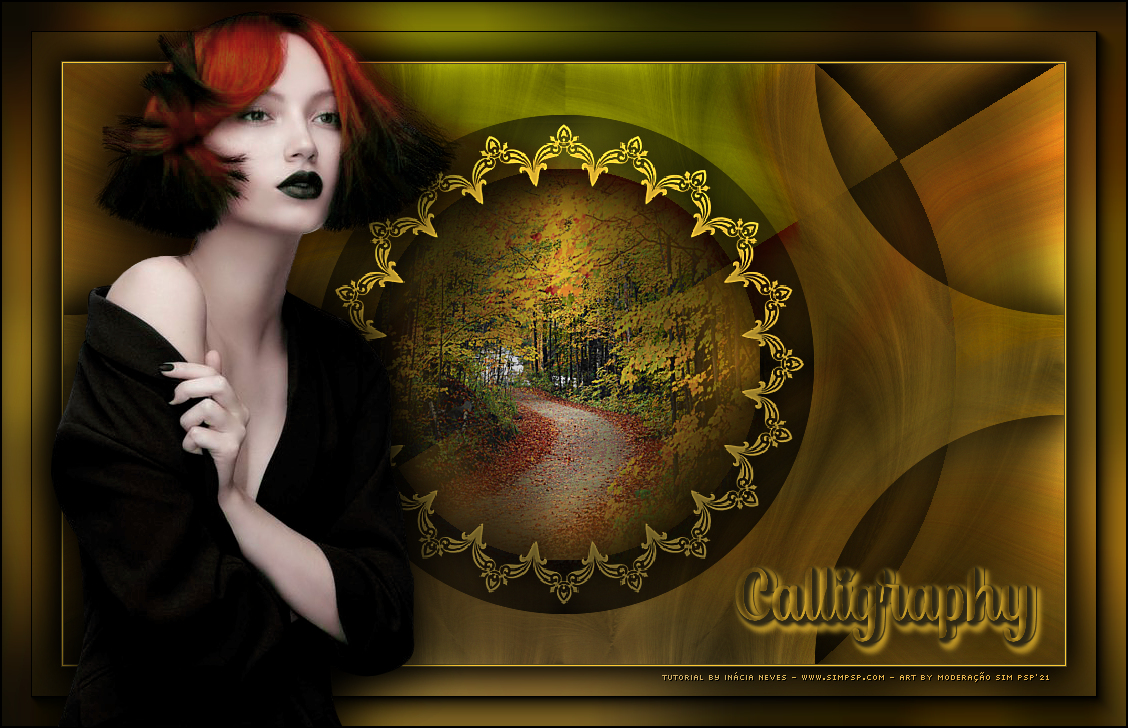
Corel PaintShop Pro 2022 Ultimate Effects Version for the English translation made in Corel PaintShop Pro 2020 Ultimate TUTORIAL
1- Import the BGRoundTheBlock8 and
Calligraphy_Inacia Brushes that are in the material, like this:
File > Import > Custom Brush... In the window that opens, click on Open...
In this window that opened, look for the material
folder where the Brushes are...
Select the Brushes and click on open...
They will appear on the left side of the window...
Now click on Add All...
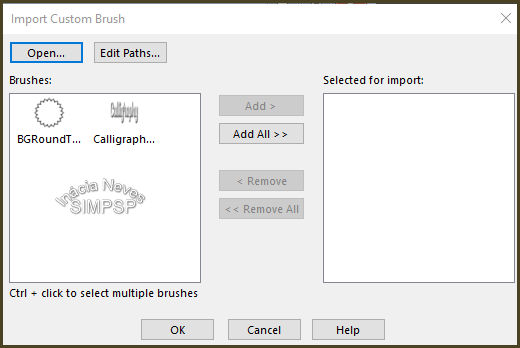 The brushes will move to the right side
and click OK...
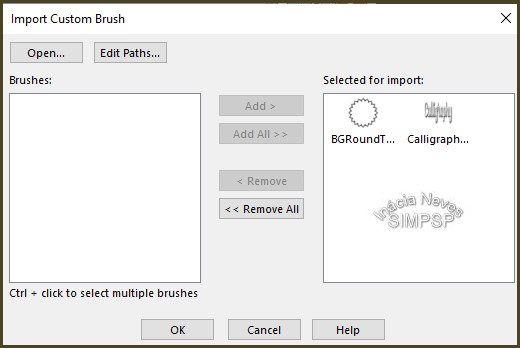 Okay, the brushes are on your PSP and can be used in this work later on. 2- Choose two
misted colors of landscape or flowers
 Foreground: #4b4223
Background: #fdca33
Form a gradient Style: Linear > Angle: 0 > Repeats: 0
 3- Open a new transparent image of 1000 x
600 px.
Paint with the gradient. Layers
> New Raster Layer.
Selections > Selec All.
4- Edit > Copy the Misted of
Landscape or Flowers.
Edit
> Paste Into Selection.
Selections > Select None.
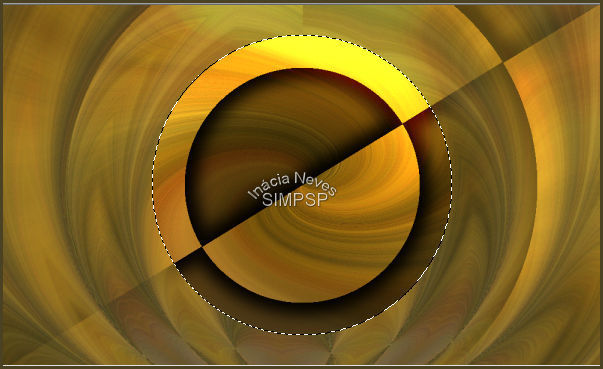
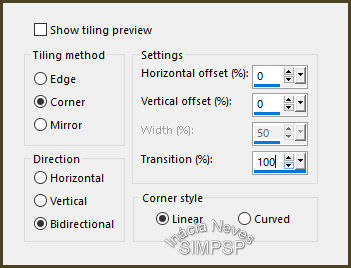
Effects
> Image Effects > Seamless Tiling > Default
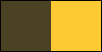
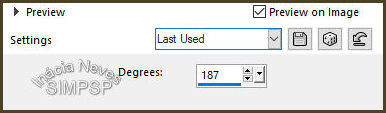
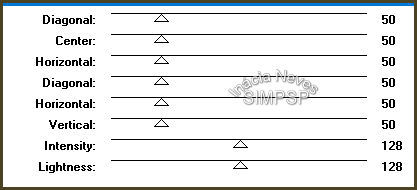
5- Adjust > Blur > Radial
Blur:
 Effects
> Edge Effects > Enhance.
Layers
> Duplicate.
Edit > Repeat Layer Duplicate...
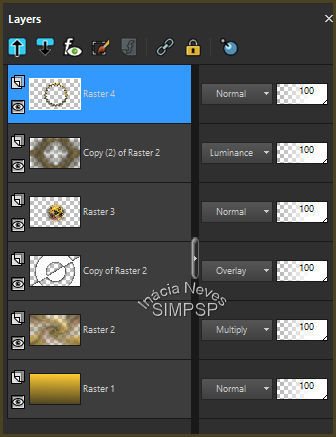
Edit > Repeat Layer Duplicate. Close the visibility of the Copy of Raster 2 and Copy
(2) of Raster 2 layers.
6- Activate the layer Raster 2.
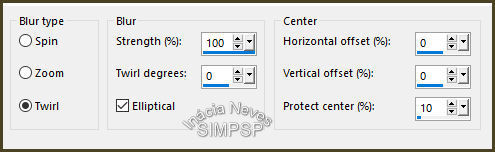
Effects
> Distortion Effects > Twirl:
 Layers
> Properties > General > Blend Mode: Multiply or your choice.
7- Open the
visibility and activate the Copy of Raster 2 layer.
Effects
> Plugins > Winnies 006 > Win_60:
 Effects
> Plugin Transparency > Eliminate Black.
Layers
> Properties > General > Blend Mode: Overlay
or your choice.
Effects
> 3D Effects > Drop Shadow:
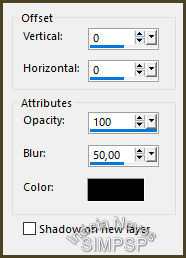
Edit > Repeat Drop Shadow.
8- Open the
visibility and activate the Copy (2) of Raster 2 layer.
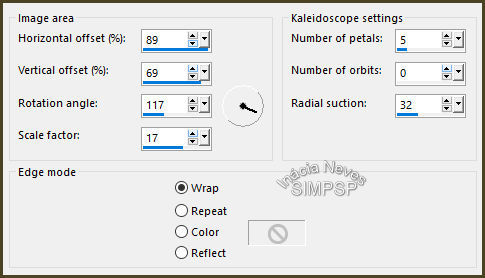
Effects
> Reflection Effects > Kaleidoscope:
 Effects
> Plugins > Mura's Meister > Pole Transform:
With the Magic Wand tool > Tolerance and Feather: 0,
select the center of the effect:
 9-
Layers
> New Raster Layer.
Edit > Copy
the Misted
Landscape.
Edit
> Paste Into Selection.
Selections > Select None.
Adjust
> Sharpness > Sharpen More.
Layers
> Arrange > Move Down.
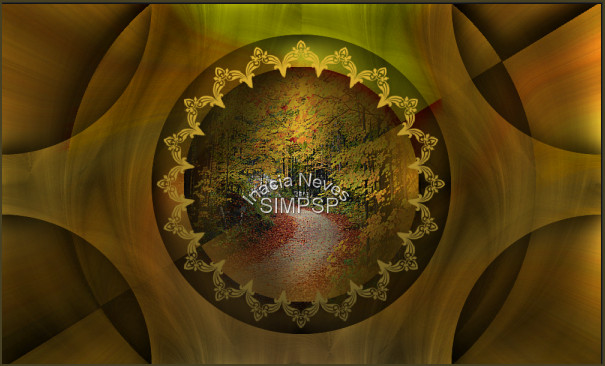
10- Activate the layer Copy(2) of
Raster 2.
Effects
> Image Effects > Seamless Tiling:
 Effects
> 3D Effects > Drop Shadow:
Edit > Repeat Drop Shadow.
Layers
> Properties > General > Blend Mode: Luminance
or your choice.
11- Layers > New Raster
Layer.
With the Foreground configured with the
gradient...
Activate the Paint Brush tool, configured with Brush BGRoundTheBlock8:

Apply by clicking on the center...
Position in the center or... Objetics > Align > Center in Canvas.
Effects
> 3D Effects > Drop Shadow:
Edit > Repeat Drop Shadow.
Adjust
> Sharpness > Sharpen More
12-
Check the layers and change the
Blend Mode to your liking, according to the colors and images used:
 Layers
> Merge > Merge All
13-
Create the Borders:
Image > Add Borders > 1px - symmetric -
color: #4b4223 (dark color)
Image > Add Borders > 1px - symmetric -
color: #fdca33 (light color)
Image > Add Borders > 1px - symmetric -
color: #4b4223 (dark color)
Selections > Select All
Edit > Copy
Image > Add Borders > 60px - symmetric - any color.
Selections > Invert
Edit > Paste Into Selection
14- Adjust > Blur > Gaussian
Blur
 Effects > Plugins > Greg's Factory Output Vol.II >
Pool Shadow > Default
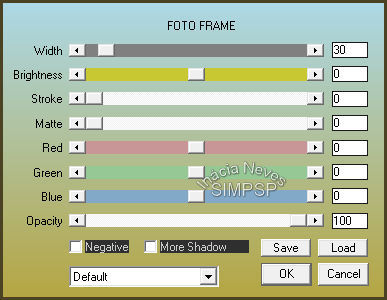
 Effects > Plugins > AAA Frames > Foto Frame:
 Selections > Invert
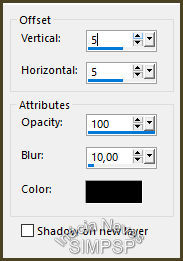
Effects > 3D Effects > Drop Shadow:
Edit > Repeat Drop Shadow.
Selections > Select None.
15- Edit > Copy the Main Tube.
Edit > Paste as New Layer.
Reduce, apply effects and Drop Shadow of your choice. Adjust > Sharpness > Sharpen.
16- Layers > New Raster Layer
With the Paint Brush tool, look for Brush Calligraphy_Inacia
 Apply to the desired location
Apply Drop Shadow to taste I applied Drop Shadow 2/2/82/5.00 twice Layers > Merge > Merge All.
17- Image > Add Borders > 1px - symmetric -
color: #000000 (black)
18- If you wish, resize your work.
Apply your watermark or signature. File > Export > JPEG Optimizer... 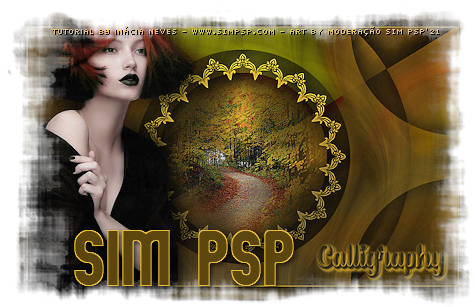
CREDITS: Main Tube: Tubed by Nikita
Misted Landscape: by
Grisi Feel free to send your versions. I will be happy to publish them on our website.   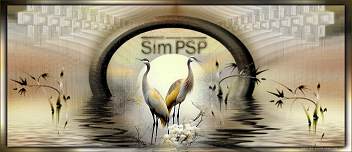
|