  MATERIAL
1 Main Tube of your choice 1 Misted Landscape of your choice WordArt
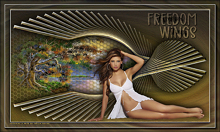
freedomwings_inacia.png
 Plugins:
FM Tile
Tools > Blend Emboss
Mura's
Meister > Copies
AAA
Frames > Foto Frame
Corel2020 PSP Effects
TUTORIAL
1-
Open the material on the PSP,
duplicate and close the original.
Choose two colors from the Landscape Misted.
I chose the colors:
Foreground: #e7cb6b (light color)
Background: #61554b (dark color)
Form a Gradient
Style: Linear > Angle: 0 > Repeats: 0 > Invert: unchecked.
2-
Open a new transparent image of 1000 x 600 px.
Paint the transparency with the gradient.
Layers
> New Raster Layer.
Selections > Select All.
3-
Activate the
Misted Landscape.
Edit
> Copy.
Activate
the work.
Edit
> Paste Into Selection.
Selections > Select None.
Effects
> Image Effects > Seamless Tiling: Default
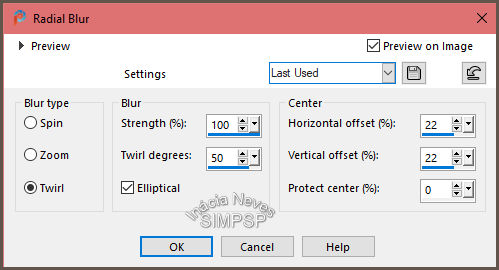
4- Adjust > Blur > Radial
Blur:
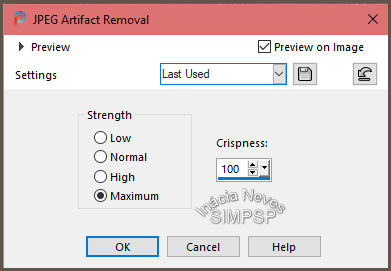
 5-
Adjust
> Add/Remove Noise > JPEG Artifact Removal:
 6- Effects
> Plugins > FM Tile Tools > Blend Emboss: Default.
Effects > Artistic Effects
> Enamel: Color > #e7cb6b
(light color)
 7- Layers
> Duplicate
Effects
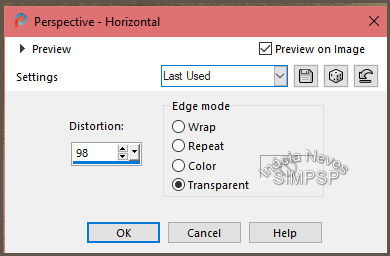
> Geometric Effects > Perspective Horizontal
 Image
> Mirror > Mirror Horizontal
Repeat Effects > Geometric Effects > Perspective Horizontal:
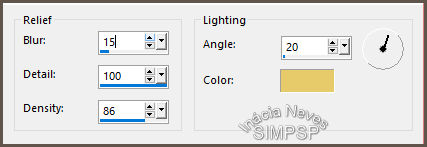
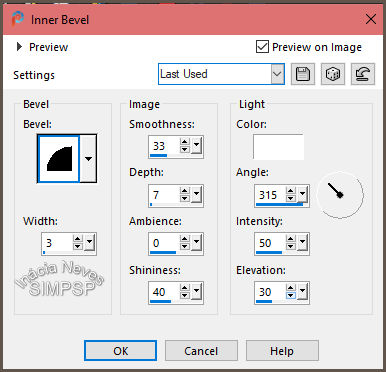
8- Effects > 3D
Effects > Inner Bevel:
9- Adjust
> Sharpness > Sharpen More.
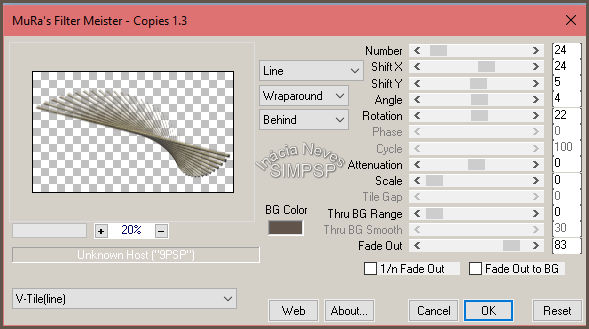
Effects > Plugins > Mura's
Meister > Copies:
 10-
Objects
> Align > Top.
Layers
> Duplicate.
Image
> Mirror > Mirror Vertical.
Layers
> Merge > Merge Down.
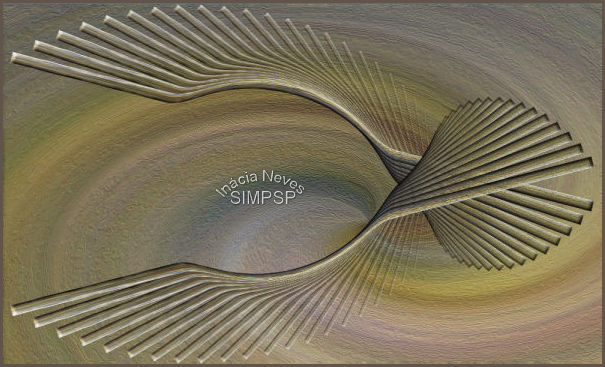
11- Activate the Warp Brush
tool:
configured as indicated:

Position the tool as in the example:
 Apply about 12 clicks, one at a time, without moving
and it looks like this:
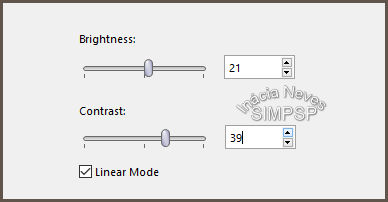
 12-
Adjust
> Brightness and Contrast > Brightness/Contrast
 13-
With the Freehand Selection tool,
configured as indicated:

Select the center of the effect.
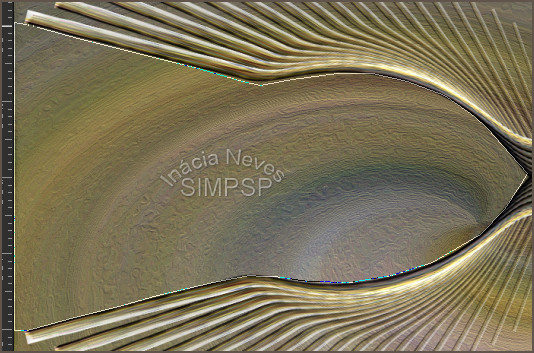 The final result of the selection will be like this,
because the tool was set with feather 20:
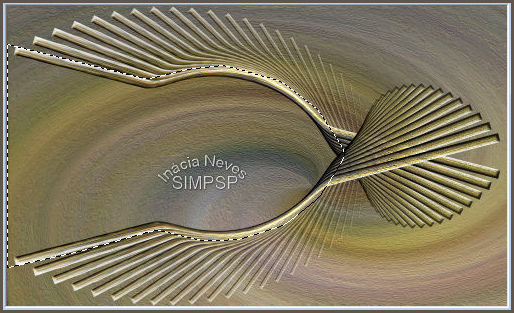 Note: Don't forget to set the Freehand Selection tool back
to Feather: 0.
14- Layers > New Raster
Layer.
Paint with the use gradient.
Selections > Select None.
Layers
> New Mask Layer > Show All.
Effects
> Texture Effects > Tiles
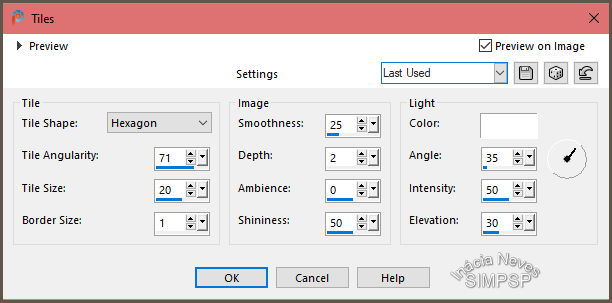 15-
Image
> Negative Image.
Layers
> Merge > Merge Group.
Effects
> 3D Effects > Drop Shadow:
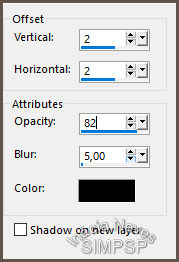 Layers
> Arrange > Move Down.
Activate the layer Copy of Raster 2.
16- Effects
> 3D Effects > Drop Shadow:
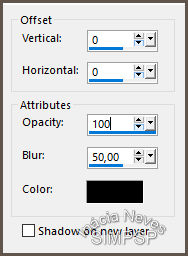 Edit > Repeat Drop Shadow.
Adjust
> Sharpness > Sharpen More.
Activate the Raster 2 layer.
17- Layers
> Properties > General > Blend Mode: Multiply or whatever you
like.
Note: When the work has all the elements, you can change
the Blend effect, if you think it's necessary.
18- Activate the
Misted Landscape.
Edit
> Copy.
Activate the work.
Edit
> Paste as New Layer.
With the Pick Tool tool, adjust the landscape so
that it is inside the effect.
Effects
> Plugins > FM Tile Tools > Blend Emboss: Default.
Adjust
> Sharpness > Sharpen.
19-
Activate the main tube.
Edit
> Copy.
Activate the work and the top layer.
Edit
> Paste as New Layer.
Image > Resize:
of your choice.
Adjust
> Sharpness > Sharpen.
Position and apply effects as you like.
20- Activate WordArt
freedomwings_inacia.png
Edit
> Copy.
Activate
the work.
Edit
> Paste as New Layer.
Image
> Resize:
of your choice.
Layers
> Properties > General > Blend Mode:
of your choice and/or apply effects to
your liking.
Layers
> Merge > Merge All.
21-
Create the Borders:
- Image > Add Borders > 2 px
> Symmetric > Color: #FFFFFF (White)
Edit
> Copy.
Selections > Select All.
- Image > Add Borders > 50 px
> Symmetric > any color.
Selections > Invert.
Edit
> Paste Into Selection.
22-
Adjust
> Blur > Radial Blur:
23- Effects
> Artistic Effects > Enamel:
24-
Effects
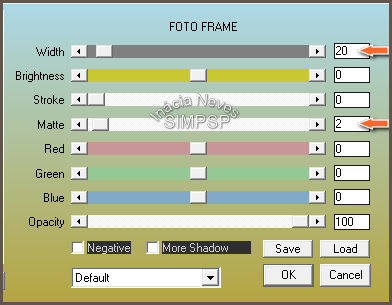
> Plugin > AAA Frames > Foto Frame:
 25- Selections > Invert.
Effects
> 3D Effects > Drop Shadow:
26- If you wish, resize your work.
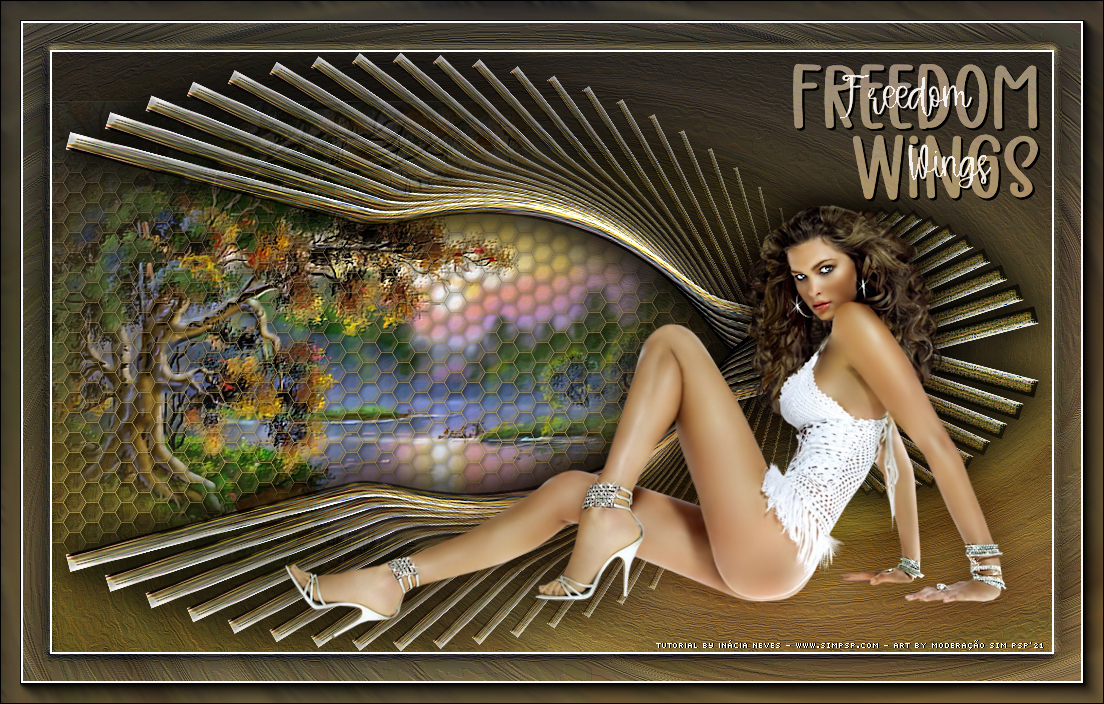
Apply your watermark or signature. File > Export > JPEG Optimizer. 
CREDITS: WordArt: by InáciaNeves
Feel free to send your versions. I will be happy to publish them on our website.   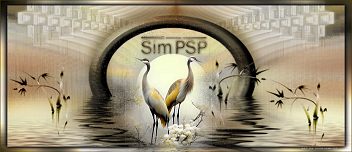
|