Material:
Tube Principal à sua escolha
Misted de Paisagem à sua escolha
Wordart

Plugins:
FM Tile Tools > Blend Emboss
Filter Factory Gallery H > Jumble
Simple > Diamonds
Mura's Meister > Copies
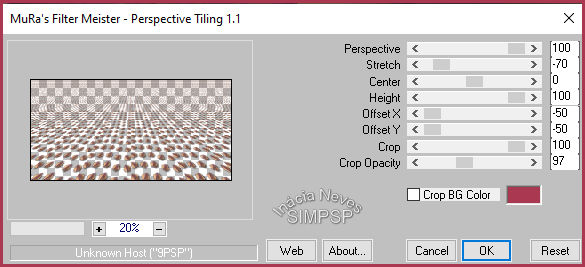
Mura's Meister > Perspective Tiling
Flaming Pear > Flood
Roteiro:
1- Abrir o misted de paisagem e escolher duas cores
Eu escolhi as cores:
Background: #fbc392
Foreground: #aa3851
Formar um gradiente Style Linear > Angle 0 > Repeats 0
2- Abrir uma transparência 1000 x 500 px
Pintar com o gradiente.
Layers > New Raster Layer.
Selections > Select All
3- Edit > Copy no misted paisagem
Edit > Paste Into Selection
Selections > Select None
4- Effects > Image Effects > Seamless Tiling > Default
Adjust > Blur > Motion Blur, como no print abaixo:
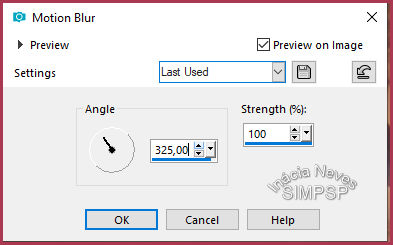
Repetir o Motion Blur.
5- Effects > Plugin FM Tile Tools > Blend Emboss
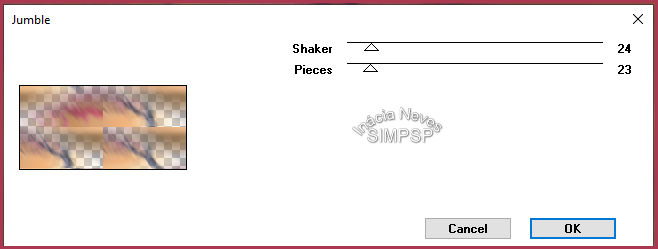
Effects > Plugin Filter Factory Gallery H > Jumble, como no print abaixo:
6- Effects > Plugin Simple > Diamonds
Effects > Distortion Effects > Pinch, como no print abaixo:
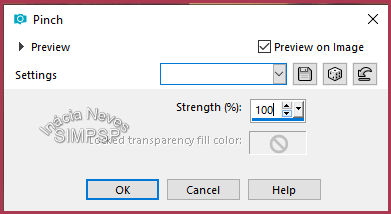
Repetir o efeito Pinch, mudando Strength para 50
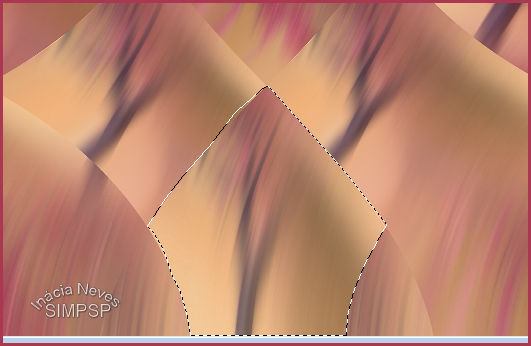
7- Configurar a ferramenta Freehand Selections conforme o print abaixo:

E selecionar o efeito, conforme mostra o print abaixo:
Edit > Copy
Selections > Select None
Edit > Paste as New Layer
Image > Resize > 60% > All Layers desmarcado
8- Selections > Select All
Selections > Float
Selections > Defloat
Layers > New Raster Layer.
Pintar com a cor escura
Selections > Modify > Contract > 1
Aperte a tecla Delete do teclado.
Selections > Select None
Layers > Merge > Merge Down
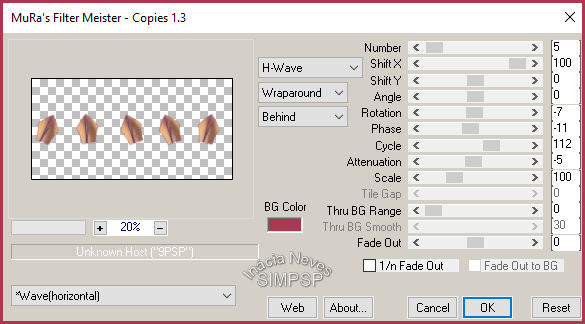
9- Effects > Plugin Mura's Meister > Copies, como no print abaixo:
Objects > Align > Bottom
Effects > 3D Effects > Drop Shadow > 10/10/100/50 Color #000000
10-
Layers > Duplicate.
Ativar a Raster 3
Effects > Plugin > Mura's Meister > Perspective Tiling, como no print abaixo:
Com a ferramenta Pick diminuir, na altura, até abaixo do meio ou ao seu gosto
11- Ativar a layer do topo (Copy of Raster 3)
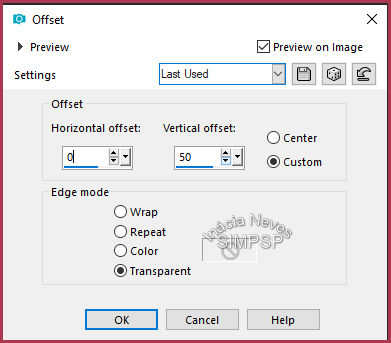
Effects > Image Effects > Offset, como no print abaixo:
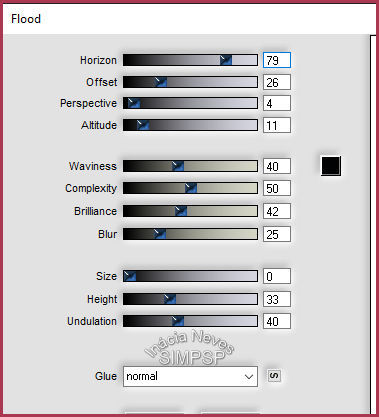
12- Effects > Plugin Flaming Pear > Flood, como no print abaixo:
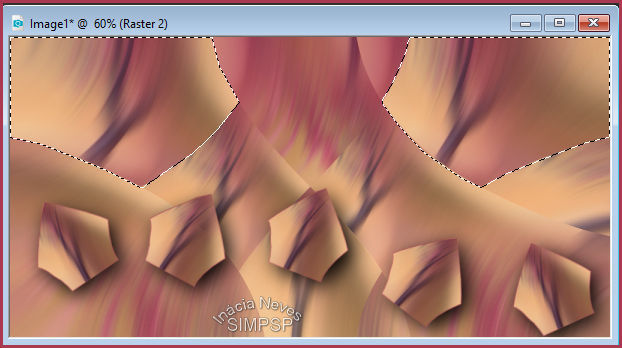
13- Ativar a Raster 2 e com a ferramenta Freehand Selection,
selecionar os dois efeitos laterais superiores
Veja o print abaixo:
14- Edit > Copy
Layers > New Raster Layer.
Edit > Paste Into Selection
Selections > Modify > Select Selection Borders, como no print abaixo:
15-
Layers > New Raster Layer.
Pintar com a cor escura.
Selections > Select None
Layers > Merge Down
Effects > 3D Effects > Drop Shadow > 10/10/100/50 Color #000000
Layers > Arrange > Move Up
16- Edit > Copy no misted paisagem.
Edit > Paste as New Layer
Layers > Arrange > Move Down
17- Edit > Copy no
tube principal.
Edit > Paste as New Layer.
Reduzir à gosto.
Adjust > Sharpness > Sharpen
Posicionar.
Effects > 3D Effects > Drop Shadow à sua escolha
(Como eu queria colocar o tube atrás do efeito superior lateral, coloquei a
Raster 4 no topo)
18
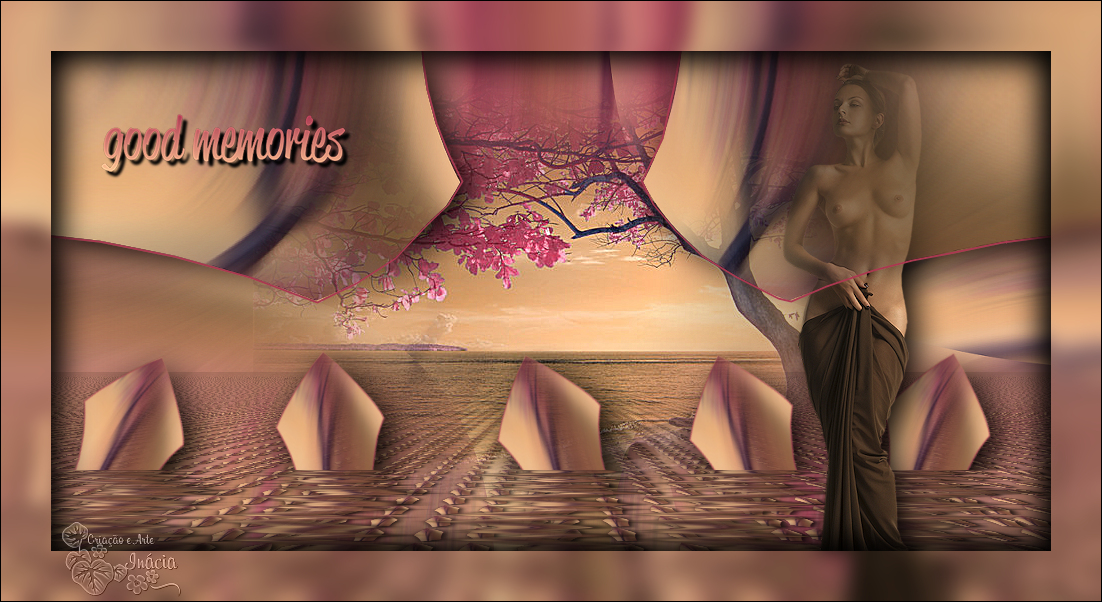
-Edit > Copy no wordart_goodmemories
Edit > Paste as New Layer
Posicionar à gosto.
Layers > Merge > Merge All
19- Edit > Copy no trabalho
Selections > Select All
Image > Add Borders > 50 px > Symmetric > com qualquer cor.
Selections > Invert
Edit > Paste Into Selection.
Adjust > Blur > Gaussian Blur > Radius: 10
Effects > 3D Effects > Drop Shadow: 10/10/100/50 Color #000000
Repetir o Drop Shadow com -10/-10/100/50
Selections > Select None
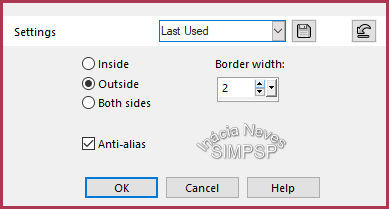
20-
Image > Add Borders > Symmetric > 1 px > color #000000
21- Se desejar redimensionar o trabalho.
Aplicar sua marca d'água ou assinatura.
File > Export > JPEG Optimizer.
Tutorial criado por Inácia Neves para SimPsp em 01/11/2020