|
The moment a child is born, the mother is also born. TRADUÇÕES:
Obrigada aos nossos tradutores!
MATERIAL 1 Tube Misted Mãe à sua escolha Decor_TextoByXiki Decor_HeartByXiki TituloBySoxikibem NarahsMasks_1698
PLUGINS Filters Unlimited 2.0 > Bkg Designer sf10 I > Cirquelate Mehdi > Sorting Tiles
NOTA: Fique à vontade para alterar os Blends e
Opacidade de acordo com o material Lembre-se de retirar a Marca d'agua do material usado para colocar em seu trabalho.
Execução
1 - Abrir o material no PSP, duplique e feche o original. Escolher 2 cores para trabalhar. Foreground #686e7b Background #c2c4b9
2 - Abra uma imagem transparente de 900x500px. Pintar com a cor do foreground Selections > Select All.
3 - Edit > Copy no Misted Mãe. Edit > Paste Into Selection. Selections > Select None.
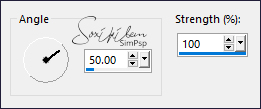
4 - Effects > Image Effects > Seamless Tiling: Default. Adjust > Blur > Motion Blur:
Edit > Repeat Motion Blur. Effects > Edge Effects > Enhance.
5 - Layers > Duplicate. Image > Mirror > Mirror Horizontal. Layers > Properties > General > Opacity 50%. Layers > Merge > Merge Down.
6 - Layers > Duplicate. Image > Resize: 50%, all layers desmarcado. Effects > Image Effects > Seamless Tiling:
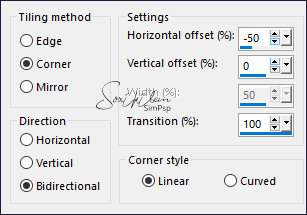
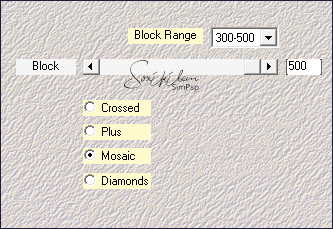
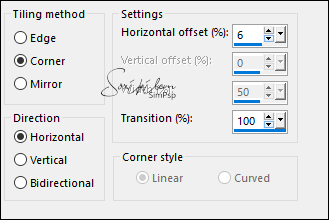
7 - Effects > Plugins > Mehdi > Sorting Tiles:
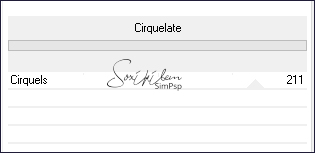
8 - Effects > Plugins > Filters Unlimited 2.0 > Bkg Designer sf10 I > Cirquelate:
Layers > Properties > General > Blend Mode: Burn.
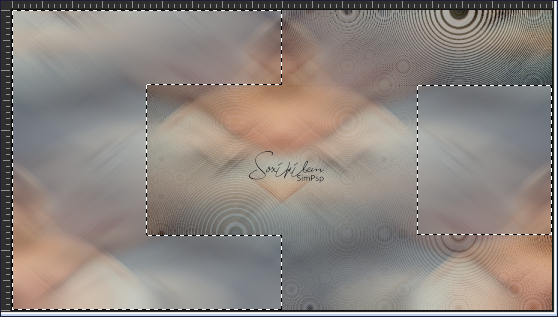
9 - Com a ferramenta Magic Wand, Tolerance e Feather 0,
selecionar como no exemplo:
Layers > New Raster Layer. Pintar com a cor do Background. Selections > Select None.
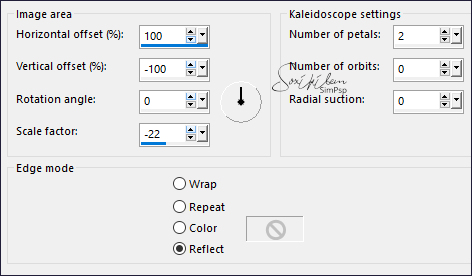
10 - Effects > Reflection Effects > Kaleidoscope:
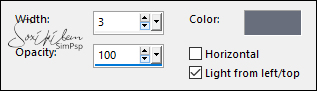
11 - Effects > Texture Effects > Blinds. Color: Com a cor do Foreground.
Layers > Properties > General > Blend Mode: Dodge - Opacity 50%.
12 - Layers > Duplicate. Effects > Image Effects > Seamless Tiling:
Layers > Properties > General > Blend Mode: Diference - Opacity 50%.
13 - Layers > New Raster Layer. Pintar com a cor do Background. Layers > New Mask Layer > From Image: NarahsMasks_1698 Layers > Merge > Merge Group. Layers > Properties > General: Blend Mode: Dodge - Opacity 70%.
14 - Effects > Image Effects > Seamless Tiling:
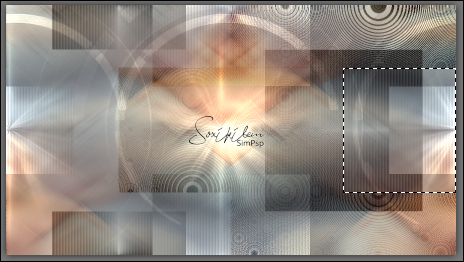
15 - Ativar a Layer Copy of Raster 1. Com a ferramenta Magic Wand, Tolerance e feather 0, selecionar como no exemplo:
16 - Selections > Edit Selection. Ativar a ferramenta Pick Tool: Position X 563, Position Y 126. Selections > Edit Selection. (Clicando novamente vai desmarcar esta opção) Ativar a Layer do Topo. Layers > New Raster Layer.
17 - Pintar com a cor do Foreground. Selections > Modify > Contract: 2. Pressionar a tecla Delete do teclado. Selections > Modify > Contract: 10. Pintar com a cor do Foreground Selections > Modify > Contract: 2. Pressionar a tecla Delete do teclado. Selections > Modify > Contract: 5. Pintar com a cor do Background, mudando a opacidade do balde para 50%. *Após pintar lembre-se de retornar para 100%.
18 - Layers > New Raster Layer. Edit > Copy no Misted Mãe. Edit > Paste Into Selection. Adjust > Sharpness > Sharpen. Selections > Select None.
19 - Ativar a Layer Raster 3. Effects > 3D Effects > Drop Shadow: 1, 1, 100, 0, Color: #000000 (preto)
20 - Edit > Copy no Decor_TextoByXiki. Edit > Paste As New Layer. Pick Tool: Position X 95, Position Y 17.
21 - Ativar a Layer Copy of Raster 2. Edit > Copy no Misted Mãe. Edit > Paste As New Layer. Image > Mirror > Mirror Horizontal. Eu não redimensionei, apenas posicionei... Pick Tool: Position X -98, Position Y 42. Layers > Properties > General > Blend Mode: Soft Light.
22 - Ativar a layer do Topo. Edit > Copy no Decor_HeartByXiki. Edit > Paste As New Layer. Pick Tool: Position X 377, Position Y 256.
23 - Image > Add Borders > Symmetric: 2px - Color: cor do Foreground 10px - Color: #ffffff (branco) 5px - Color: cor do Foreground 10px - Color: #ffffff (branco) 2px - Color: cor do Foreground 30px - Color: #ffffff (branco) 2px - Color: cor do Foreground
24 - Edit > Copy no TituloBySoxikibem. Edit > Paste As New Layer. Pick Tool: Position X 459, Position Y 532.
25 - Aplicar sua marca d'água ou assinatura. File > Export > JPEG Optimizer.
CRÉDITOS: Versão 1 & 2: Tutorial & Art by Soxikibem Misted Mãe by Pqna&Alice - Mask by Narah
Sinta-se à vontade para enviar suas versões. Terei todo o prazer em publicá-las em nosso site.
|