|
The great gift of Easter is hope – Christian hope which makes us have that confidence in God,
in his ultimate triumph, and in his goodness and love, which
nothing can shake. O grande presente da Páscoa é a esperança – esperança cristã que nos faz ter aquela confiança em Deus,
em seu triunfo final, e em sua bondade e amor, que nada pode
abalar.
TRADUÇÕES:
Obrigada aos nossos tradutores!
MATERIAL 1 Misted Paisagem à sua escolha graficoHORbySoxikibem TituloHOR_bySoxikibem DecorHOR_BySoxikibem NarahsMasks_1653
PLUGINS AAA Frames > Foto Frame Mock > Windo
NOTA: Fique à vontade para alterar os Blends e
Opacidade de acordo com o material Lembre-se de retirar a Marca d'agua do material usado para colocar em seu trabalho.
Execução
1 - Abrir o material no PSP, duplique e feche o original. Escolher três cores para trabalhar. Foreground #493208 Background #e9ddca Cor 3: #bda177
2 - Abra uma imagem transparente de 900x500px. Selections > Select All. Edit > Copy no graficoHORbySoxikibem. Edit > Paste Into Selection. Selections > Select None.
3 - Layers > New Raster Layer. Pintar com a cor do background. Layers > New Mask Layer > From Image: NarahsMasks_1653. Layers > Merge > Merge Group.
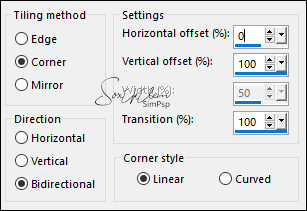
4 - Layers > Duplicate. Effects > Image Effects > Seamless Tiling:
Layers > Properties > General: Blend Mode: Overlay.
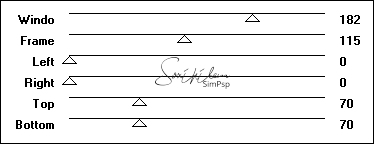
5 - Ativar a layer Raster 1. Layers > Duplicate. Effects > Plugins > Mock > Windo:
Layers > Properties > General: Blend Mode: Darken.
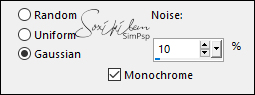
6 - Adjust > Add/Remove Noise > Add Noise:
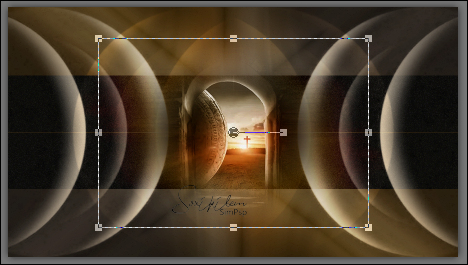
7 - Ativar a Layer do Topo (Copy of Group - Raster 2). Edit > Copy no Misted Paisagem. Edit > Paste As New Layer.
8 - Layers > Duplicate. Effects > Image Effects > Seamless Tiling:
Layers > Arrange > Move Down.
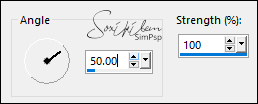
9 - Adjust > Blur > Motion Blur:
Effects > Edge Effects > Enhance. Layers > Duplicate. Image > Mirror > Mirror Horizontal. Layers > Properties > General: Blend Mode: Screen.
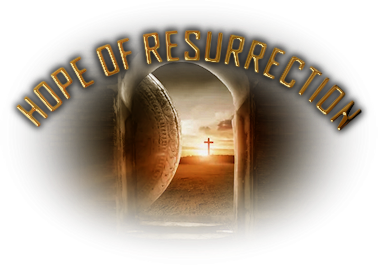
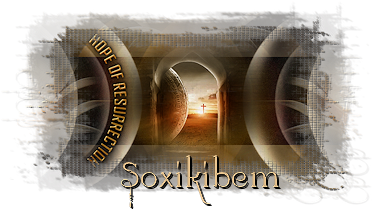
10 - Edit > Copy no TituloHOR_bySoxikibem. Edit > Paste as New Layer. Pick Tool: Position X: 171, Position Y: 68.
11 - Edit > Copy no DecorHOR_BySoxikibem. Edit > Paste as New Layer. Layers > Duplicate. Layers > Merge > Merge Down. Layers > Properties > General: Blend Mode: Hard Light, Opacity: 50%. Selections > Select All.
12 - Image > Add Borders > Symmetric: 20 px - Color: cor do Background Effects > 3D Effects > Drop Shadow: 0, 0, 100, 10, Color: #000000 (preto) Edit > Repeat Drop Shadow. Selections > Select None.
13 - Selections > Select All. Image > Add Borders > Symmetric: 40px - Color: cor 3 Effects > 3D Effects > Drop Shadow: 0, 0, 100, 10, Color: #000000 (preto) Edit > Repeat Drop Shadow. Selections > Select None.
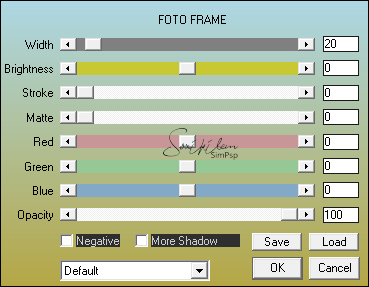
14 - Effects > Plugins > AAA Frames > Foto Frame:
15 - Aplicar sua marca d'água ou assinatura. File > Export > JPEG Optimizer.
CRÉDITOS Tutorial & Art by Soxikibem Misted Paisagem: by Pqna&Alice - Mask by Narah
Sinta-se à vontade para enviar suas versões. Terei todo o prazer em publicá-las em nosso site.
|