|
Tutorial By
AnaMariaC
English Translation by SIM-PSP
moderation
Original Tutorial
MATERIAL
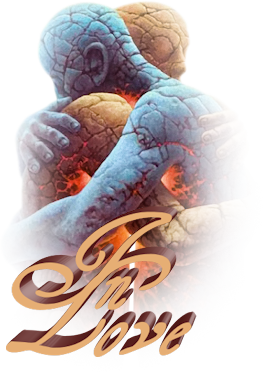
1 Tube or Misted of your
choice
1 Mask Silvie_Masck_Flowers04C
Pattern Gold_2 (save to
PSP Patterns folder)
WorArt_by_AnaMariaC
PLUGINS
Unlimited 2.0 > FunHouse > Tremors.
Filters Unlimited 2.0 > Lens Flares > Flare 03.
Mehdi > Wavy Lab 1.1
PSP effects
TUTORIAL
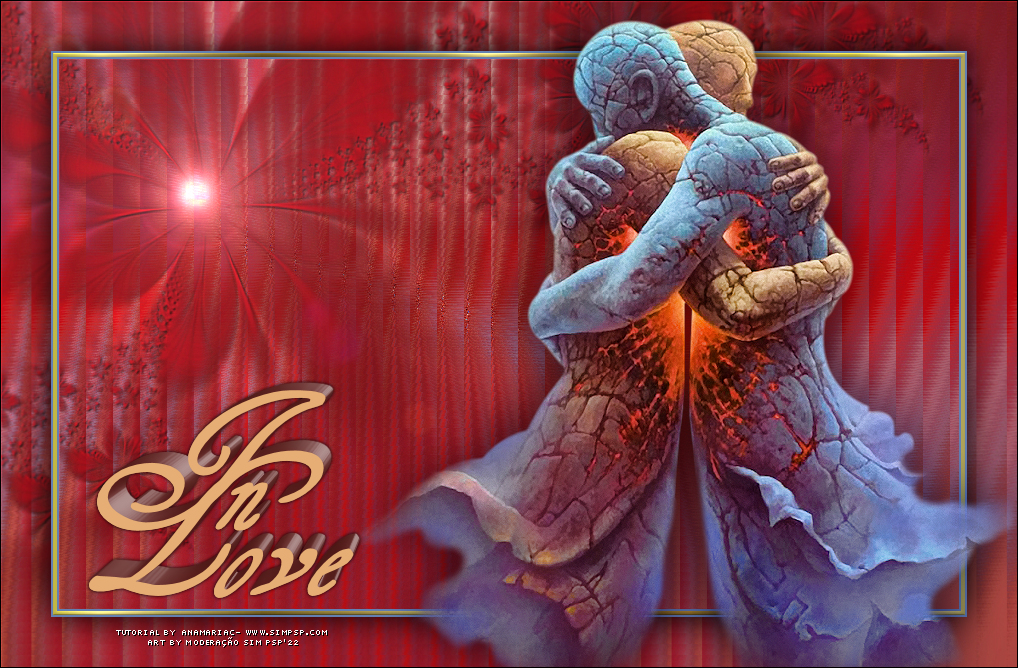
1- Open the material on the
PSP, duplicate and close the original.
Choose two colors to work with:
Foreground #a20c17
Background #647fb2

2- Open a transparent image of 900x550 px.
3- Fill with color #a20c17 (Foreground).
4- Selections > Select All.
Edit > Copy on tube or misted.
Edit > Paste Into Selection.
Selection > Selection None.
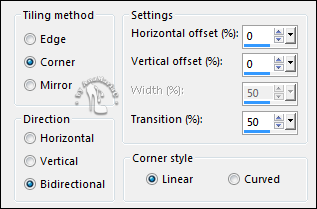
5- Effects > Image Effects > Seamless Tiling: Default
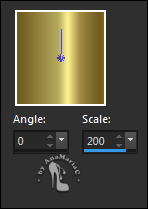
6- Adjust > Blur > Radial Blur.
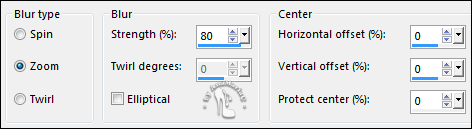
Edit > Repeat Radial Blur.
Effects > Edge Effects > Enhance More.
7- Layers > Duplicate.
Image > Mirror > Mirror Horizontal.
Layers > Properties > General > Blend Mode: Hard Light - Opacity:
70%.
Layers > Merge > Merge Down.
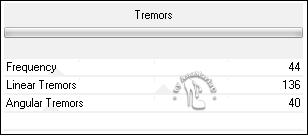
8- Effects > Plugins > Unlimited 2.0 > FunHouse > Tremors:
9- Layers > Duplicate.
Layers > Properties > General > Blend Mode: Screen - Opacity: 100%.
Layers > Merge > Merge Down.
10- Layer > New Raster Layer,
Fill with color: #a20c17 (Foreground).
11- Layers > New Mask Layer > From image: Silvie_Mask_Flowers04C
Layers > Merge > Merge Group.
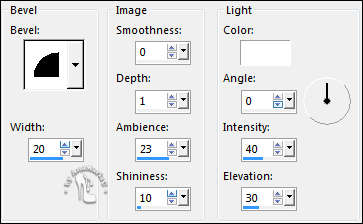
12- Effects > 3D Effects > Drop Shadow: 1 / 1 / 100 /
0, Color: #000000 (black)
13- Adjust > Sharpness > Sharpen More.
Layers > Merge > Merge Down.
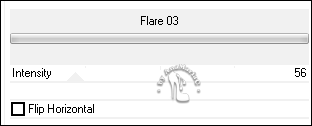
14- Effects > Plugins > Filters Unlimited 2.0 > Lens Flares > Flare
03.
15- Edit > Copy.
16- Image > Add Borders > Symmetric: 2 px - Color: #647fb2
(Background).
17- Selections > Select All.
Image > Add Borders > Symmetric: 4 px - Color: any
color.
Selections > Invert.
18- Configure the Foreground with Patterns Gold_2:
Fill the selection with
the pattern.
19- Effects > 3D Effects > Inner Bevel:
Selections > Select None.
20- Image > Add Borders > Symmetric: 2 px - Color: #647fb2
(Background).
21- Selections > Select All.
Image > Add Borders > Symmetric: 50 px: any
color.
22- Selections > Invert.
Edit > Past As Into Selections.
Selections > Invert.
23- Effects > 3D Effects > Drop Shadow: 0 / 0 / 100 /
50, Color: #000000 (black)
Selections > Select None.
24- Edit > Copy on tube.
Edit > Paste As New Layer.
Image > Resize if necessary.
Adjust > Sharpness > Sharpen.
Position right.
Effects > 3D Effects > Drop Shadow of your choice.
25- Edit > Copy no WorArt_byAnaMariaC.
Edit > Paste As New Layer.
Adjust > Sharpness > Sharpen.
Effects > 3D Effects > Drop Shadow of your choice.
26- Image > Add Borders > Symmetric: 1 px - Color:
#000000 (black)
27 -
If you wish, resize your work.
Apply your watermark or signature.
File > Export > JPEG Optimizer...
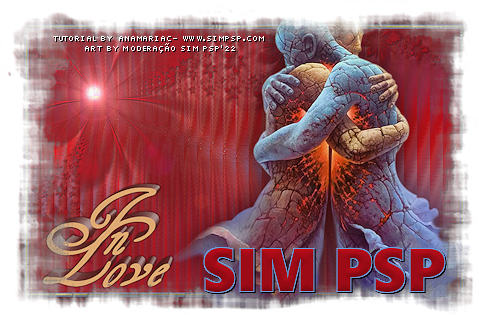
Tutorial by AnaMariaC
English Translation by Moderation SIM-PSP
Main Tube: Tubed by LisaT
Mask by Silvie_Mask_Flowers04C.jpg
WorArt by AnaMariaC
Feel free to send your versions.
I will be happy to publish them on our website.

|
Tutorial created by AnaMariaC, in
February/2022. Translated into English in February/22,
by the Moderation of SIM-PSP. It cannot be copied,
removed from its place, translated or used in learning
lists or groups without the author's prior consent. |
|