|
Tutorial by Roberta Maver English Translation by Moderation SIM-PSP Original Tutorial
MATERIAL 1 Misted Landscape of your choice Deco_Time_for_love_byRoberta Seleções: 01_TimeForLove - 02_TimeForLove - 03_TimeForLove* *Save selections in PSP's Selections folder
Alien Skin Eye Candy 5: Impact > Glass Italian Editor Effect > Effetto Fantasma Filters Factory Gallery A > Weave Toadies > Sucking Toad Bevel II.2 Toadies > What Are You? Mehdi > Wavy Lab
1.1 Xero > Fritillary
Choose 2 colors to work with: Foreground #3c6844
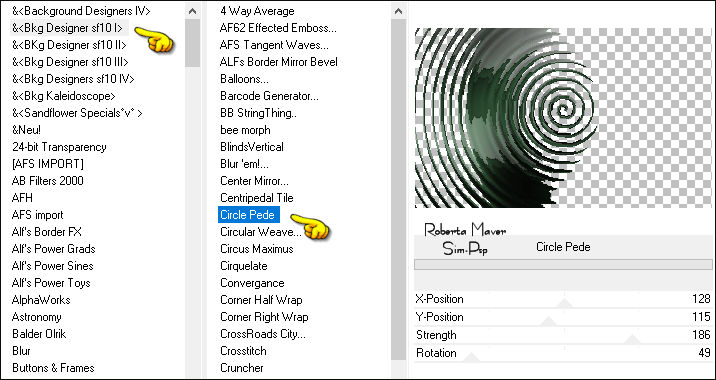
5 - Effects > Plugins > Simple > Quick Tiles. Effects > Edge effects > Enhance.
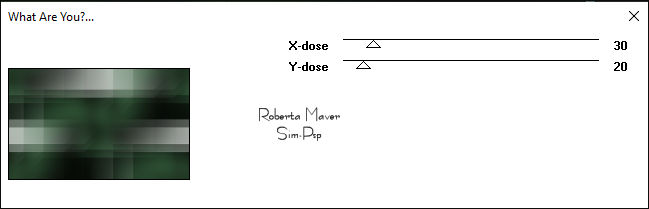
6 - Layers > Duplicate. Activate the Layer Raster 1 Effects > Plugins > Toadies > What Are You?
Activate the Copy of Raster 1 (top layer)
8 - Selections > Load/Save Selections > Load Selection From Disk: 01_TimeForLove Selections > Promote
Selection to Layer. Selections > Select None. Close
the visibility of the layer Promoted Selection Activate the layer Copy Layer Raster 1
Activate and open the visibility of the layer Promoted Selection.
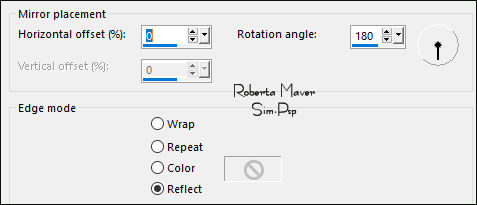
11 - Effects > Reflection Effects > Rotating Mirror:
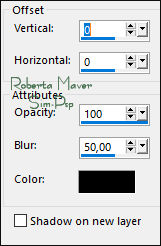
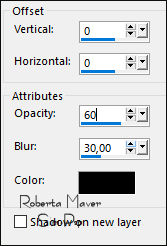
12 - Effects > 3D Effects > Drop Shadow:
Layers > Arrange > Move Down. Activate and open the visibility of the layer Copy of Promoted Selection
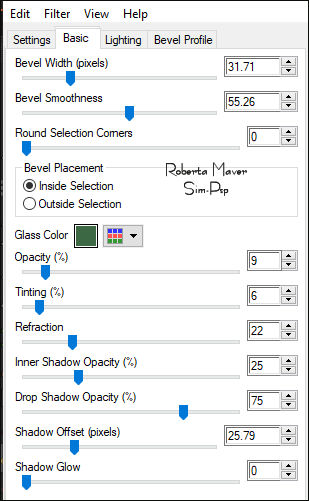
14 - Image> Resize: 30% - all layers unchecked. Selections > Load/Save Selections > Load Selection From Disk: 02_TimeForLove Layers > New Raster Layer. Paint with Foreground color (light color). Selections > Select None. Effects > Plugins > Alien Skin Eye Candy 5: Impact > Glass: Settings: Clear
Layers > Merge > Merge Down. With the Pick Tool, position: Position X: 730 - Position Y: 99 Layers > Duplicate. With the Pick Tool, position: Position X: 730 - Position Y: 356 Layers > Merge > Merge Down.
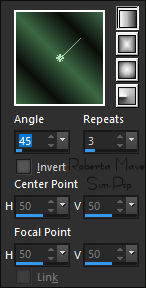
15 - Selections > Load/Save Selections > Load Selection From Disk: 03_TimeForLove Layers > New Raster Layer. Paint with the Linear Gradient, formed by the colors in use:
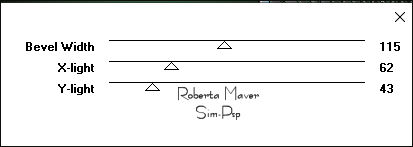
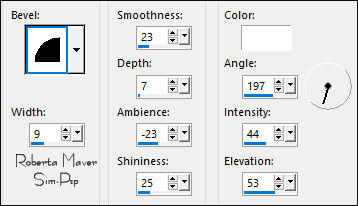
16 - Effects > 3D Effects > Inner Bevel:
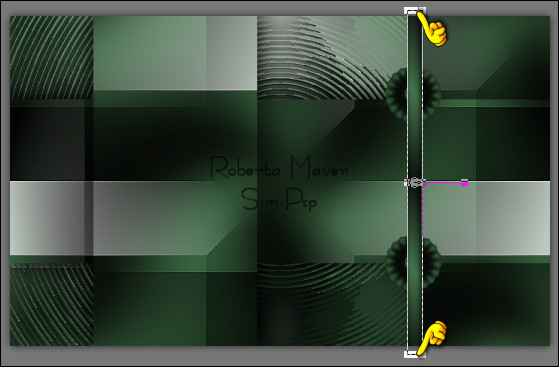
Selections > Select None. With the Pick Tool pull the top and bottom of the bar out:
Layers > Arrange > Move Down. Activate the layer Copy of Promoted Selection. Layers > Merge > Merge Down. Effects > 3D Effects > Drop Shadow:
Activate and open the visibility of the layer Copy (2) of Promoted Selection
19 - Edit > Copy in Misted Landscape. Image > Resize if necessary. *In the Material misted I gave a resize of 80%
Adjust > Sharpness > Sharpen. Layers > Properties > General > Blend Mode: Luminance (L).
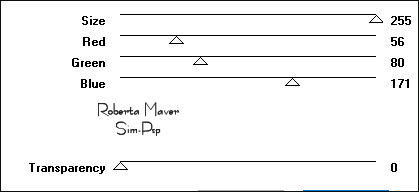
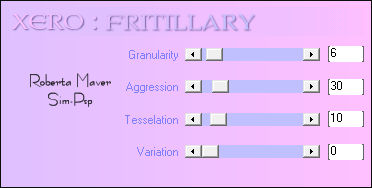
22 - Effects > Plugins > Xero > Fritillary:
Adjust > Sharpness > Sharpen.
Selections > Select None. Edit > Paste as New Layer. With the Pick Tool, position: Position X: 76 - Position Y: 236 Layers > Duplicate. Image > Mirror > Mirror Vertical. Layers > Merge > Merge Down.
24 - Edit > Copy on Main Tube.
Effects > 3D Effects > Drop Shadow: your choice.
Effects > 3D Effects > Drop Shadow: your choice.
26 -
Image > Add Borders > Symmetric: 1px - Color: Background color CREDITS: Tutorial by RobertaMaver English Translation by Moderation SIM-PSP Main Tube: Tubed by LB Tubes & Mists Misted Landscape: Tubed by RobertaMaver
Feel free to send your versions. I will be happy to publish them on our website.
|