|
Tutorial by Soxikibem English Translation by Moderation SIM-PSP Original Tutorial:
MATERIAL 1 Main Tube of your choice 1 Misted Christmas of your choice jss_heavenly_scattered stars white tituloSTJBySoxikibem DecorBySoxikibem Selections - spreadthejoy1 (Save selections in the PSP's Selections folder)
PLUGINS Alien Skin Eye Candy 5: Nature
NOTE: the material and colors chosen for your work.
TUTORIAL
1 – Open the material on the PSP, duplicate and close the original. Choose two colors to work with: Foreground #660704 Background #f1eeea
2 - Open a 900x550px transparent image. Paint with a Linear gradient, formed by the chosen colors:
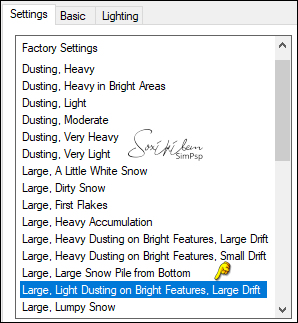
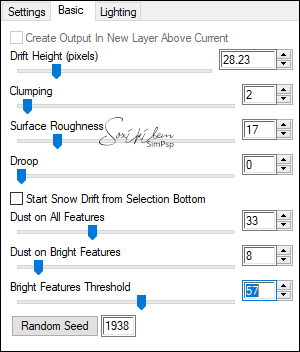
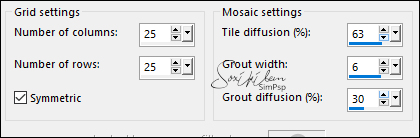
3 - Adjust > Blur > Gaussian Blur: 20. Effects > Plugins > Alien Skin Eye Candy 5: Nature > Snow Drift:
Lighting > Shadow Color: Foreground color.
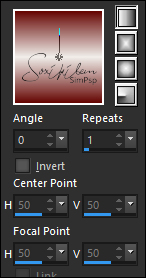
4 - Layers > Duplicate. Effects > Plugins > Mehdi > Sorting Tiles.
Layers > Properties > General > Blend Mode: Darken.
5 - Layers > New Raster Layer. Selections > Select All. Edit > Copy in Misted Natalino. Edit > Paste Into Selection. Selections > Select None. Effects > Image Effects > Seamless Tiling: Default.
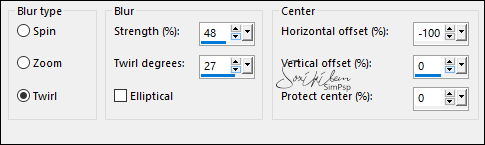
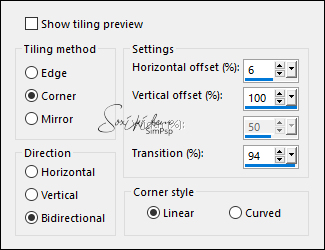
6 - Adjust > Blur > Radial Blur:
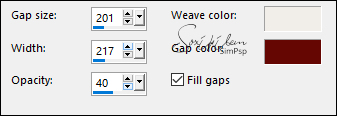
Effects > Texture Effects > Weave: Weave color: Background color - Gap color: Foreground color
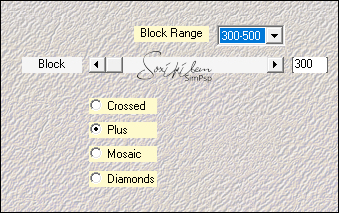
7 - Effects > Texture Effects > Mosaic - Antique:
Layers > Properties > General: Blend Mode: Hard Light.
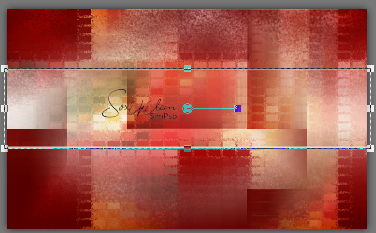
8 - Layers > New Raster Layer. Selections > Load/Save Selections > Load Selection From Disk: spreadthejoy1. Paint this selection with the background color. Selections > Modify > Contract: 3. Press the Keyboard's Delete key. Selections > Select None. With the Pick Tool: Mode Scale tool, move the sides as in the example:
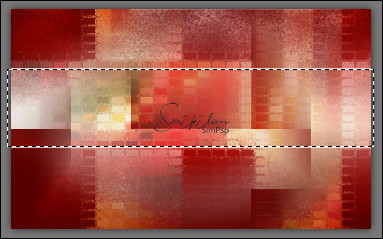
9 - With the Magic Wand tool: Tolerance and Feather 0, select the center of this rectangle:
Layers > New Raster Layer. Paint this selection with the background color. Selections > Select None. Layers > Properties > General > Opacity: 40%.
10 - Activate the layer Raster 3. Layers > Duplicate. Activate the Raster 3 layer again. Effects > 3D Effects > Drop Shadow: 0, 0, 100, 20, Color: #ffffff (White). Layers > Properties > General > Blend Mode: Dissolve.
11 - Activate the top layer. (Raster 4) Edit > Copy in Misted Natalino. Edit > Paste as New Layer. Position to the left.
12 - Edit > Copy no jss_heavenly_scattered stars white. Edit > Paste as New Layer. Image > Mirror > Mirror Vertical. With the Pick Tool tool, position: Position X: 14, Position Y: 13. Effects > Image Effects > Seamless Tiling: Side by side.
13 - Edit > Copy in the tituloSTJBySoxikibem. Edit > Paste as New Layer. With the Pick Tool tool, position: Position X: 287, Position Y: 120.
14 - Edit > Copy No DecorBySoxikibem. Edit > Paste as New Layer. Objects > Align: Left.
15 - Image > Add Borders > Symmetric: 1px - color: Background color. 5px - color: Foreground color. 30px - color: Background color. 2px - color: Foreground color. 5px - color: Background color. 2px - color: Foreground color. 30px - color: Background color. 2px - color: Foreground color.
16 - Edit > Copy the Main Tube. Edit > Paste as New Layer. Image > Resize if necessary. Adjust > Sharpness > Sharpen. Position of your choice. Effects > 3D Effects > Drop Shadow: your choice.
17 - Apply your watermark or signature.File > Export > JPEG Optimizer.
CREDITS: Tutorial by Soxikibem English Translation by Moderation SIM-PSP Main Tube: Tubed by Animabelle Misted Landscape by Isa Christmas misted and decor: by Soxikibem
Feel free to send your versions. I will be happy to publish them on our website.
|