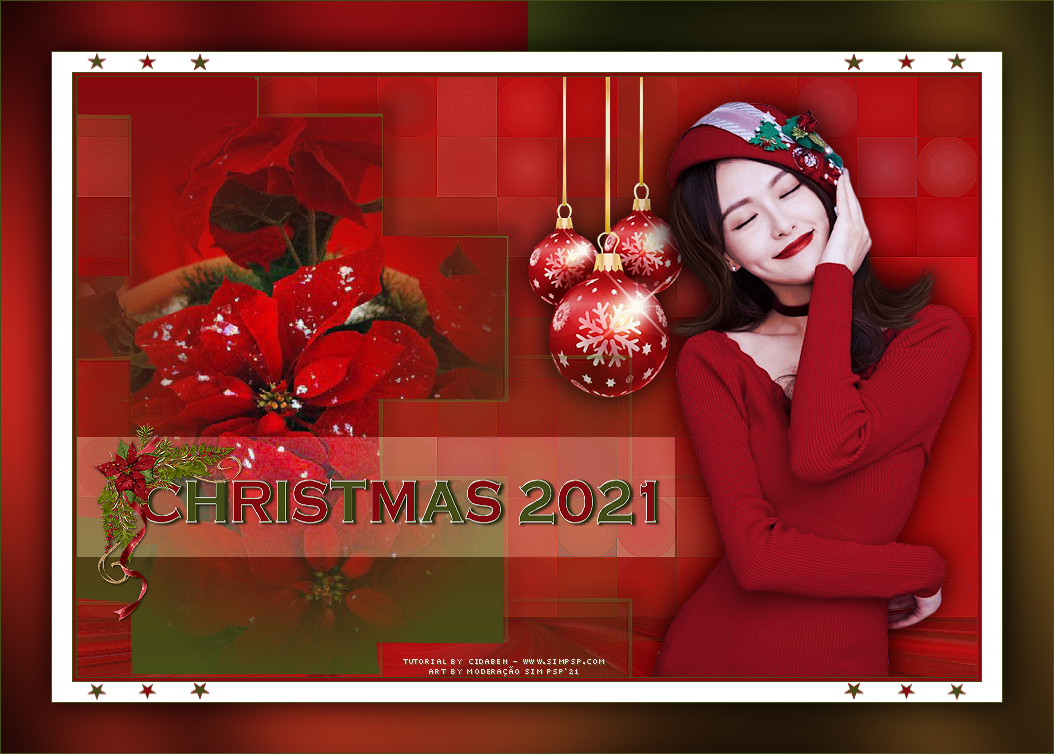
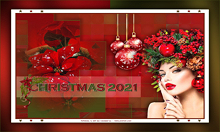
|
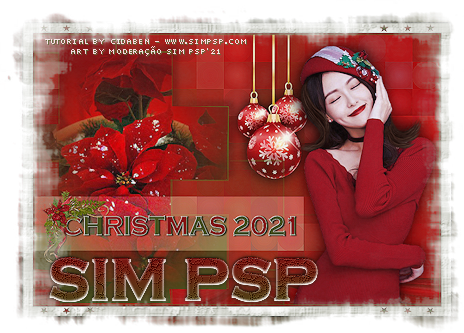
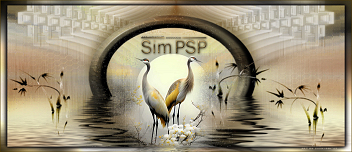
Tutorial By
CidaBen
MATERIAL:
1 Main Tube of your choice. Mask: Ibdm-masque-213 titlo_christmas2021-bycidaben decor_christmas2021_bycidaben Decor_Flor_Pascua Selections: natal2021_cidaben - natal2021_cidaben2 (Save selections in PSP Selection folder)
Plugins MuRa's Meister Filters Unlimited 2.0 &<Background Designers IV LOtis Filters Graphics Plus
Note: Feel free to
change the Blends Mode according to material
TUTORIAL
1 - Open the material in PSP, duplicate and close the original. Choose two colors to work with: Foreground #880910
2 - Open a 900 X 600px transparent image. Paint with a Linear
gradient formed with the chosen colors:
Selections > Select All.
3 - Edit > Copy in Misted Flower or Landscape.
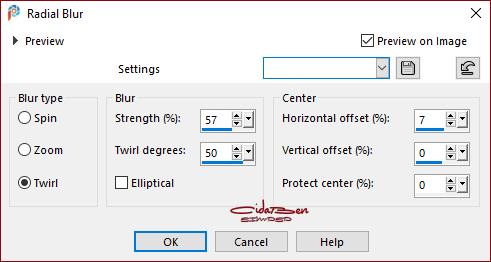
Adjust > Blur > Radial Blur:
Effects > Edge Effects > Enhance More.
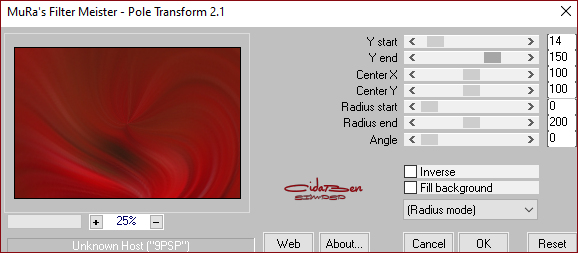
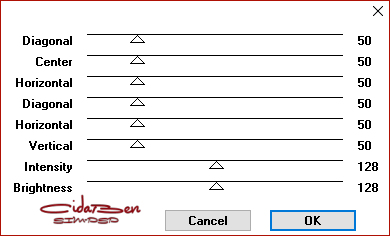
4 - Effects > Plugins > MuRa's Filter Meister > Pole Transform 2.1:
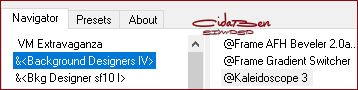
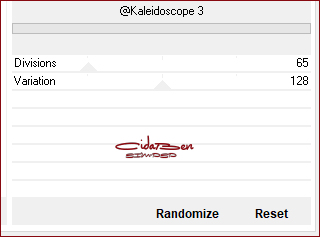
5 - Effects > Plugins > Filters Unlimited 2.0 > &<Background Designers IV > @Kaleidoscope 3:
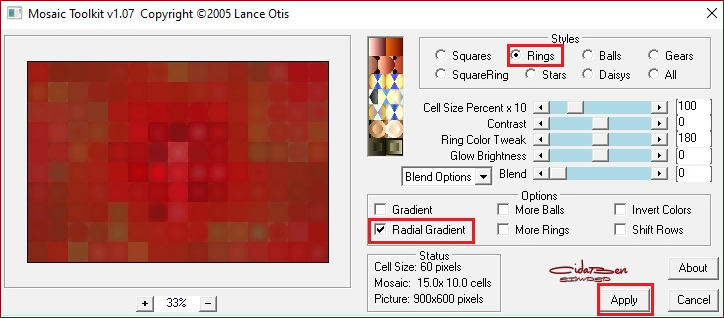
Effects > Plugins > LOtis Filters > Mosaic Toolkit - Square, Rings, and Balls... v1.07.
7 - Effects > Effects Edge > Enhance.
Layers > New Raster Layer.
Layers > New Mask Layers > From Image: Ibdm-masque-213
Layers New Raster Layer.
9 - Edit > Copy in Misted Flower or Landscape.
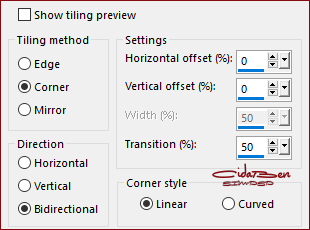
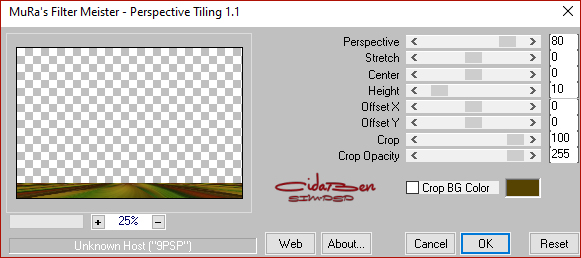
Edit > Paste Indo Selection. 10 - Close the visibility of Copy of Raster 1 and Group - Raster 2. Activate the Layer Raster 1. 11- Effects > Plugins > MuRa's Meister > Perspective Tiling...
Layers > Arrange > Move Up Open the visibility of the Copy of Raster 1 and Group - Raster 2 Layers.
Activate the Layer Raster 1
With the Pick Tool tool, position: Position X: 450, Position Y:
-40. Activate Top Layer
13 - Edit > Copy on Main Tube.
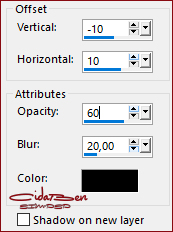
IImage > Resize if necessary. Position of your choice. Effects > 3D Effects > Drop Shadow or another effect of your choice.
Paint with the color #ffffff (white).
Selections > Select None.
16 - Image > Add Borders > Symmetric:
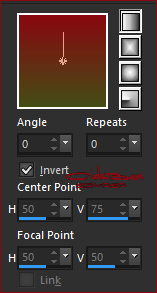
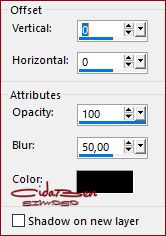
17 - Selections > Select All. Selections > Invert. Paint this selection with the Radial gradient formed by the colors in use: Angle: 0 - Repeats: 0, Center Point: H 50 - V 75 - Invert: Marked
18 - Selections > Invert.
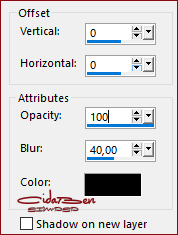
Effects > 3D Effects > Dro Shadow: 0, 0, 100, 50, Color: #000000
(black)
19 - Selections > Invert. Effects > Plugins > Graphics Pluss > Cross Shadow: Default
Selections > Select None.
20 - Edit > Copy on decor_christmas2021_bycidaben. Edit > Past As New Layer.
2 1 - Image > Add Borders > Symmetric: 1px - Color: Background color.
21-
Apply your watermark or signature.
CREDITS: Tutorial by CidaBen English Translation by Moderation SIM-PSP Main Tube: Tubed by SuizaBella
Misted Flower;
by SuizaBella
Decorative Tube; Tubed by
LisaT
Feel free to send your versions.
|