|
Tutorial by Soxikibem English Translation by Moderation SIM-PSP Original Tutorial:
MATERIAL 1 Main Tube of your choice 1 Misted Landscape of your choice GoldenBalls_MistedByXiki or use one of your choice decorMiracleOfChristmas (Decor tutorial here) titulo_Miracleofchristmas
PLUGINS Alien Skin Eye Candy 5 - Impact Italian Editors Effect Mehdi Meister Toadies VM Natural
NOTE:
- Feel free to change the Blends and Opacity according to
the material
TUTORIAL
1 – Open the material on the PSP, duplicate and close the original.Choose two colors to work with:Foreground #604d32 Background #ead6a6
2 - Open a 900x550px transparent image. Paint it with the foreground color. Selections > Select All. Edit > Copy in GoldenBalls_MistedByXiki. Edit > Paste Into Selection. Selections > Select None.
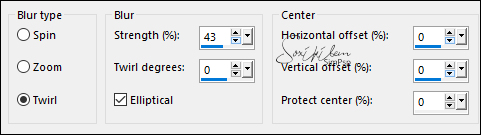
3 - Effects > Image Effects > Seamless Tiling: Default. Adjust > Blur > Radial Blur:
Effects > Edge Effects > Enhance.
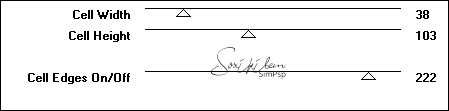
4 - Effects > Plugins > Toadies > Weaver:
5 - Layers > Duplicate. Effects > Plugins > Toadies > Blast 'em!:
Layers > Properties > General > Blend Mode: Overlay.
6 - Edit > Copy Special > Copy Merged. Edit > Paste as New Layer. Effects > Plugins > Mehdi > Sorting Tiles:
Layers > Properties > General > Blend Mode: Darken - Opacity: 65%.
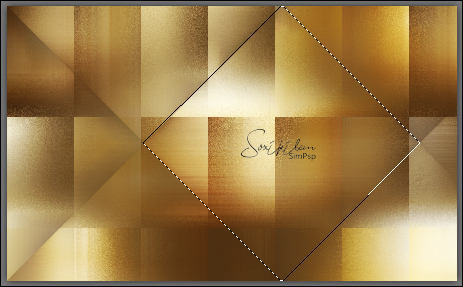
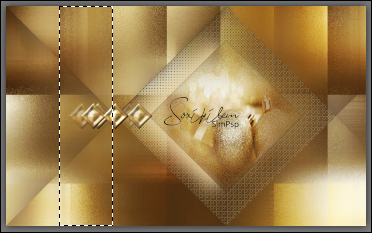
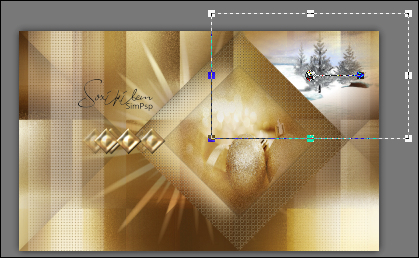
7 - With the FreeHand Selection Tool, select as in the example:
8 - Layers > New Raster Layer. Edit > Copy Special > Copy Merged. Edit > Paste Into Selection.
9 - Selectiosn > Modify > Contract: 60. Selections > Promote Selection to layer. Adjust > Blur > Gaussian Blur: 10. Adjust > Add/Remove Noise > Add Noise: Gaussian, 20, monochrome checked. Adjust > Sharpeness > Sharpen.
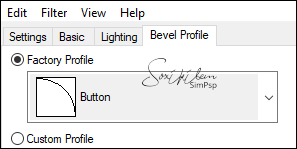
10 - Layers > New Raster Layer. Edit > Copy in GoldenBalls_MistedByXiki. Edit > Paste Into Selection. Adjust > Sharpness > Sharpen. Effects > Plugins > Alien Skin Eye Candy 5 - Impact > Glass: Settings: choose Clear. Basic > Glass Color: choose Foreground color.
Selections > Select None.
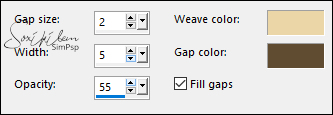
11 - Activate Layer Raster 3 ( Larger diamond). Effects > Texture Effects > Weave: Weave color: Backgorund color - Gap color: Foreground color.
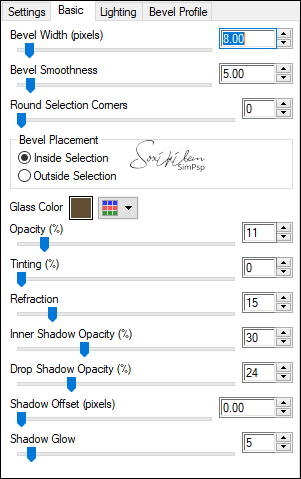
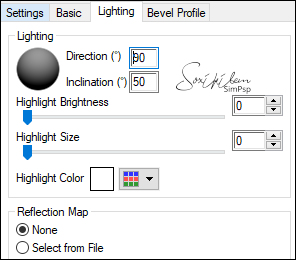
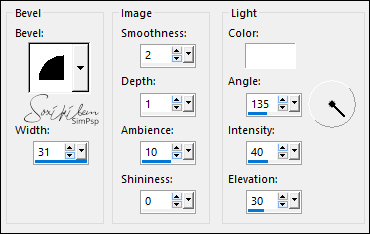
12 - Effects > 3D Effects > Inner Bevel:
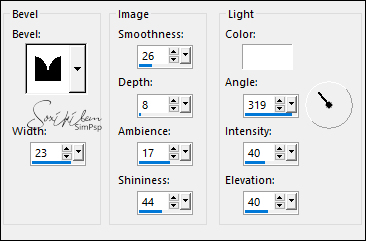
13 - Layers > Duplicate. Layers > Arrange > Bring To Top. Image > Resize: 20%, all layers unchecked. Effects > Distortion Effects > Pinch: 100%. Adjust > Sharpness > Sharpen. Effects > 3D Effects > Inner Bevel:
With the Pick Tool tool, position: Position X: 241, Position Y: 242.
14 - Effects > Plugins > Mura's Meister > Copies:
15 - Activate the Layer Promoted Selection. Effects > 3D Effects > Drop Shadow: Color: background color.
16 - Activate the Raster 2 layer. Layers > New Raster Layer. With the Selection Tool: Feather: 0, select as in the example:
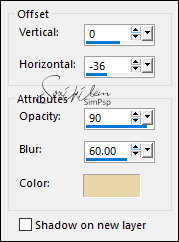
Paint this selection with the color #FFFFFF (White). Selections > Select None. Effects > Plugins > Italian Editors Effect > Effetto Fantasma:
With the Pick Tool tool, position: Position X: 23, Position Y: 0.
17 - Effects > Texture Effects > Weave:
Note: If you are using two dark colors like I used in
the second version, Layers > Properties > General > Opacity: 50%. Layers > Duplicate. Image > Mirror > Mirror Horizontal. Layers > Properties > General > Opacity: 20%.
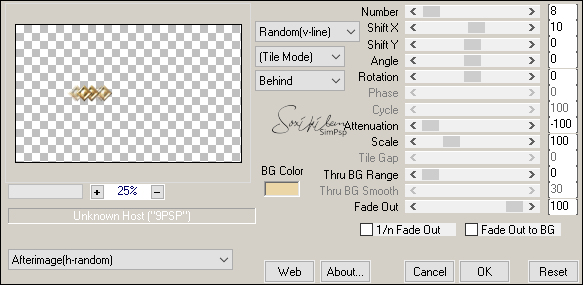
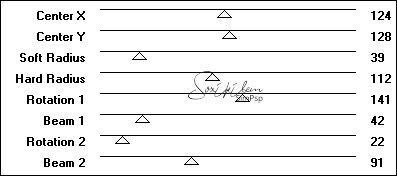
18 - Activate the Copy of Raster 1 layer. Effects > Plugins > VM Natural > Starmaker:
19 - Activate the Copy of Raster 5 layer. Edit > Copy in Misted Landscape. Edit > Paste as New Layer. Image > Resize if necessary, in this misted I applied 60% of resize. Position in the upper right corner.
Effects > Image Effects > Seamles Tiling: Default. Layers > Properties > General > Blend Mode: Hard Light - Opacity: 65%. Adjust > Sharpeness > Sharpen.
20 - Activate the top layer. Edit > Copy no decorMiracleOfChristmas. Edit > Paste as New Layer. If you want to make your own decor click HERE. Image > Resize: 60%, all layers unchecked. With the Pick Tool tool, position: Position X: 160, Position Y: 249. Effects > 3D Effects > Drop Shadow: 8, 0, 100, 15, Color: Background color.
21 - Edit > Copy the Main Tube. Edit > Paste as New Layer. Image > Resize if necessary. Adjust > Sharpness > Sharpen. Position to the right. Effects > 3D Effects > Drop Shadow: as you prefer.
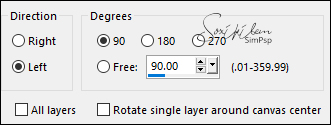
22 - Edit > Copy in titulo_Miracleofchristmas. Edit > Paste as New Layer. Image > Free Rotate:
With the Pick Tool tool, position: Position X: 68, Position Y: 39.
23 - Edit > Copy Special > Copy Merged. Image > Add Borders > Symmetric: 2px - color: #FFFFFF (White) Selections > Select All. Image > Add Borders > Symmetric: 10px with any color. Selections > Invert. Edit > Paste Into Selection. Adjust > Blur > Gaussian Blur: 20. Effects > Edge Effects > Enhance. Selections > Select None.
24 - Image > Add Borders > Symmetric: 15px - color: #FFFFFF (White) Selections > Select All. Image > Add Borders: 2px with any color. Selections > Invert. Edit > Paste Into Selection. Adjust > Blur > Gaussian Blur; 20. Effects > Edge Effects > Enhance. Selections > Select None.
25 - Image > Add Borders > Symmetric: 30px - color: #FFFFFF (White) Selections > Select All. Image > Add Borders > Symmetric: 10px with any color. Selections > Invert. Edit > Paste Into Selection. Adjust > Blur > Gaussian Blur: 20. Effects > Edge Effects > Enhance. Selections > Select None.
26 - Image > Add Borders > Symmetric: 2px - Color: foreground color.
27 -
Apply your watermark or signature.
CREDITS: Tutorial by Soxikibem
English Translation by
Moderation SIM-PSP
Main Tube: Tubed by Marcinha Misted Landscape by Isa GoldenBalls_Misted & decorMiracleOfChristmas by Soxikibem
Feel free to send your versions. I will be happy to publish them on our website.
|