|
TRADUÇÕES:
Obrigada aos nossos tradutores!
Material: 1 Tube principal 1 Tube decor de flor. Título_mulher_leni Mask Narah_Mask_1264 Mask mask_micheline1_mj
Plugins: Filters Unilimited 2.0 Caroline abd Sensibiliyy
Cores: #061a33 foreground #324f7b background #afc1db extra.
TUTORIAL:
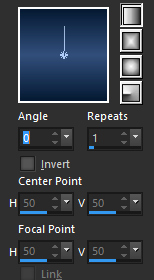
1- Abrir o material no PSP, duplique e feche o original. Abra uma imagem transparente 850x500. Pintar com o gradiente Linear: Angle 0 / Repeats 1 / Invert desmarcado.
2- Effects > Distortion Effects > Pixelate: 40 > 40 symetric marcado
3- Effects > Edge Effects > Enhance More.
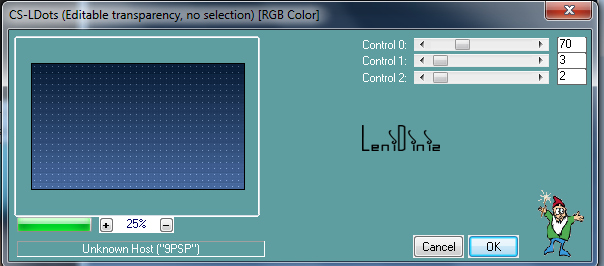
4- Effects > Plugins > Caroline and Sensibility > CS-LDots: 70 > 3 > 2
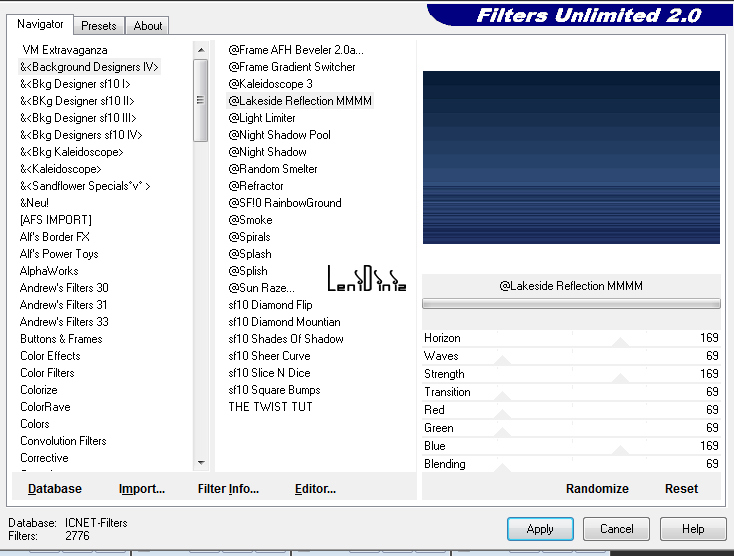
5- Effects > Plugin Unlimited > Bck Designers IV > Lakeside Reflection MMMM: 169 > 69 > 169 > 69 > 69 > 69 > 169 > 69.
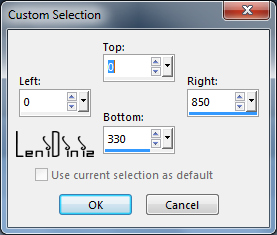
6- Layers > Duplicate Com a ferramenta Selection Toll > Custom Selection: Top 0 > Left 0 > Right 850 > Bottom 330
Aperte a tecla delete do seu teclado. Selections > None.
7- Effects > Reflection Effects > Rotating Mirror: 0 > 0 >190 - Repeat
Effects 3D Effects > Drop Shadow: 0 > 0 > 100 > 30, color: #000000
8- Layers > New raster Layer Pinta com a cor extra #afc1db Layers > New Mask Layer > From image: mask_micheline1_mj Com invert mask data marcado. Layers > Merge > Merge Group.
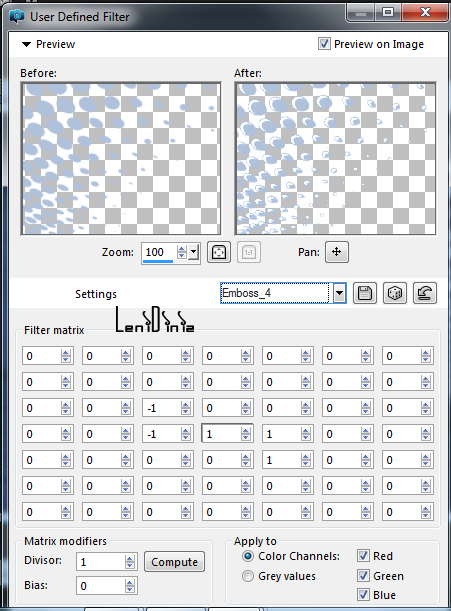
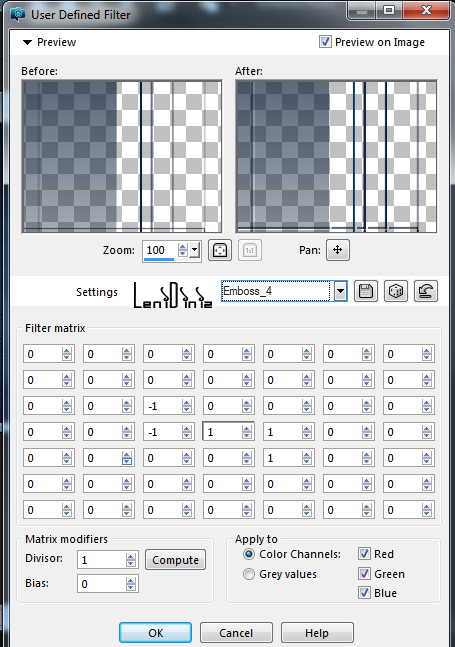
9- Effects > User Defined Filter > Emboss 4
Effects > 3D Effects > Drop Shadow: 0 > 0 > 100 > 30, color #000000
10- Layers > New Raster Layer. Pinta com a cor do forenground #061a33 Layers > New Mask Layer > From image: Narah_Mask_1264 Com invert mask data desmarcado. Layers > Merge > Merge Group.
11- Effects > User Defined Filter > Emboss 4
Effects > 3D Effects > Drop Shadow: 1 > 1 > 100 > 1, color: #000000
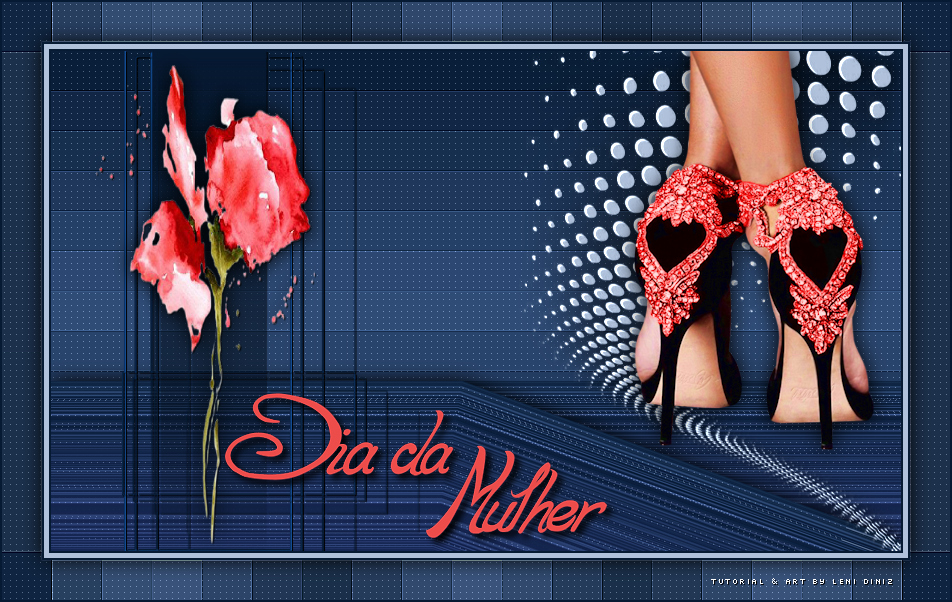
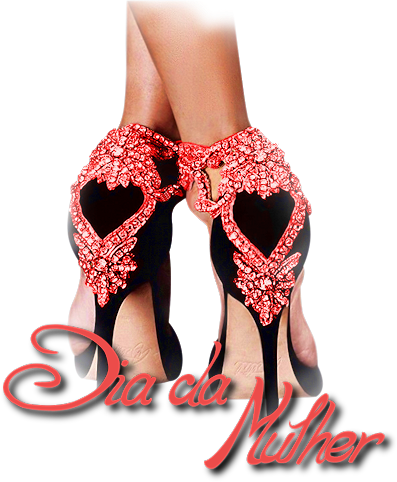
12- Edit > Copy no tube principal. Edit > Paste as new layer. Image > Rezise se for necessário. Adjust > Sharpness > Sharpen. Posicione à direita. Effects > 3D Effects > Drop Shadow: como preferir.
13- Edit > Copy no tube decoração flor. Edit > Paste as new layer. Image > Rezise se for necessário. Adjust > Sharpness > Sharpen. Posicione à esquerda. Effects > 3D Effects > Drop Shadow: como preferir.
14- Image > Add Borders: 2 px foreground #061a33 5 px cor extra #afc1db 2 px foreground #061a33
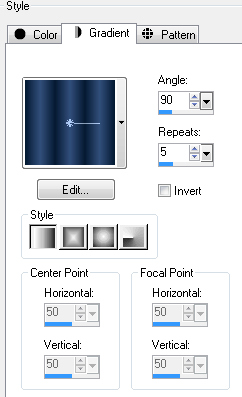
15- Selection > Select All Image > Add Border 40 pixes qualquer cor. Selections > Invert. Pintar com o gradiente Linear: Angle 90 / Repeats 5 / Invert desmarcado.
16- Effects > Distortion Effects > Pixelate: 50 > 50 symetric marcado...
17- Effects > Edge Effects > Enhance More.
18- Effects Plugin Caroline and Sensibility > CS-LDots: 70 > 3 > 2
19- Selections > Invert. Effects > 3D Effects > Drop Shadow: 0 > 0 > 100 > 30. Selections > Nome.
20- Image > Add Border: 2 px na cor do foreground #061a33.
21- Copy no título_mulher_leni. Edit > Paste as new layer. Posicione à sua escolha.
22- Assine ou deixa sua marca d'água em nova layer. Layers > Merge > Merge All
23- File > Export > JPG Optimizer
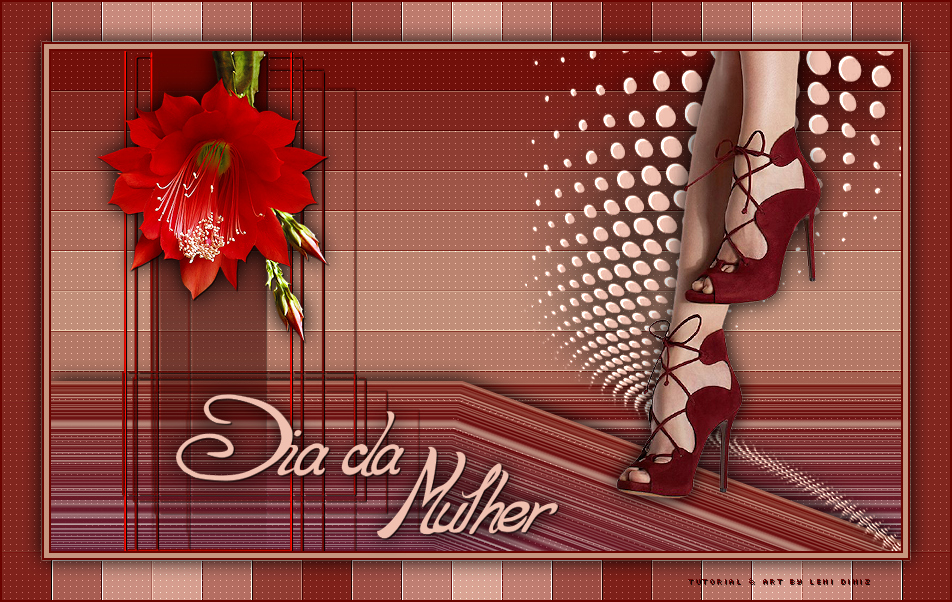
Créditos: Tutorial by Leni Diniz Tube principal by Lisa T. Tube decor flor aqui Mask Narah_Mask_1264 Mask mask_micheline1_mj
tube principal
aqui
flor piros_erd_vir
Mask Narah_Mask_1264 Mask mask_micheline1_mj
Sinta-se à vontade para enviar suas versões. Terei todo o prazer em publicá-las em nosso site.
|